So. The time finally came. After 6 months of work and waiting, this homeowner finally got to tear down a wall. I spent most of Saturday doing demolition in the master bathroom, and I got a ridiculous number of pictures and videos doing it. I'll post as many as I can on here so you can see the process. First, a retrospective.
Way back when, this is what the master bath looked like.
Back in those days, the master bedroom looked like this.
This is how the day started. We left that section green because we knew it was coming down, and painting it didn't make any sense.
Here's the medicine cabinet in the master. You can't really tell, but it is freaking gross in there.
And it's gone!
Now the mirror...
I didn't take any intermediate shots of the sink coming out, since you've seen all that before. Unscrew the countertop from the vanity, disconnect the plumbing bits and cap them, etc.
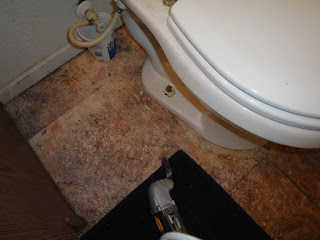
The toiler decided to be a big pain, too. The nuts on here didn't want to come off, preferring instead to spin the bolts along with them. I managed to simply weasel one out, but the other side was having none of it. Time for our handy dandy everything-cutter.
Problem solved.
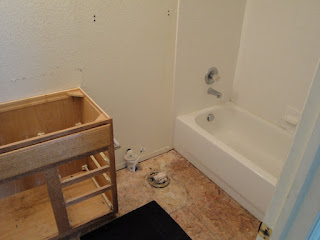
Toilet: Gone
Inside the vanity. I can't pull it out from the wall with these on there, so I have to get them out. I need to cap these supply lines anyway, so it's not a huge deal to do it now. Also, note the duct tape on the drain pipe. You don't want any of the gas from there getting into your house, so you want to close it up.
Spare bucket to catch any remaining water... I still managed to dump a lot of it into the vanity, unfortunately. Thankfully we aren't planning saving it for anything. Turn off your water where it comes into the house, drain your water heater, empty your pipes, etc. It's pipe-cutting time!
My wonderful little pipe cutter. I love this little thing.
You'll not that the sink valves are off and also that the rag from the last shot of the toilet drain has been replaced with a plug. Again, sewer gas = bad. The rag is okay, but not really a long-term solution. The plug is a couple of bucks from your hardware store and you don't have to worry about losing it and then trying to get it out of your plumbing system.
To cap off the supply lines, I got these. From what I hear, plumbers don't really like them, but I think they're a Godsend. This application is strictly temporary, so I'm not too worried about it.
Here are those supply lines, happily capped off.
Here's me taking the trim off the door. Yes, I'm doing demolition in flip-flops. Why do you ask?
The pile of junk grows steadily larger.
The tub spout came off pretty easily. It just screws on until it's tight against the tile and you caulk around it to hold it in place.
The valve was a little tougher, but still came off with minimal fuss. Taking these things off was cool because it helped me see how I'll have to set everything up when the time comes to build it back up again.
My very first real destruction. Taking the hammer to the tile was cool, but i was impressed with how resilient the tile was. I had to whack it pretty hard a bunch of times to break it out. Granted, I was being kind of a pansy at first because I didn't know what to expect. Last think I wanted was to hit it too hard, somehow damage a water line and flood my upstairs.
I broke out as much of this area as I could to get a good view of it. I was thinking I wanted some space in here to work my pipe cutter so I could cap these lines off.
I kept breaking the tile out until I realized "Wait, why would I cap these over here and leave all this crazy pipe structure i'll have to work around? Why not just take it back closer to the source?" And so I did.
I busted the wall out around the showerhead, also thinking I needed to cap off that line. Capping it off a ways back meant I didn't have to worry about that.
I decided to smash out this wall here because it seemed like a good idea at the time.
Look at all my debris!
From this angle, you almost can't tell how much damage I've done.
From this angle, you can tell precisely how much damage I intend to do.
I wanted to get video of me smashing up that wall, so I figured it would be best to wait for the wife to come home so she could run the camera for me. Also, I wanted her to be impressed with my destructive capabilities. I know the way to a woman's heart. "Come, watch me break things to show you how good of a mate I am."
Here's the closet in the hobby room.
Here's the hobby room closet with a hammer sticking through the back of it.
Any questions? I was indicating where I wanted the hole on the back. The reason I needed this hole was so that I could work my pipe cutter. Since it rolls around the pipe, it needs a little room to work.
Big ragged hole = room to work
I had to cut these pipes in two places to give me room to put the caps on. The bucket is there to catch any water left in the pipes. Thankfully there wasn't any.
Caps are go.
Also, I smashed this out so I could take down the rest of these pipes.
And there we go.
Can you tell how much I like destroying things?
Here's our cat, Smitty, investigating this hole in the wall.
There's a missing section in here, of me punching, kicking, axing, hammering and crow-barring this wall into submission. Those are the videos and I'll add more of them as I get them loaded. For now, here's one of my favorites:
For the link to the Youtube video, go here.
You can see the side of the tub there at the bottom. I'm not sure how to get that thing out of there, but we'll give it a try.
Getting down to bare studs is weird. It makes you realize just how insubstantial your house really is.
Pretty much the entire bedroom side wall is out of there now. I have a bit more work to do with getting it ready for the wall framing to come out a bit, but that's more precise work than I was going for at this point.
So anyway, there you have it. Destruction is in process. I'll keep working on it as I have time, and then I'll get to go with the joy of trying to figure out how to build new walls that intersect with old walls. Hooray! Thanks for reading!
Monday, October 25, 2010
Monday, October 18, 2010
Hot water heater? No, cold water heater.
That's one of my pet peeves. Why would you heat hot water? "Water heater" is plenty, describes exactly what it does, and doesn't have that annoying redundancy. End mini-rant.
Speaking of water heaters, ours was broken, if you'll remember. That's all done now. We had the new plumber come in and replace it with a similar model, but one that hadn't been destroyed by our incredibly awful water yet. Hooray! I think I also mentioned the pump:
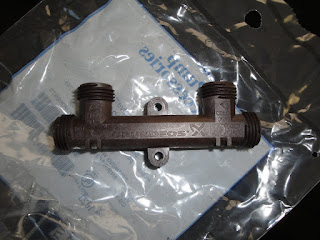
And the little bypass valve thingy:
Here's the basement with the old one torn out:
It's so bare! Pretty weird not to see the heater in there, I'll admit.
Here's the new one in the process of being installed. The guys worked quickly and efficiently and everything went very smoothly. I'm very pleased with their efforts and I'm confident they'll do a good job with the master bath.
This is the pump on the heater. It's sort of a simple timer, but it should be easy to use and relatively maintenance-free. All you do to set the time for it to turn on is to flip the little switches all around the edge. They're the little blue bits. You flip them to the outside to have the pump come on at those times. We're still working on our timing for that, but so far I think it looks pretty promising.
This is the ceiling in the powder room. All clean and white, now. I don't know what it was with the previous owners and painting the ceiling the same color as the walls. They really enjoyed that.
Here are the walls with their color on them. The yellow is the same as the office, and it has a very bright, sunny feel to it. We're thinking about a few options in here, mainly revolving around beadboard. I'm not sure what we'll end up doing, but I think it'll be pretty neat.
That's about all we got done this weekend, but it's some pretty good progress for as busy as we were. I'm hoping to finish the painting in the powder room (cutting in, mostly) and maybe do our second coat in the kitchen so we can get rid of all that tape. I'll take pictures, of course, and let you know all about it tomorrow. Thanks for reading!
Subscribe to:
Comments (Atom)


