Just a quick post to let you guys know I haven't forgotten about you all. We've just been crazy busy doing stuff every night this week. Our friend's b-day (all the sushi I could eat +1), trivia and harmonica class, and our book club. We're very busy people. I suppose we could be making much faster progress on the house if we gave up some of our social schedule or something, but I'm pretty happy with how everything's going.
We haven't made any real progress, but I just have to say that the addition of those cabinets has changed the whole dynamic of the kitchen. Things that had to be squirreled away in the tiny cabinets above the fridge-where even I had to use a step stool to get to them-are now in much more accessible spaces. We can also move some things out from the pantry and make more room for food. The big appliances, like the slow cooker and the electric skillet, will have to stay there, but the rice cooker, the crock pot, the blender, the food processor, etc, can all be moved to where I can grab them out with little issue. We've also managed to get things to a place that makes more sense. Plates, bowls, glasses and water bottles are all on the bottom two shelves of the new cabinets now, so they're easily accessed. Storage and cooking containers are going to be in thecabinet near the stove, since that's where we generally need them. I don't know if you can tell, but I've put a lot of thought into these cabinets. I would even go so far as to say that I've fantasized about having them and about how efficient and shiny my kitchen would be once they were installed.
So that's really it for now. Not too much else to report. I think I'm going to adjust some sprinklers tomorrow morning to catch the parts of the lawn that are looking a little yellow. If I remember to do so, I'll take some pictures of that so you can see how that whole process goes. Thanks for reading!
Friday, September 17, 2010
Monday, September 13, 2010
Cabinet Appointment
See? It's funny because I made a joke about a political cabinet but the blog is actually about the wooden kind. Okay, it isn't that funny. Fine. Well, we finally got our act together and put up the cabinets in the kitchen. Before we go much farther, let me say this: I once was blind and now I can see. The cabinets are perfect. That blank wall was useless and off-putting and it looks perfect now. It's not so much like we added something that wasn't there as it is like we put something back that should've been there the whole time. Hopefully the pictures will get the feeling across and you'll see what I mean. They have so much more of an effect on the look of the kitchen than they really should.
 Okay, this is a very old picture. Like before we moved in. So, lest you think we're savages, we aren't actually living and eating in a kitchen that looks like this.
 We used the stud-finder to locate the nominal center of the piece (my dad has a really great stud-finder but it's still rarely dead-on) and then use the tiny nails on either side to find where the middle actually is.
 A laser, you say? Yeah, it's awesome. My dad also got a self-leveling laser level that came in very handy for this project. We threw a beam up on the wall to mark the middles of the studs and also the edges of the cabinets. That piece saved us so much time and energy.
 Here it is. So cool. It's actually a plum bob with a laser in it, so it's just hanging free in a chamber inside. It doesn't matter if your surface is level or not, the line always will be. You can also mount it on a tripod and stuff, so that's cool. It even has an electric motor attached to a suction cup on the back so you can stick it to a wall or whatever.
 We drilled through the back and got some damage inside even with a small drill bit. Probably should've used some masking tape or something.
 Got the screws started in here so it'll be easier to drive them into the wall.
 This is the jack from my dad's truck. We used that, a piece of particle board to protect the tile, and a piece of scrap wood from the garage to keep from damaging the cabinet. It worked perfectly. We got a nice snug fit up against the ceiling and could raise or lower it if we needed to adjust anything.
 Hooray! One cabinet on the wall under its own power. This one was placed such that it got two screws into studs on the bottom, and one on top. Apparently you only need two to hold these up (or so the mounting instructions say) but I'm glad we got an extra. The top right one was hitting a nail or something in the stud so we couldn't get it to sink. Lame. I may put a shorter one in there just to make it symmetrical.
 Time for cabinet number two! Same setup. We're attaching this one to the existing cabinet first, then attaching to the wall. This is important so you make sure your face frames line up evenly.
 We drilled through with a thin bit, and the re-drilled with this larger bit up to the tape. The idea was to keep the screw threads from driving the two pieces apart too much and it worked pretty well.
 There we are. First connection between them. The face frames aren't perfectly flat and square so it took a little wiggling to get them to line up. Even then, they're not perfect. They're as good as we could get them though, and the difference is almost invisible to anyone but us, I'm sure.
 Two cabinets up on the wall!
 Here we go. Once we prime and paint the walls in the kitchen, it's going to look so much nicer. Everything's coming together!
 Look at all that storage! We basically added another 50% in upper cabinet space compared to what we had before. It's a huge addition in organization and room to expand. I'm thinking we'll be able to move quite a few things out of the pantry and into the cabinets so we'll free up more room to be able to put things in some sort of order.
I'm so pleased with this change! The kitchen is slowly coming together now.We have quite a bit left to do, but big projects are getting checked off the list. Thanks for reading!


I'm so pleased with this change! The kitchen is slowly coming together now.We have quite a bit left to do, but big projects are getting checked off the list. Thanks for reading!
Tuesday, September 7, 2010
Manual Labor Day
I didn't actually do a lot on Monday, but I got a few things done this weekend that I'd been wanting to do for a while now. Here are some pictures and words.
This is our laundry room, as we found it originally:

 Not in terrible shape, just a fair bit of junk in it. it got worse as we moved boxes down there and worked on the speaker wires and all that jazz. It had gotten downright gross. Here it is now:
 Still not great, but cleaner, brighter, and much more usable. We'll be taking out all the foam in there and building finished walls eventually (putting other insulation back in, of course). We also want to tile everything, build some shelves, move some walls, etc. It's going to be a big project, but we'll end up with a very nice utility/laundry/storage room. For now, the freezer right there was the big goal. We wanted to get a nice chest freezer and stick it down there, but we didn't have any functioning outlets down there (aside from the 220 for the dryer). What that means is that we had to get power down there in a way that would require minimal fuss. When we do finish this room eventually, we're going to have an electrician install some new breakers for us for the basement, including a dedicated circuit for the freezer. But that'll come later. For now, we need to tie into an outlet and get some power down there. My dad came over to help, like he always does. If I haven't mentioned it before, let me say it now: My dad rocks. I would literally not have this house, much less have it in the condition it is now, without him. Thanks so much for everything, Dad!
 First, we need one of these. I may have mentioned it before, but they're very handy and worth mentioning again. Use this to see if your outlets are hot. If the two lights on the right light up, you're wired properly and your power is on. Before you do anything with the electrical systems, you want all the lights off. Go flip your breakers and make sure your power is off. Getting electrocuted isn't a good time.
 Next, figure out where you're going to get your power. For this one, we decided to go straight up into the family room. Recognize this panel? This is one of the panels where we ran our speaker wire. We're going to tie to this outlet and run the cable down into the basement just like the speaker wire.
 Fishing tape FTW! This thing is worth its weight in gold. If you need to pull wire, you need one of these. The tape is flat and pretty stiff. It'll bend around the spool but it stays pretty straight once you run it out. It's stiff enough to push through some resistance, but flexible enough to be able to bend around when necessary. It's a great tool.
 Here's the end coming out of the box. We decided to go up from the basement on this one because we knew we had to squeeze through a hole drilled in the floor plate to get up to this box. It's easier to get through there first and then fish the tape out from behind the boxes than to try to weasel it down from the box and get it through the hole.
 Here's our cable. We checked the exposed stuff in the basement to see what it had on it. This refers to 14-gauge wire, two strands, with a ground. You can get bigger and smaller, but it's a good idea to stick with what you have in the rest of your house when doing stuff like this. It never hurts to be consistent.
 Tape the wire to your fishing tape, then pull it down though. Sometimes you can run into issues if you have too much bulk on the tape and the hole is too small, but you can normally kinda finagle it to make it work.
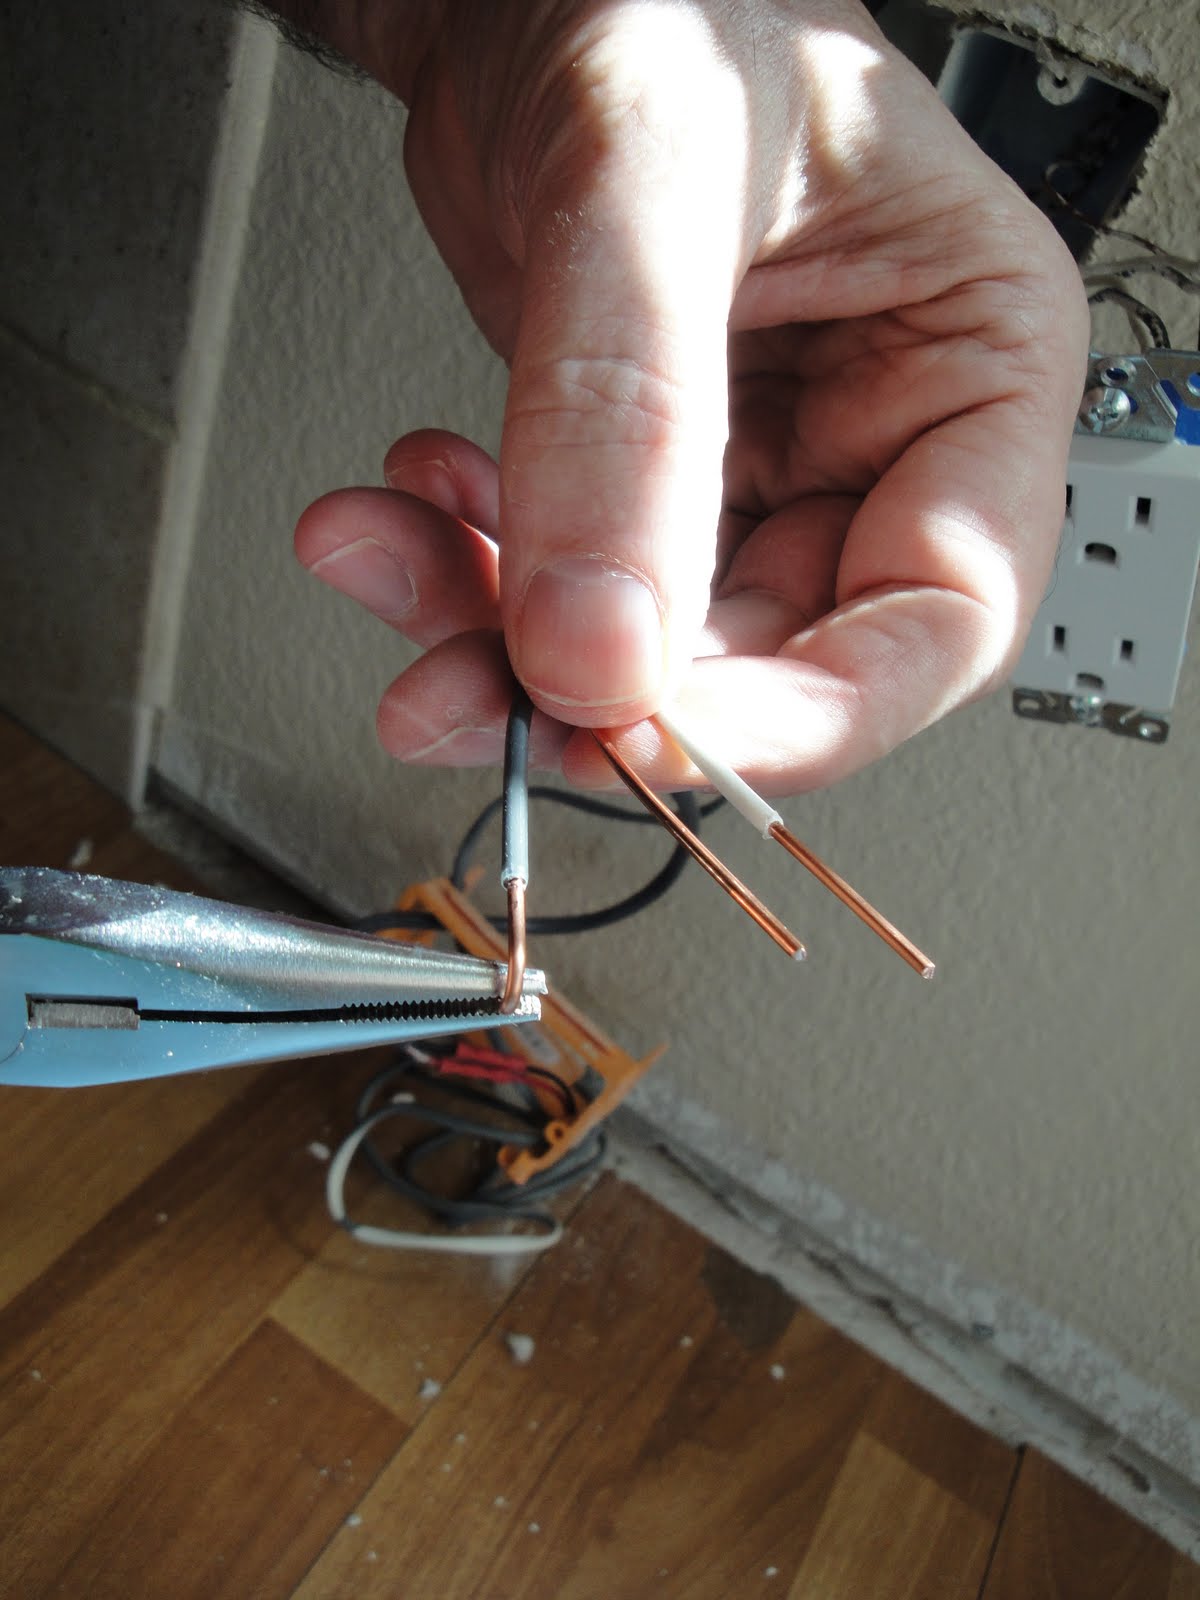
 Now take your needle nose pliers and curve the ends of the wires.
 Yeah, like that!
 This may be a little tough to see, but here's what's going on. These outlets have a grippy hole in them. I'm sure there's a real term for it, but I have no idea what it is. Essentially, you strip the wire to a certain length, push it into the hole and the outlet will grip onto it. This is easier and faster than bending your wires, using the screws on the side, etc. However, the makers of these outlets do include the screws on the side as well. This is going to help us.
 So you can see the one wire going into the back and the other on the screw plate on the side, right? Just remember that you want to be consistent with your wires. White wire goes to the steel screw and the black wire goes to the gold screw. You don't want to get your wires crossed, do you?
 We mounted a plastic box up on the joist with some screws and pulled the cable through it. Strip and bend the wires, then attach them to the back of your other outlet. Don't forget to attach the ground.
 There you go.
 You can't really see because of the flash, but the lights are on. We wanted to test the power before you wrapped everything up. We checked it, then turned it back off again to finish mounting it in the box, then turned it back on and checked it again. Walkie talkies would probably be handy for this part.
 So there you have it. Nice new outlet in the ceiling of the utility room. We didn't have to splice any wires, so when the time comes to take this puppy back out again, we won't have made any permanent changes to the wiring. I like a temporary fix that can be undone completely. We also win because the power to this outlet isn't on a GFI circuit. That's important with freezers, because the compressor kicks on and it draws enough power to flip them. When your GFI flips, your power goes off and you're left with a shiny cabinet full of rotting food. Awesome. Do yourself a favor and check your outlets first.
My friend Webber came over to help me carry the freezer to the basement, which was cool of him. I talked him and his wife into the same freezer, since we're going to be sharing a half a cow together when harvest season comes around. He's also helping us figure out our media networking plans and all. I spent a lot of time fiddling with it this weekend, but I haven't gotten anything solid yet so I'm reserving the post on it until later.
Aside from that, I also bought and mounted some speakers. Here's what we stopped with last time:
 These speaker wire panels. They're not bad, really, but the posts stick out about half an inch from the panel. Mounting the speaker to the wall with the included brackets runs the back of it into these posts. Not cool. I went out looking for other speaker brackets and talked with a guy at Best Buy who had a good idea. Why not just get rid of the speaker posts and run the wire through a hole directly to the speakers? Then I can use the brackets that came with the speakers and mount to one of the screws that holds the plate on. Brilliant! And saves me a ton of money, to boot. The speaker brackets I was looking at purchasing, even the cheap ones, are about $20 each. Lame. I may still need to get one for the center channel, but one is much better than five.
 Okay, take it on down to the basics again. I took this opportunity to re-seat and re-tighten these boxes.
 The plates I found that had just the hole through the middle included this weird bracket thing. It's kind of weird, but I went with it. i used the included screw on the bottom hole to pin the plastic piece to the box, but I left the top one empty.
 If you look at the plastic piece, it's there to give you two holes to screw the plate to. Why they didn't just move the holes up and down 1/4" and use the holes that are already there is beyond me. I drilled a hole in the plate to line up with the hole that's in the orange box instead of the plastic piece. It's a lot stronger, so it should be more stable for these. I put a screw in the bottom hole of the plastic bit, but didn't put the screw in the top hole until I was putting the plate and bracket on.
 These screws are just going into the little plastic piece, so they aren't really holding anything up, just holding the plate to the box by way of the plastic deal. So much more complicated than it needed to be.
 Here's the speaker bracket. I used a longer stainless steel screw and a washer to hold the bracket to the panel. The speakers are pretty small, and though they're heavy for their size, they're definitely only a few pounds each. This setup feels plenty strong to hold them in place.
 Get the wires hooked up...
 And then attach the speaker to the bracket. Voila!
 The speakers are on the wall and sounding pretty darned good. The center channel still needs to be mounted, but it's not terrible sitting there for the moment. These are small speakers, but they're pretty powerful. They're the Mirage Nanosat 5.1 system, if you're interested. They're known for their indirect sound so they're a lot more forgiving of the strange placement than others would be. Most speakers, you'd want them at about ear level, spread a little farther apart, angled to the center of your viewing area, etc. You end up with great sound, but only in that one sweet spot. These give good sound everywhere in the room. With the lights off, it's very easy to lose track of them, and just feel like the sound is coming from everywhere. It's a pretty cool experience, for sure.
So there you have it, guys. That's what we did this weekend. Thanks for reading!
This is our laundry room, as we found it originally:


My friend Webber came over to help me carry the freezer to the basement, which was cool of him. I talked him and his wife into the same freezer, since we're going to be sharing a half a cow together when harvest season comes around. He's also helping us figure out our media networking plans and all. I spent a lot of time fiddling with it this weekend, but I haven't gotten anything solid yet so I'm reserving the post on it until later.
Aside from that, I also bought and mounted some speakers. Here's what we stopped with last time:


So there you have it, guys. That's what we did this weekend. Thanks for reading!
Wednesday, September 1, 2010
Sprayed and Neutered
Not really, but I have to admit I'm feeling a little outmatched by the bathroom wall. Here's how it all went down:
 Looks like a scene from Dexter, doesn't it? After the issue with splatter last time, I wasn't risking anything.
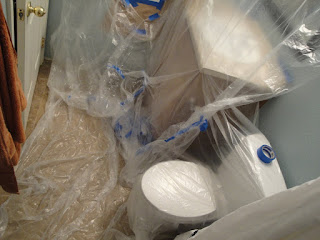 It actually worked pretty well, too. I still haven't seen any stray splatter, so I think it was at least as much coverage as I needed.
 Here's my first spray. Not too bad, really. The knocking down didn't work well, though. The pattern was a little too small and even. I should have taken off the tape and knocked down towards the outside to help mask the edges but I didn't want to tear everything down and have to put it back up again if it didn't work. This wasn't a good choice, since the plastic and all impeded my knife and may have contributed to the bad knockdown.
 Another spray, another attempt. A bit better pattern here.
 Knocked down, it doesn't look too bad. I still have the tape on there and that didn't help, but the spray pattern was much closer this time.
 You can see a spot in the middle where I didn't knock down properly, but overall this isn't a bad effort. The hard lines around the edge are bad news, though.
 Yeah, see that? Way too clean there, and way too tough to mask.
 I tried softening the hard edge with a wet sponge and that was sort of okay, but ended up making the edge flat more than anything.
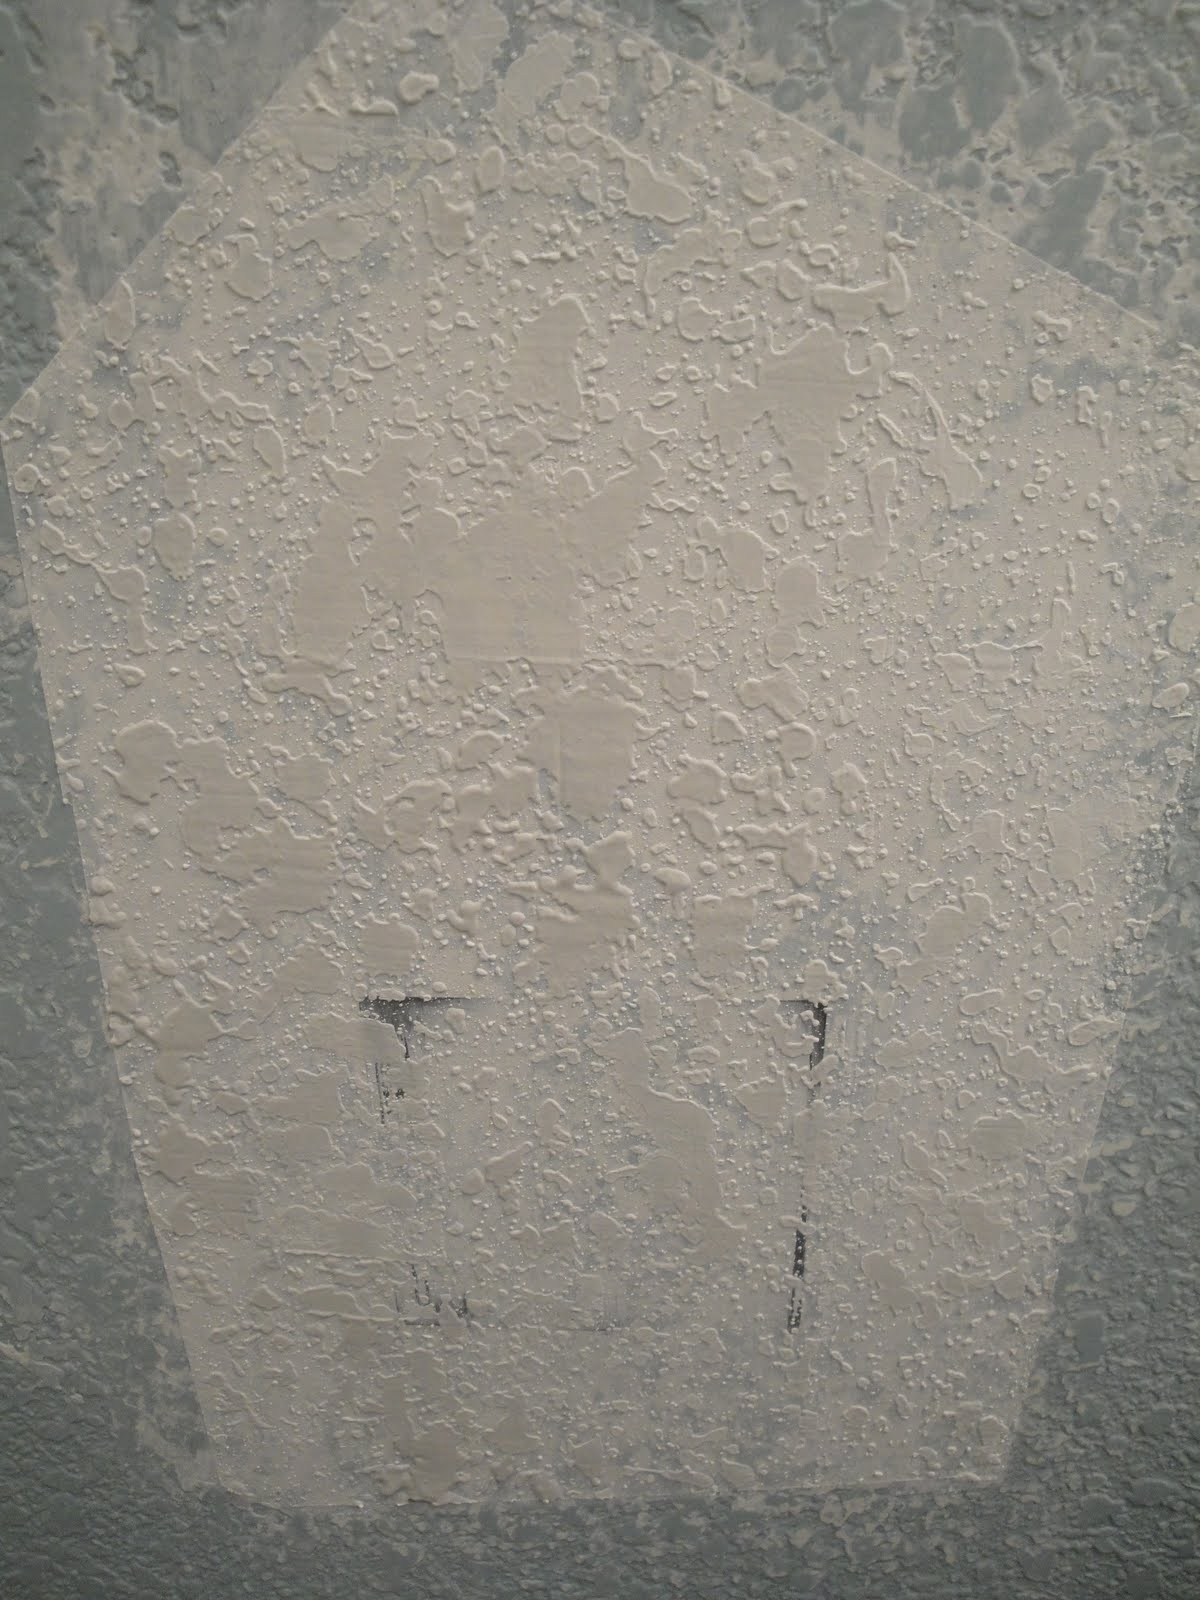
 This is after painting. You can see the flat frame around the patch, so this obviously isn't going to cut it. There are some small areas of truly acceptable texture in here, though. Enough at least to give me hope that I can make this work. I'm going to have to sand/float this patch flat, then re-spray with a bit of a different taping technique. I'm going to hang my plastic first with a bit less bulk right near the patch so I can maneuver my knife more effectively, for one. I'm also going to tape onto the flat area at the edge instead of just outside it, and then use the knife to push the texture into that margin to hopefully blend the textures. Time will tell whether this will work.
Also, this:
 We're taping again, this time to paint the woodwork. We've been needing to do this for some time, and it just felt right to get started. Like the front door, the smooth woodwork needs a little extra help to come out looking smooth. We'll be using a lot of foam brushes and thinned paint to get this looking good, but a nice coat of bright white on here will help make the whole place pop.
 We're also painting the edge around the family room right now. This will be cool and should help this room look a lot more finished.
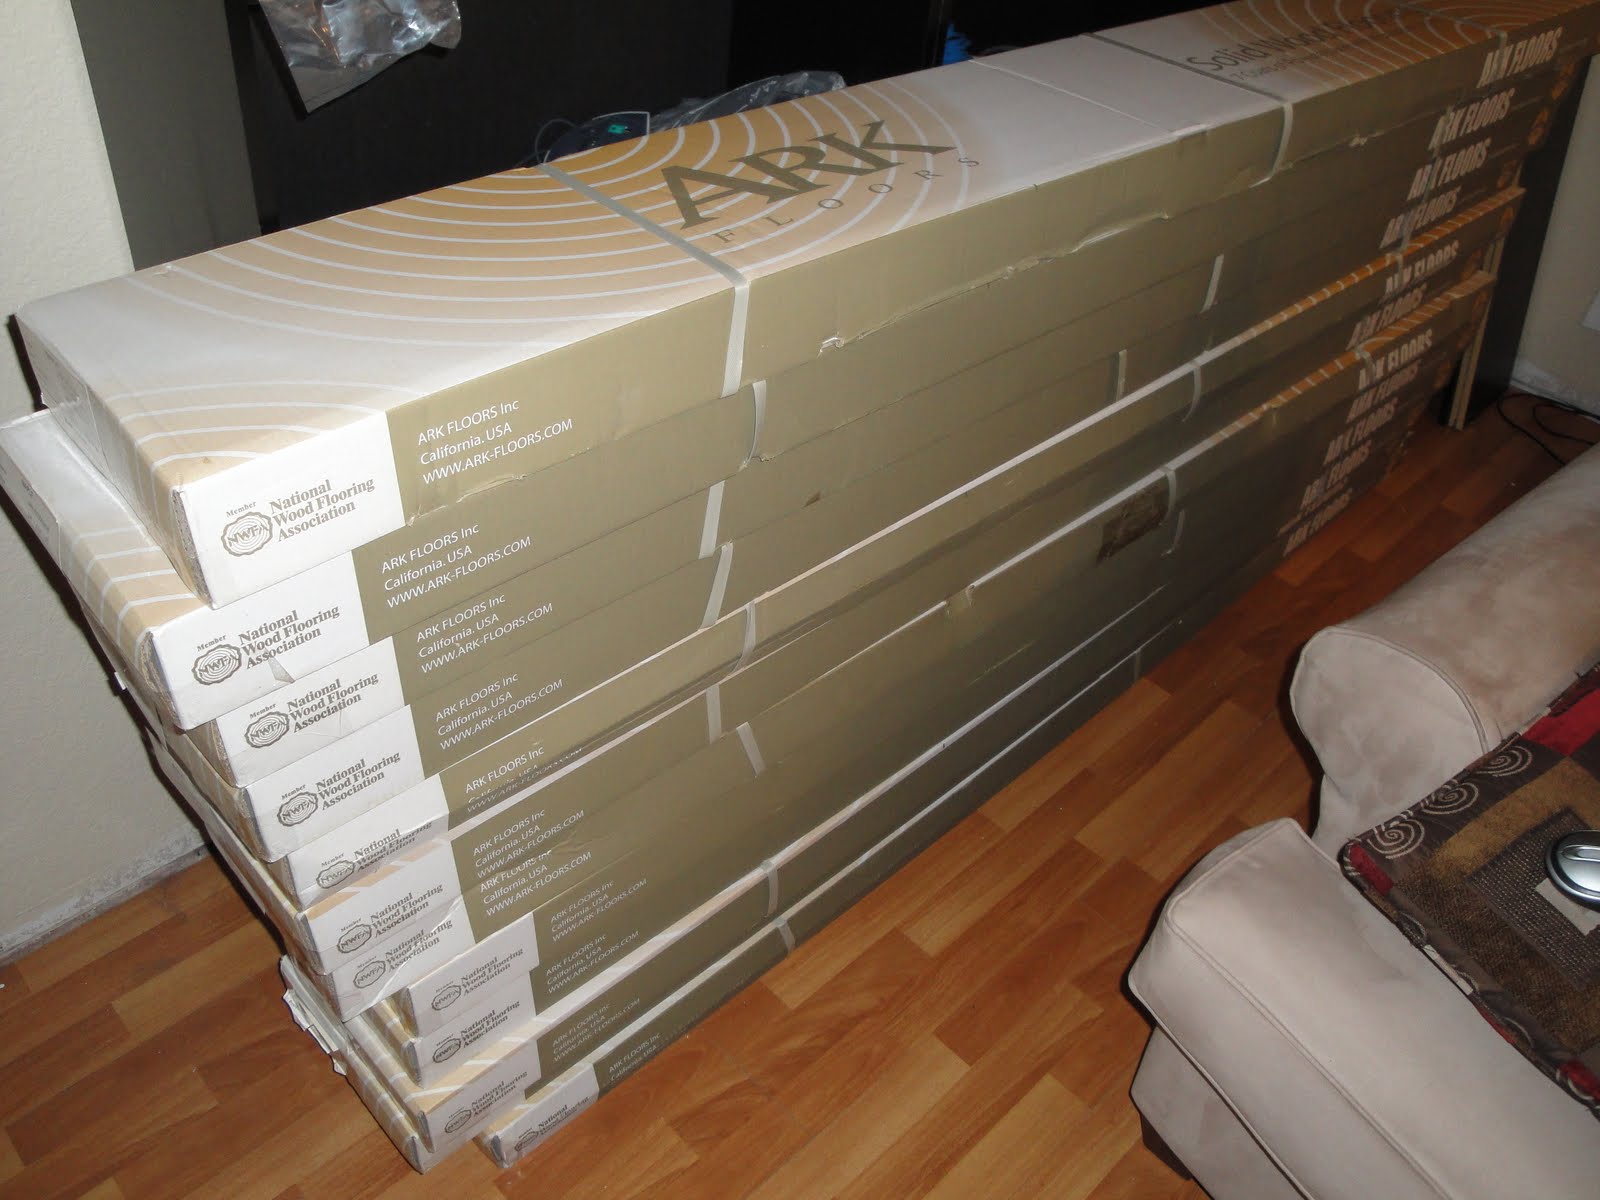
 I also hauled up the wood flooring that we're using on the family room. We figured out that we can do the floor in here without disrupting any of our other plans, which then opens up a few other large projects for us, so that's very cool.
 Here's some of the wood. See how pretty it is? That's going to look amazing in this room, and really warm the place up a lot, I think.
So there you have it, the products of a semi-productive weekend. Thanks for reading!


Also, this:


So there you have it, the products of a semi-productive weekend. Thanks for reading!
Subscribe to:
Posts (Atom)
