I didn't actually do a lot on Monday, but I got a few things done this weekend that I'd been wanting to do for a while now. Here are some pictures and words.
This is our laundry room, as we found it originally:
Not in terrible shape, just a fair bit of junk in it. it got worse as we moved boxes down there and worked on the speaker wires and all that jazz. It had gotten downright gross. Here it is now:

Still not great, but cleaner, brighter, and much more usable. We'll be taking out all the foam in there and building finished walls eventually (putting other insulation back in, of course). We also want to tile everything, build some shelves, move some walls, etc. It's going to be a big project, but we'll end up with a very nice utility/laundry/storage room. For now, the freezer right there was the big goal. We wanted to get a nice chest freezer and stick it down there, but we didn't have any functioning outlets down there (aside from the 220 for the dryer). What that means is that we had to get power down there in a way that would require minimal fuss. When we do finish this room eventually, we're going to have an electrician install some new breakers for us for the basement, including a dedicated circuit for the freezer. But that'll come later. For now, we need to tie into an outlet and get some power down there. My dad came over to help, like he always does. If I haven't mentioned it before, let me say it now: My dad rocks. I would literally not have this house, much less have it in the condition it is now, without him. Thanks so much for everything, Dad!

First, we need one of these. I may have mentioned it before, but they're very handy and worth mentioning again. Use this to see if your outlets are hot. If the two lights on the right light up, you're wired properly and your power is on. Before you do anything with the electrical systems, you want all the lights off. Go flip your breakers and make sure your power is off. Getting electrocuted isn't a good time.
Next, figure out where you're going to get your power. For this one, we decided to go straight up into the family room. Recognize this panel? This is one of the panels where we ran our speaker wire. We're going to tie to this outlet and run the cable down into the basement just like the speaker wire.
Fishing tape FTW! This thing is worth its weight in gold. If you need to pull wire, you need one of these. The tape is flat and pretty stiff. It'll bend around the spool but it stays pretty straight once you run it out. It's stiff enough to push through some resistance, but flexible enough to be able to bend around when necessary. It's a great tool.
Here's the end coming out of the box. We decided to go up from the basement on this one because we knew we had to squeeze through a hole drilled in the floor plate to get up to this box. It's easier to get through there first and then fish the tape out from behind the boxes than to try to weasel it down from the box and get it through the hole.
Here's our cable. We checked the exposed stuff in the basement to see what it had on it. This refers to 14-gauge wire, two strands, with a ground. You can get bigger and smaller, but it's a good idea to stick with what you have in the rest of your house when doing stuff like this. It never hurts to be consistent.
Tape the wire to your fishing tape, then pull it down though. Sometimes you can run into issues if you have too much bulk on the tape and the hole is too small, but you can normally kinda finagle it to make it work.
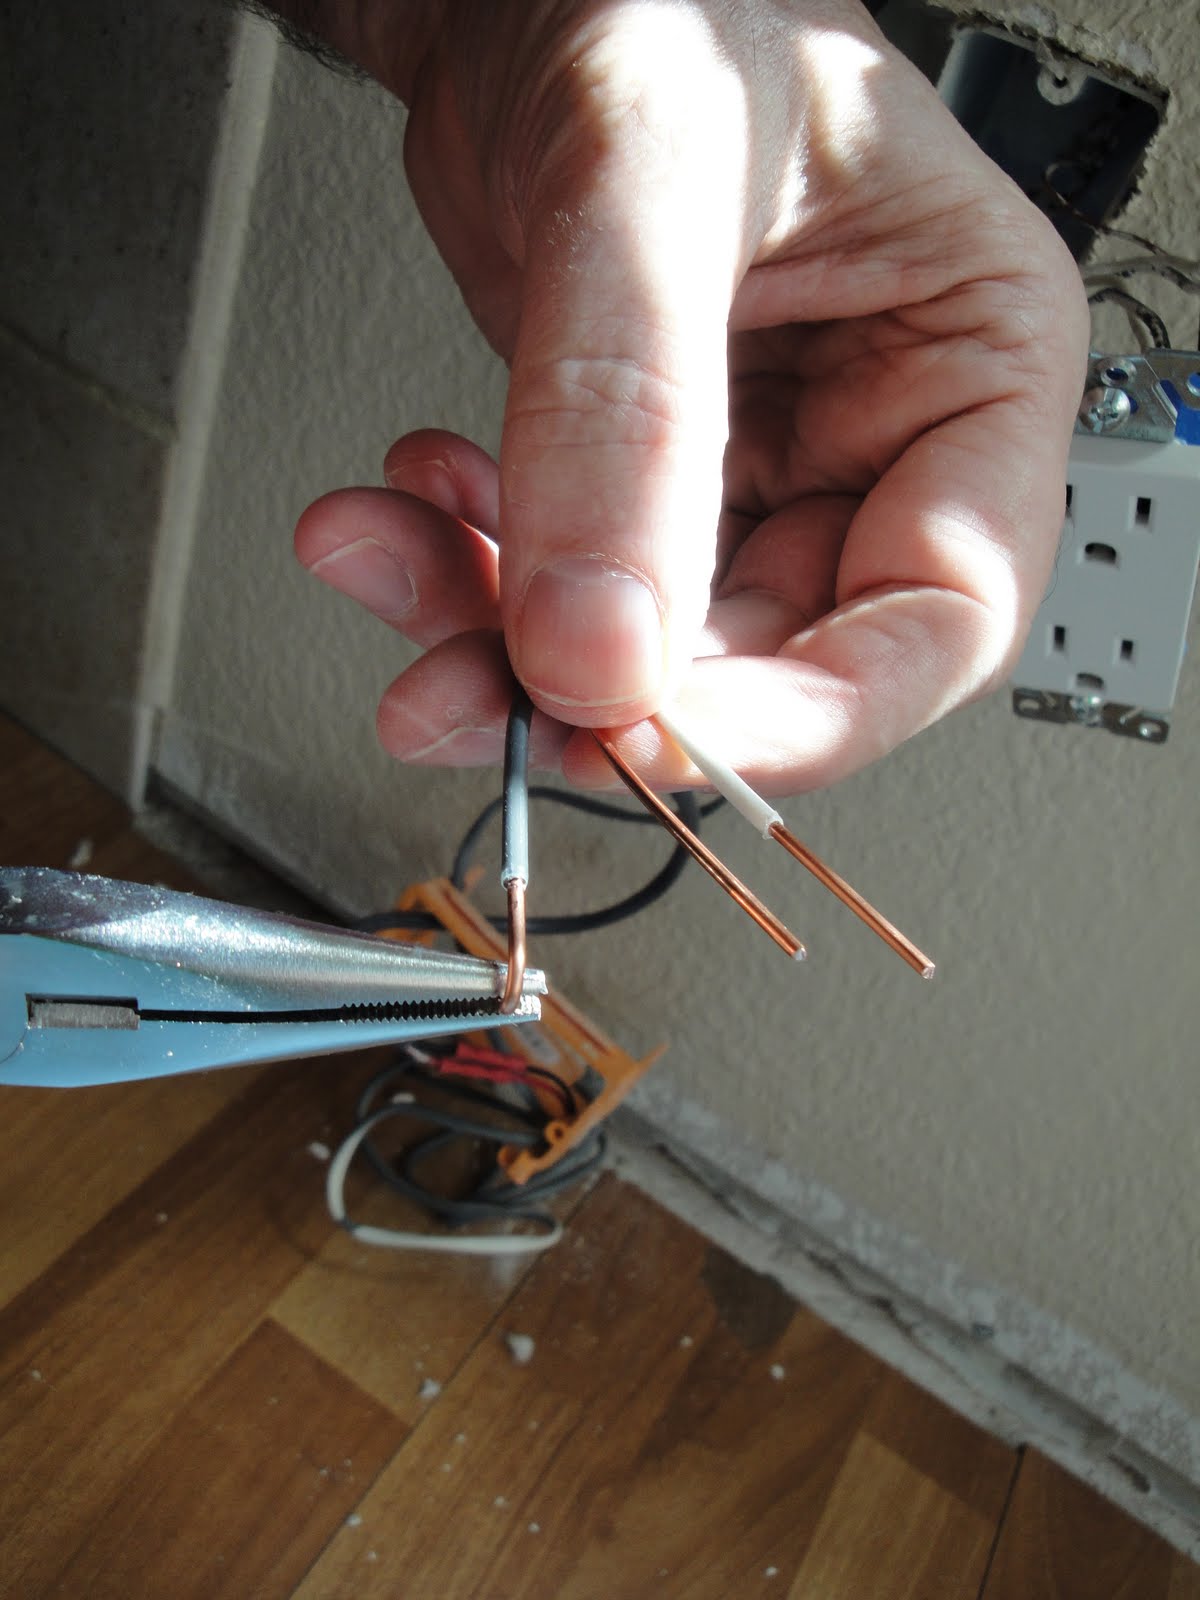
Now take your needle nose pliers and curve the ends of the wires.
Yeah, like that!
This may be a little tough to see, but here's what's going on. These outlets have a grippy hole in them. I'm sure there's a real term for it, but I have no idea what it is. Essentially, you strip the wire to a certain length, push it into the hole and the outlet will grip onto it. This is easier and faster than bending your wires, using the screws on the side, etc. However, the makers of these outlets do include the screws on the side as well. This is going to help us.
So you can see the one wire going into the back and the other on the screw plate on the side, right? Just remember that you want to be consistent with your wires. White wire goes to the steel screw and the black wire goes to the gold screw. You don't want to get your wires crossed, do you?
We mounted a plastic box up on the joist with some screws and pulled the cable through it. Strip and bend the wires, then attach them to the back of your other outlet. Don't forget to attach the ground.
There you go.
You can't really see because of the flash, but the lights are on. We wanted to test the power before you wrapped everything up. We checked it, then turned it back off again to finish mounting it in the box, then turned it back on and checked it again. Walkie talkies would probably be handy for this part.
So there you have it. Nice new outlet in the ceiling of the utility room. We didn't have to splice any wires, so when the time comes to take this puppy back out again, we won't have made any permanent changes to the wiring. I like a temporary fix that can be undone completely. We also win because the power to this outlet isn't on a GFI circuit. That's important with freezers, because the compressor kicks on and it draws enough power to flip them. When your GFI flips, your power goes off and you're left with a shiny cabinet full of rotting food. Awesome. Do yourself a favor and check your outlets first.
My friend Webber came over to help me carry the freezer to the basement, which was cool of him. I talked him and his wife into the same freezer, since we're going to be sharing a half a cow together when harvest season comes around. He's also helping us figure out our media networking plans and all. I spent a lot of time fiddling with it this weekend, but I haven't gotten anything solid yet so I'm reserving the post on it until later.
Aside from that, I also bought and mounted some speakers. Here's what we stopped with last time:
These speaker wire panels. They're not bad, really, but the posts stick out about half an inch from the panel. Mounting the speaker to the wall with the included brackets runs the back of it into these posts. Not cool. I went out looking for other speaker brackets and talked with a guy at Best Buy who had a good idea. Why not just get rid of the speaker posts and run the wire through a hole directly to the speakers? Then I can use the brackets that came with the speakers and mount to one of the screws that holds the plate on. Brilliant! And saves me a ton of money, to boot. The speaker brackets I was looking at purchasing, even the cheap ones, are about $20 each. Lame. I may still need to get one for the center channel, but one is much better than five.
Okay, take it on down to the basics again. I took this opportunity to re-seat and re-tighten these boxes.
The plates I found that had just the hole through the middle included this weird bracket thing. It's kind of weird, but I went with it. i used the included screw on the bottom hole to pin the plastic piece to the box, but I left the top one empty.
If you look at the plastic piece, it's there to give you two holes to screw the plate to. Why they didn't just move the holes up and down 1/4" and use the holes that are already there is beyond me. I drilled a hole in the plate to line up with the hole that's in the orange box instead of the plastic piece. It's a lot stronger, so it should be more stable for these. I put a screw in the bottom hole of the plastic bit, but didn't put the screw in the top hole until I was putting the plate and bracket on.
These screws are just going into the little plastic piece, so they aren't really holding anything up, just holding the plate to the box by way of the plastic deal. So much more complicated than it needed to be.
Here's the speaker bracket. I used a longer stainless steel screw and a washer to hold the bracket to the panel. The speakers are pretty small, and though they're heavy for their size, they're definitely only a few pounds each. This setup feels plenty strong to hold them in place.
Get the wires hooked up...
And then attach the speaker to the bracket. Voila!
The speakers are on the wall and sounding pretty darned good. The center channel still needs to be mounted, but it's not terrible sitting there for the moment. These are small speakers, but they're pretty powerful. They're the Mirage Nanosat 5.1 system, if you're interested. They're known for their indirect sound so they're a lot more forgiving of the strange placement than others would be. Most speakers, you'd want them at about ear level, spread a little farther apart, angled to the center of your viewing area, etc. You end up with great sound, but only in that one sweet spot. These give good sound everywhere in the room. With the lights off, it's very easy to lose track of them, and just feel like the sound is coming from everywhere. It's a pretty cool experience, for sure.
So there you have it, guys. That's what we did this weekend. Thanks for reading!


Wow. It's great that you bought the speakers with metal brackets included. You didn't find it hard to attached your speaker unit on the wall because of it. It's a great tool, right? Well, I wasn't as lucky as you are because I had to find brackets for my own speakers. I didn't have any problem while installing them though, so it's fine. :)
ReplyDeleteCarl Patten