Wednesday, December 14, 2011

Bathroom Update!

And by that, I don't mean that I'm posting this while on the throne. I don't even have a throne installed yet, so that's a perfectly silly reading of the text. Anyway, I do have some other stuff, though. Stuff you will like.

A door. We have one.

Check this out. Cabinets!

They're so pretty. And loads of space in them, too.

The shelf stack is going to give us loads more storage than medicine cabinets would, and I think it will look awesome to boot.

What's this? Granite? In my bathroom? Heck yes.

Matching granite bench seat. That's the hotness.


Today is paint, and the tile is actually all done, but I didn't get any pictures of it because I'm lame. So anyway, there you go. Things are coming along very well. Hopefully we'll have a bathroom before Christmas!

Friday, December 2, 2011

Grout!

More pictures of the bathroom tile, this time with the grout in place:

How great does that back wall look? I'm so pleased.

This is the completed alcove on the back wall of the shower. Should give us some extra storage so the bench doesn't become one giant shelf.

The bench will actually be the same granite as the counter top, and the guy came out today to measure it. They'll come back and put in the last of the tile after the granite is done, since the tiles sit on top of it. We're getting so close!

Wednesday, November 30, 2011

Tile!

There's some tile in my bathroom. There's a lot of beautiful, sexy tile. It's not all done, but everything is progressing wonderfully. Here are some pictures:

The floor:


The Bench:

The back wall:


The part that's currently on the floor but will become part of the back wall:


I'm pretty pleased. Everything is looking just fantastic, as far as I'm concerned. Couldn't be happier with how it's turning out. I like the double tiny tile border around the diagonally-placed slightly larger tiles. That whole thing just works for me. I like that the floor and the inset on the back wall will tie together. I like that my shower bench is made of freakin' concrete so it will be impervious to water. I like all of these things.Today, this should all be finished being set and then tomorrow will likely be grout. Or maybe there will be some grout today and some tomorrow? I don't know. It should all be done by the end of this week, at least. I'll keep you all posted, of course. Thanks for reading!

Monday, November 28, 2011

More progress, but not a ton more

Thanksgiving last week brought most of the progress on the bathroom to a halt. We got the shower pan built:

It spent the rest of the weekend curing. Tomorrow, the tile guys will come back and get to work on the rest of it. They're supposed to be done this week, for sure. The holiday and some illness and family stuff have pushed our schedule a bit, but everything is still moving forward.

Also, my dad and I did this yesterday:

Woot! We've been living without an opener for a year and a half now, and that crap gets old. It was supposed to be a quick, relatively simple project, but it turned into an all-day affair with us trying to make it far more precise than it probably needed to be. No matter, it works now. So that's awesome.


Also, my mom came over, and she and Jenna started talking about painting things. So...now things are getting painted. It's going to be a lot of work to repaint the whole house (yeah, we're totally doing that) with a new neutral color, but the color is awesome. I don't mind doing work when the result will be great. Here's what they got done yesterday, and it already looks really good.

The whole kitchen is going from blue to this new color (Basketry from Behr), and then the family room will follow. Then probably everything else that is currently, what we call "Whole House Neutral".

You can see the old color (left) and the new color (right) in this picture. You can see how it pops so much more with the bright white woodwork. It's richer, warmer, and all around more pleasant. I will be happy to have this color throughout the house, so I'm cool to have it all redone. It's not going to be easy to do with all our stuff in the house now, but we'll make it happen.

So there you go. Progress! Thanks for reading.

Tuesday, November 22, 2011

As organized as it's likely to get

Here's the garage, as organized as I plan to get it for the moment. I have a few things that will need to find homes other than the top of my bench, but I'm not overly concerned about them at the moment. Until I free up some more 12-gal bins, there's not much more I can do. I could buy more, but that seems intensely silly.


And another shot:

Everything is pretty well where i want it. I'll adjust the pegboard for sure, as I find things that I need more or less often, or find other places for some of it. But for right now, almost all my tools are up there, accessible. Do you see all my little bins up top? Those are awesome. I bought two packs of them from Costco because they're the perfect size for what I wanted. They're cheap enough (14 for $20) that I can have a bin for everything, rather than having a few bins for really popular categories (Drills and Drill Bits) and having to find somewhere else or something else to store my less popular options (Sculpting Tools or Seasonal). It's a pretty awesome setup, I have to say.

Monday, November 21, 2011

Drywall texture is done!

I don't have pictures of it, because it mostly just looks like the same walls you've already seen several times. But it's done. Tile is the next step and should be starting tomorrow morning. I also spent a lot of time getting my garage organized, and I'll get some pictures of that as soon as it's a little closer to being done. Things are really coming together!

Friday, November 18, 2011

So much stuff!

Garage first.

Ta-da! It's obviously still not done, but it's getting very close now. We have a work light over the bench and added two more general lights up top, but can't plug them in without some 3-prong to 2-prong adapters. I'll pick those up today and get them all set up. But you can see that everything is lining up pretty much the way I wanted it to.

Obviously you can't see it because the light is on, but there's a cool little adapter you can put in a light socket that has two plugs on it, so you can plug extra things into your light socket and have them go on when your light goes on. Perfect for what I've been wanting to do.

This is where the magic happens. Or will be soon, anyway. I've got to get a lot more pegs for the pegboard to get stuff up there, and I've got to get a lot more stuff up there, too. I also need to start figuring out what to do with my smaller tools and the like. Maybe some shelves on the right there with little bins on them? I have little bins somewhere, I'm sure of it. And having a shelf where I could label my little bins and keep the stuff organized would be awesome.I'm going to look into that, for sure. I think that may just be the perfect solution. I've got about three feet by two feet, which is a fair amount of shelf space for tiny bins. Next step is to find my labelmaker.

This is my bench tool shelf. I've got my various bench tools on there so I don't have to try to stuff them somewhere else. Having them all in one spot will be awesome.

Okay, that's it for the garage. I'll take more pics when it gets refined a bit more.

Remember how I said we had issues with inspections? Yeah, that sucked. So anyway, here's what we had to do.

This toilet drain pipe didn't have enough of a slope (any slope) to it, so we had to reslope it.

The lav drain pipe also didn't have any slope to it, so we had to take it out and do it again as well.

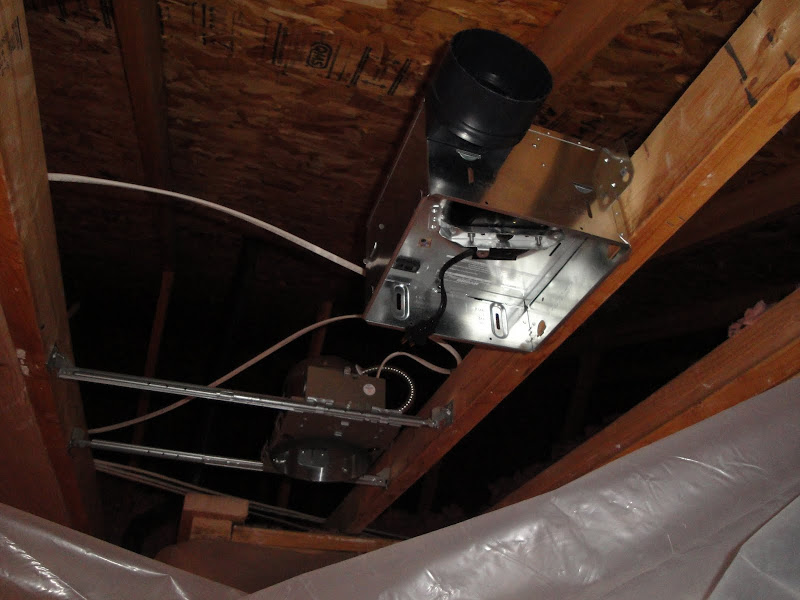
My dad took out the 4" heat duct and put in a 6" heat duct and ran it up through the floor. This should help keep the bathroom much warmer.

The new plumber also extended everything out, put the right fittings on all of it, and tacked the supply lines to the studs so they weren't flopping around everywhere.

You see all those metal plates? Yeah, our bathroom is armor plated. I don't think we technically had to use those as much as we did, but we figured it wouldn't hurt to ensure that everything was protected against accidental penetration.

Winifred is inspecting the patches my dad put in all the holes that were in the floor. She seems to approve.

Now, we fast forward a little. Here's what's happened the past few days:

Drywall! it's so weird to look in here and see real walls instead of gaping holes or bare studs.


Drywall in the shower...

We can no longer walk through the wall between the master bathroom and the hobby room. That's weird.

The closet is also walled in now. Woot!

Now, with tape and mud...

Taped and mudded here, too.

The closer this gets to being finished, the crazier it feels. Some day, I'm actually going to be taking a shower in this shower. Some day i will be standing at my new vanity and brushing my teeth. It's kinda blowing my mind, to be honest.


Today is texture, so I'll have even more pictures of that soon, hopefully. Thanks for reading!

Thursday, November 17, 2011

Catching Up

We've got some huge progress on the house, but no real pictures of the latest. I realized I hadn't fully explained all the trials and tribulations that got us to where we are now. Let me do that now.

I think I mentioned that we hired out the master bath project, right? Well we did. And we've struggled with some of the plumbing work we had done previously not being up to code. It was a battle to get everything ready to move forward, but we finally got it done, after a lot of work and some expense. It's cool, though. This story is definitely looking like it has a happy ending.Here's what we had done before inspections:

Added switches and outlets to this wall.

More outlets. We're going to have a lot of them because outlets are awesome.

Can light and big giant fan in the toilet area. The fan is going from a 50 CFM fan hooked to a 3" duct to an 80 CFM fan hooked to a 4" duct. Should keep things pretty dry in there, hopefully.

Can light in the shower, too. Lots of light up in here.

Switch, light and outlet for the desk area in the hobby room. There will be another light put in there, too.

I think that's it for stuff I have pictures of right now. I'll get more up soon so you can see all the progress that has been made. Thanks for reading!

Monday, November 14, 2011

The Virtue of Shelfishness

Finally done with shelves! Here's how it all went down:

We've got one full support system up and hanging now, and my dad is narrowing in on the center of the beam for another.

All three supports are mounted to the ceiling here. I was very pleased with how they went up. Everything feels just crazy solid.

First shelf section is up! We're still figuring out the best order in which to do everything, but we're making it all happen.

Second section up, and attached. We put the steel plate near the front edge to help keep the pieces attached to each other without affecting the total depth of the shelf or anything. It seems to have worked quite well for us.

Close up of the plate. it's 5" x 8" and about 1/16" thick. We got a bunch of them for the bathroom upstairs, and they were also perfect for this purpose. The boards are secured to the rear support, so they're not going anywhere, this just helps make sure they stay together in the vertical plane. It also helps spread the load out across the support strap, since there's a seam in the wood right there.

 All shelves are up and in place. Woot!

Still very pleased with how low-profile the shelves are. Going with this support system allowed me to get 3 shelves above head height instead of just two, which is what I would've been looking at with the other support systems I had in mind. It's also the most versatile, allowing me to move things around underneath as needed, so I can change my mind about what goes where and all.

Woot! We didn't completely screw everything up to the point where bins wouldn't actually fit! These are just test bins. Sample bins, really. But they are the first of many more bins that will find their way up onto these shelves. Probably this week, we'll go get a bunch from the basement and get them up here, to free up more space downstairs.

So there you have it. Project completed. Well, mostly completed. We have maybe one or two minor things to do, just to call it all the way done. But they're minor and sort of cosmetic, more than anything. So I'm calling it done, for all intents and purposes. By the time you read this, it will likely be done for reals.

Thanks for reading!

Friday, November 4, 2011

Actual Physical Progress!

So we have a few big things going now. My dad and I have made some positive progress on the garage shelves, though things are going pretty slowly as we figure stuff out. Also, we got the work started on the master bathroom today! There's an electrician doing electrical things as we speak! It's super exciting. I'll take lots of pictures as soon as there's stuff to take pictures of. We're hoping to be ready for electrical/plumbing/hvac inspections next week, and then up with the drywall.

But anyway, let's get to the stuff I actually have pictures of, eh?

Here it is, the blank wall. Our empty canvas.

We needed to put the laser level way up high to get it to work to throw the line at the right spot on the wall, so I ended up with this nonsense. A laser level on a tripod on a 50-gal drum on a workbench.


That's just beautiful, I must say.

You can see the first wall-side support and the laser line for the second one here. This is how we got these up on the wall relatively straight. The laser level is such an amazing tool. We use it for darn near every project.

There we go! All three supports on the wall. You can see a 6-foot ladder there on the left. I can easily walk under the shelves as we have them designed, which will be very nice. I'll also be able to pull bins off the bottom shelf without a ladder or anything, which is also pretty perfect.

Okay, you may be wondering how I plan to support the front of the shelves. We thought about a lot of options, and ended up coming up with one that I think will work like gangbusters. Here's a diagram:

Okay, the way this works is that the 1" square tube at the top is attached to the ceiling joists with lag screws. The all thread rod is suspended from it with a washer and locking nut inside the tube and another washer and nut underneath. That forms the main support. I like it because the weight is all being applied in a straight line down on the all thread. Everything seems like it should be very secure. I also like it because it won't interfere with the bins sliding back and forth on the shelf. It's as low-profile as we could get on the support system while still allowing ourselves to use the full length of the shelf. I'm pretty proud of it. Anyway, so there's also a metal strap that loops over the all thread, and is trapped between two nut/washer combos on top and goes under the shelf to rest on the rear support. A screw will go through the shelf, through a hole in the metal strap, and into the support. Everything is basically being tied together, with the metal straps providing the support for the shelves at the front. The all thread passes in front of the shelves instead of through them so the bins can slide around behind the supports without having to use shelves deeper than 24". I'm hoping this all makes sense, but the pictures will explain it in any case.

This is how the all thread secures to the metal tube. There's a locking nut and washer inside there that gets tightened down, and then another regular nut and washer will tighten up underneath to hold everything in place.

Okay, here's the first support we have up. We learned a lot doing this one so the others should go faster.

So you can see the support attached to the ceiling, as well as the metal strap going from the all thread back to the rear support.

Here's a closeup. Hopefully all my rambling makes some sense. Anyway, I'm really hoping we can get this whole project finished up tomorrow. Lots more pictures, hopefully! Thanks for reading.