Friday, May 28, 2010

Paying homage to the Waste King 8000

Before we get too far, here's a picture of the installed and perfectly functional dishwasher:

Looks good, doesn't it? It's really nice. It's cleaning our dishes very well, and it's very quiet while it's doing so. our last dishwasher was so loud you couldn't have a conversation in the kitchen while it was on. It also tended to scatter food particles around rather than doing anything helpful with them, so that was fun. I'm very pleased with this one, though. I just hope we can figure out what to do with it when the time comes to install the tile floor. It barely fits under the counter as it is, adding another quarter inch or so might be an impossibility. We'll just have to see when the time comes, I guess.

So there's that. It looks good, I think. I'm still not a big fan of the cabinets themselves, color-wise, but they'll have to do. I am absolutely enamored with the little rolly drawers, though. We just heard back that we'll be getting our new cabinet and I'm thinking I may put in another order with them for some more rolly drawers. They just make all the cabinets so much more useful, and make getting things into and out of them so much faster, I'm having a hard time figuring out how I lived without them.

We're also one step closer to having the kitchen all the way done as of last night with the installation of our new garbage disposal. We had an In-Sink-Erator badger 5 which is supposed to be a pretty beastly disposal from what I've read. It was just broken from the start, and rather than trying to figure out how to repair a 10-year old disposal, I figured I'd drop a new one in there. Also, it was a good opportunity to give it MORE POWER. You know how I like that.

Here's the old one with the drain pipes pulled out:

Make sure you put a bucket under there before you actually unscrew any of this stuff. There's probably water and gross in there.

Getting this thing out was easily the hardest part of the whole endeavor. Make sure it's unplugged, obviously. If you have a three-screw setup (we did and you probably do too) you'll need to unscrew this retaining ring to get the main piece to drop off. You see the metal ring at the top with those loopy bits on it? You have to turn that to get the main body of the thing to come off of the mount. We had to hit it with a hammer about 70 times to get it to loosen up. Your mileage may vary.

Once it's off, you need to remove the retention ring with a screwdriver and then remove the mounting bracket. Basically, keep taking things off until you get down to just the sink. Then clean the sink around the opening and make sure there isn't any grime in there.

Now, you can go about installing the new one. It should come with everything you need to install it, except some plumber's putty (you may not use any, depending on your sink and your disposal).

Here's the sink ring. It appears that the sink opening is of a standard size, so you shouldn't have to worry about that too much. This one has that rubber gasket that you can use instead of plumber's putty. Yours may or may not have that, so pay attention to your installation instructions.

Look how pretty!

These go underneath and squeeze the drain hole thing down to the sink so it forms a seal and doesn't rotate around or anything.


The installation of this thing was seriously easy. Once you get to this point, you're really almost done.

This type of mount is known as the "Easy Mount" system, and it involves a lot less futzing and hammering than the other. The metal ring here is held on by a rubber gasket. The disposal hooks into it and that's the entirety of the connection. It's much simpler than the other, with a lot fewer parts. It also requires no tools to install, which is pretty neat.

And there she is. We still need to reattach the drain lines, but the disposal itself is hooked up.It's not the same shape (or size, look at that monster!) so the drain pipes will need to be adjusted.

This part is a little tough to describe. You have to hold all the pipes up to get a rough idea of how long they need to be so they'll all match up. We attached this one (it was new since the old one was too short) and then matched everything up with it to make it all flow. This part comes out of the other sink, and the the horizontal pipe from the disposal hooks up with a neat little joint piece right here.

This is the joint piece. It keeps water from flowing from the left sink into the disposal, and it keeps disposal water from flowing into the left sink. Cool system, really. Then we tie in the p-trap and everything looks good on this side.

This is the horizontal pipe here. I don't know if you can tell, but there's a slight downward angle on it. You want that to make sure everything flows properly.

This is how the horizontal pipe attaches to the disposal. There's a metal plate that screws on and squishes a rubber o-ring to seal the gap.

And that's it! Pretty simple, really. And the thing works like a charm. I can't wait to run stuff down here and see how it does. At this point it drains water, which is more than I can say for the other one. Thanks for reading!

Thursday, May 27, 2010

HOA-down

I don't know if that title works at all, because I'm not sure if anyone other than me sees "HOA" and thinks "ho-uh." Probably not. Anyway, we had our HOA meeting on Tuesday. Our second one in a row, now. I'm hoping that we're becoming something of a fixture now, though we'll only be staying for the first hour or so of the meetings I'm afraid. The meetings are once a month and Tuesday is our trivia night. Rather than skip out on trivia entirely, we're leaving the HOA meeting and showing up right before the game starts instead of getting there about an hour or so early, like we do on other weeks. So, we're staying for a lot of the HOA meeting, just not the whole thing.

Here's the situation. The HOA board is different, technically, from the ARC (Architectural Review Committee). They are almost identical in membership, but the board meeting isn't the same as an ARC meeting. We have submitted two ARC requests, one right when we first bought the house, and the other immediately after last month's meeting. We haven't received a response on either and the first one is getting very near to the 60-day cutoff that the covenant allows. These two ARC requests have been about our doors. We want a new front door and a new back door. Not having these doors is keeping us from finishing a few other projects, like installing the door sensors for our security system and installing the tile floor in the kitchen. We sent in the appropriate paperwork and supplemental information, so there really isn't a great reason for it to have taken this long. I know for a fact that the head of the ARC has had our first request in hand for a month now, since she brought it with her to the first meeting we attended. It's really frustrating to have to wait all this time when we could be checking these things off our list. The committee said they'd come by this weekend and take a look at our stuff and give us a decision, so that'll be very nice.

Also, in more news-worthy news, my parents came over and pulled all the weeds out of our front yard! That was a huge job and we really appreciate all of their help. It looks so much better now! My dad and I are going to check out the sprinkler system tonight and maybe test it to make sure we don't have any leaks or anything.

And now, for your viewing pleasure, here are some pictures from the Mother's Day extravaganza up at my sister's place.


Thanks for reading!

Monday, May 24, 2010

Working on the weekend

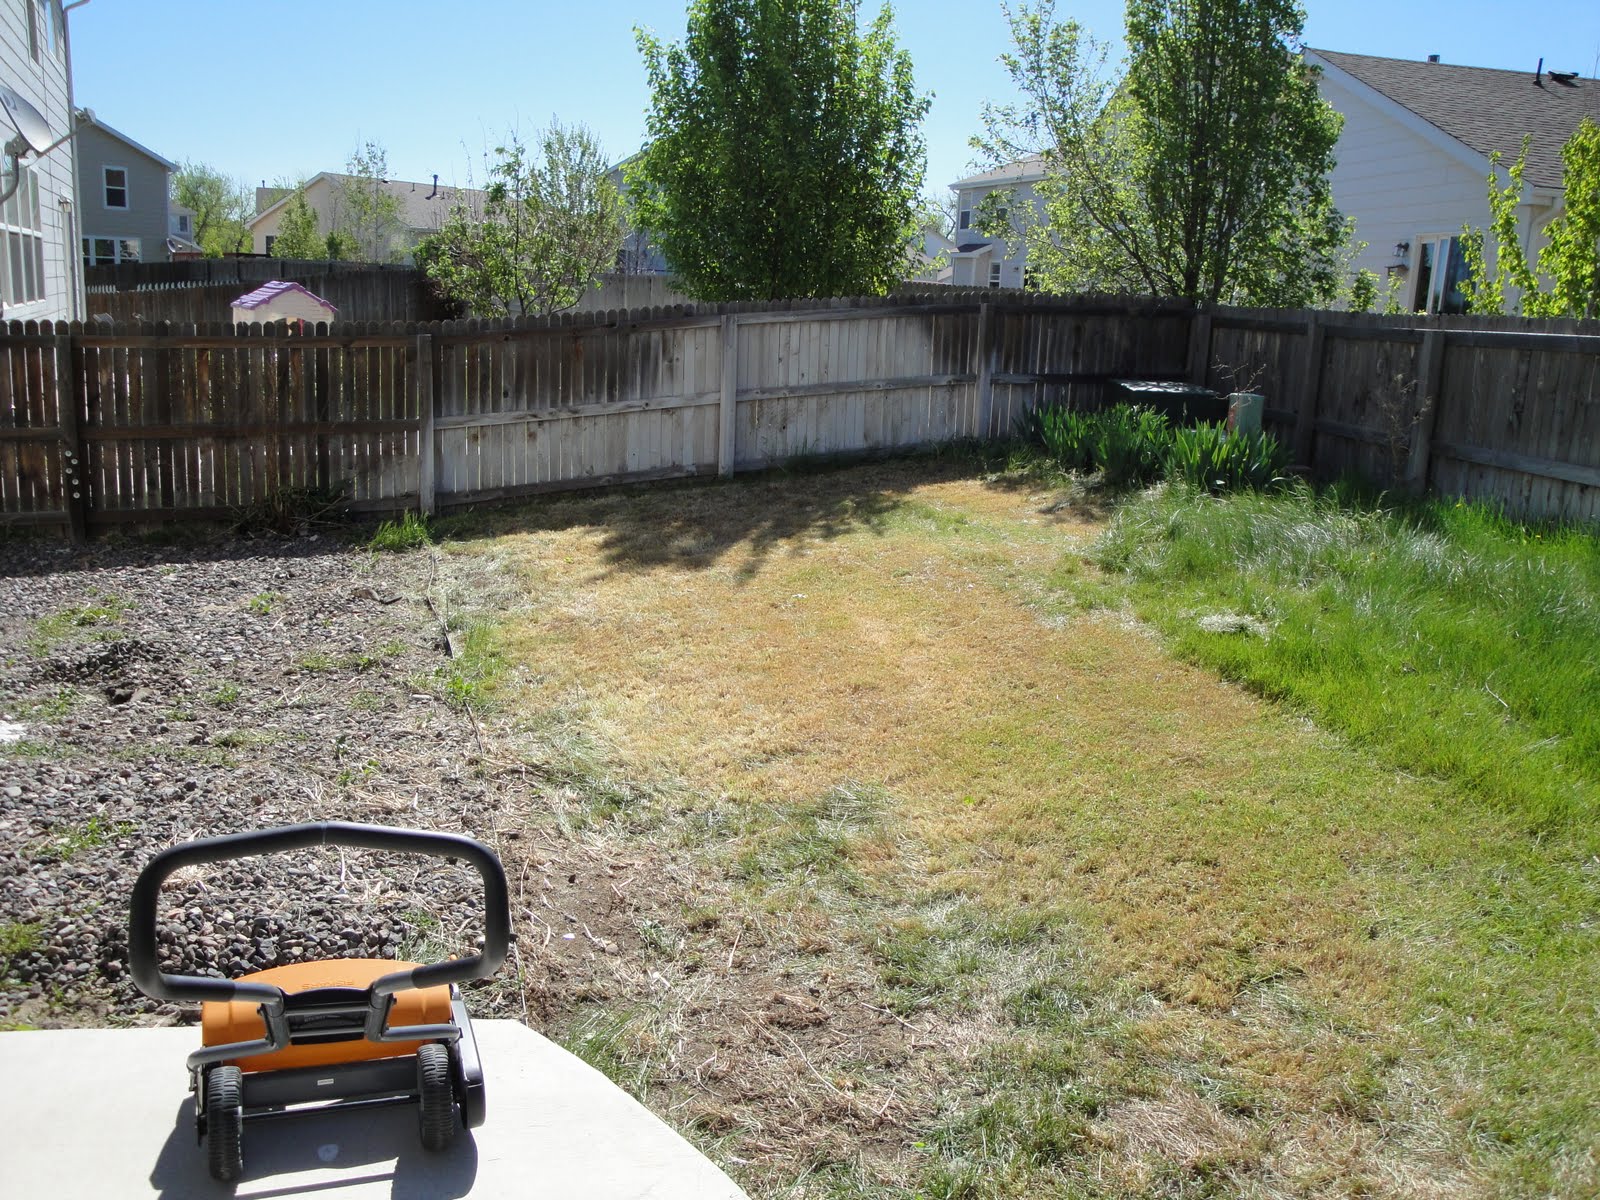
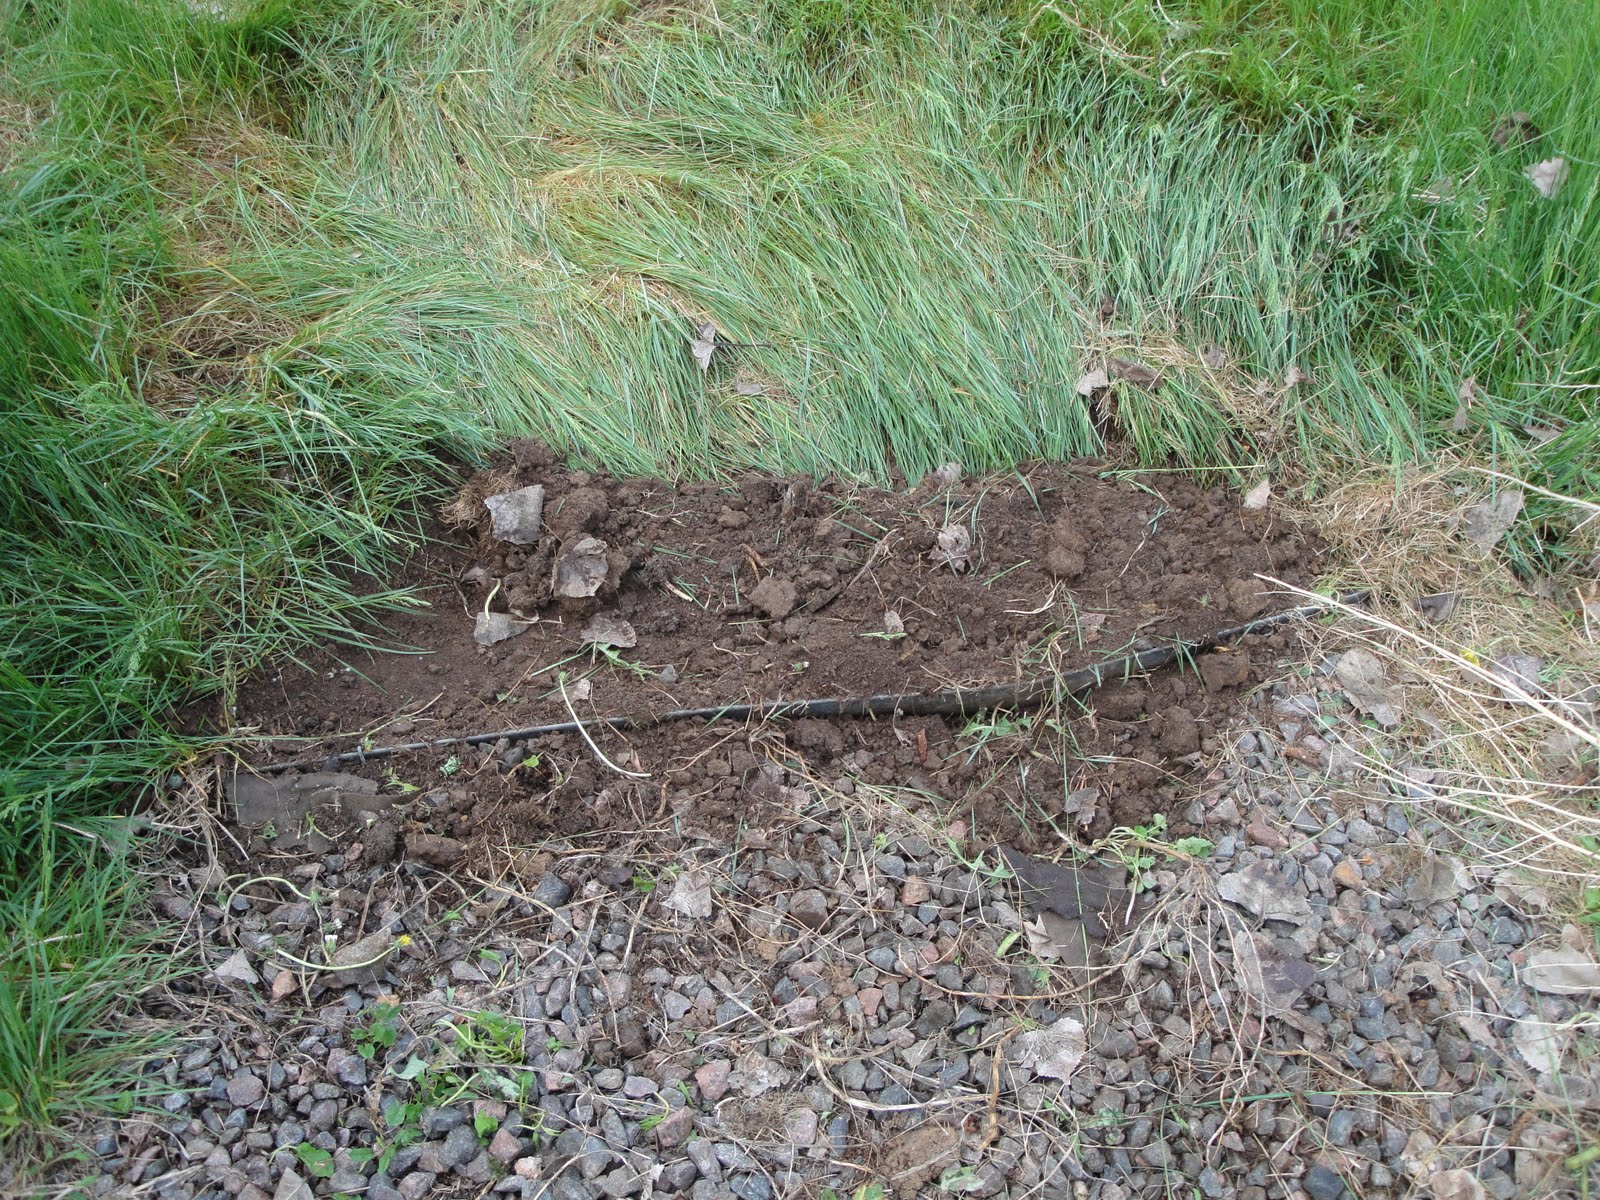
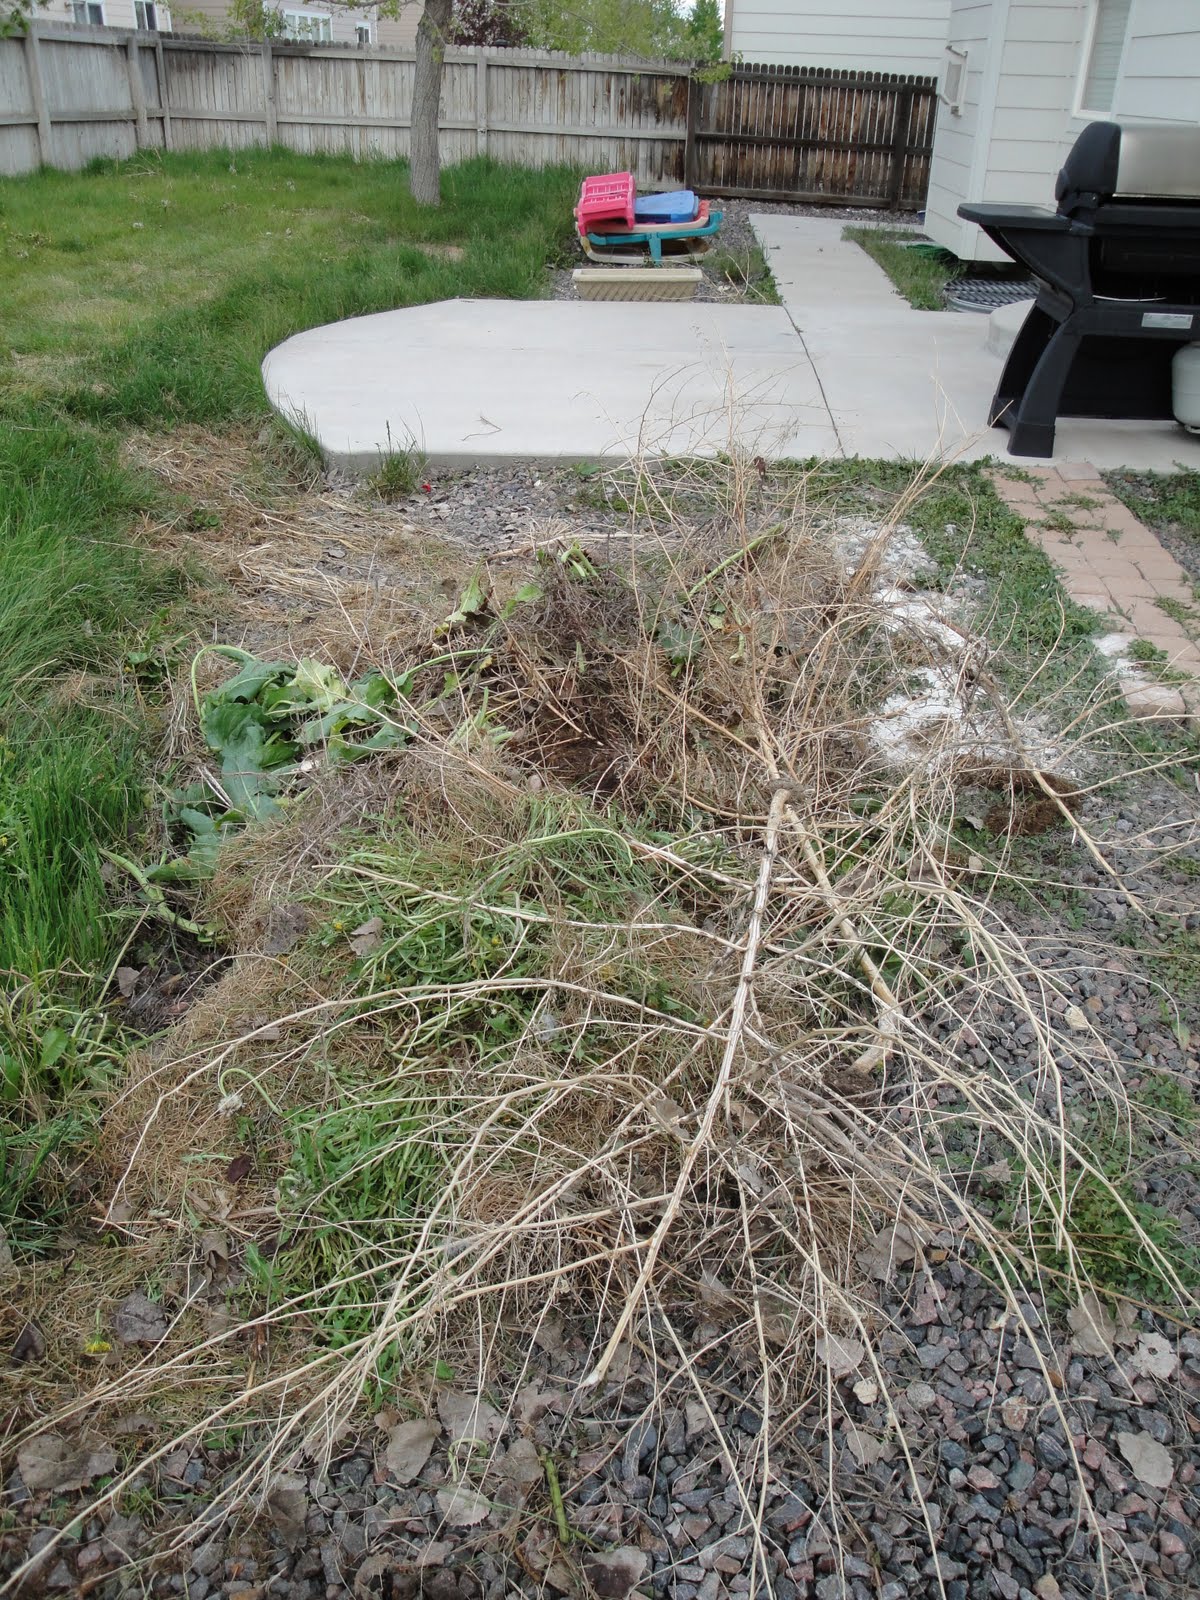
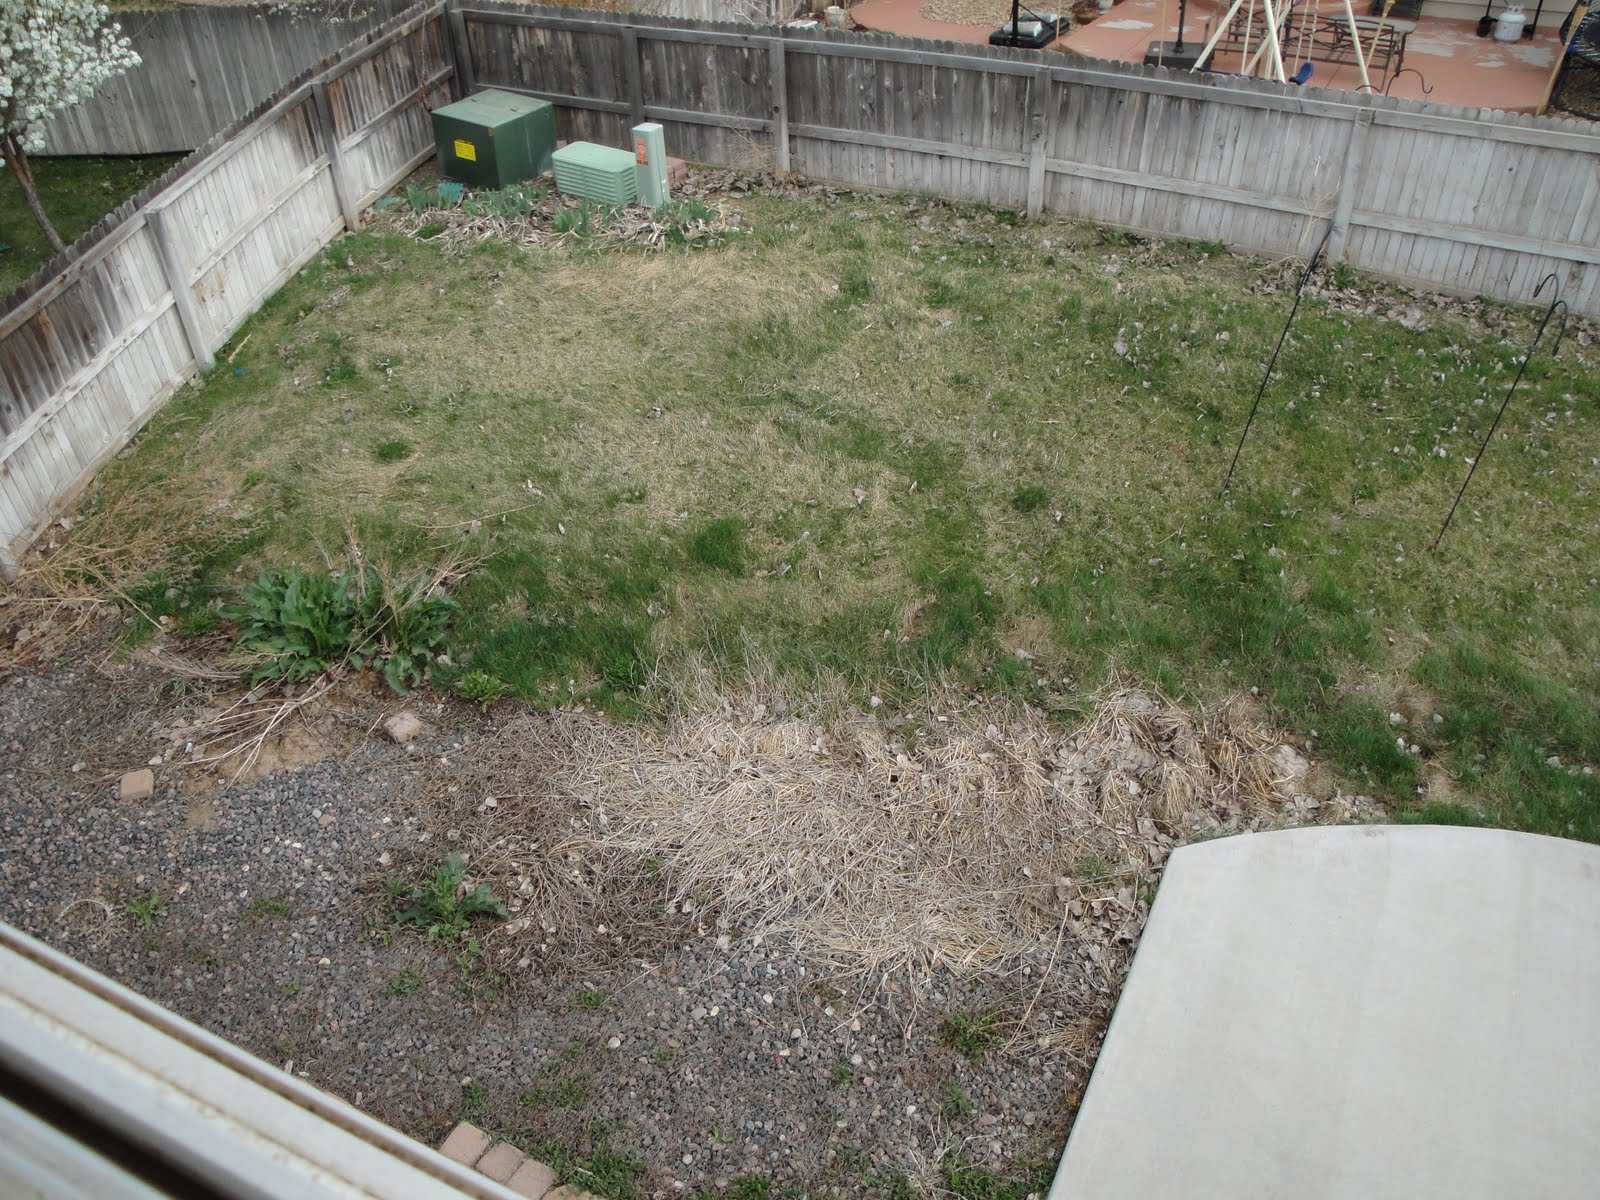
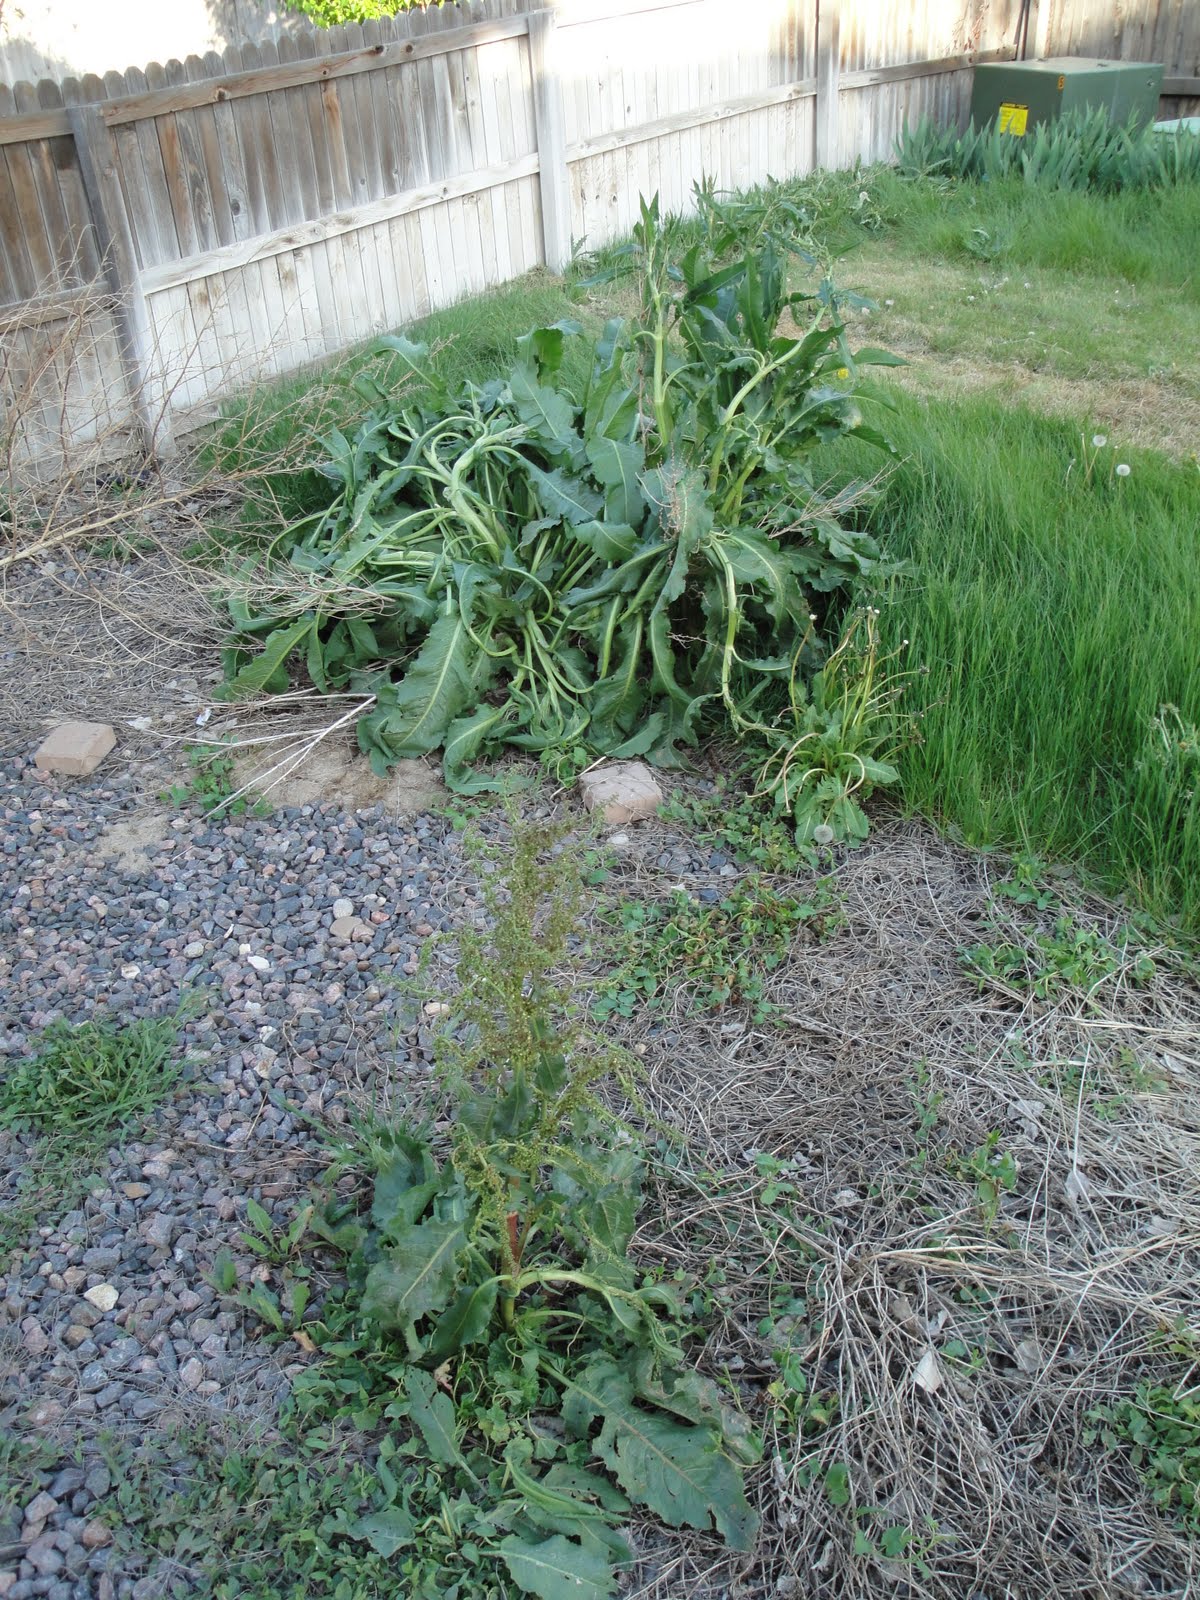
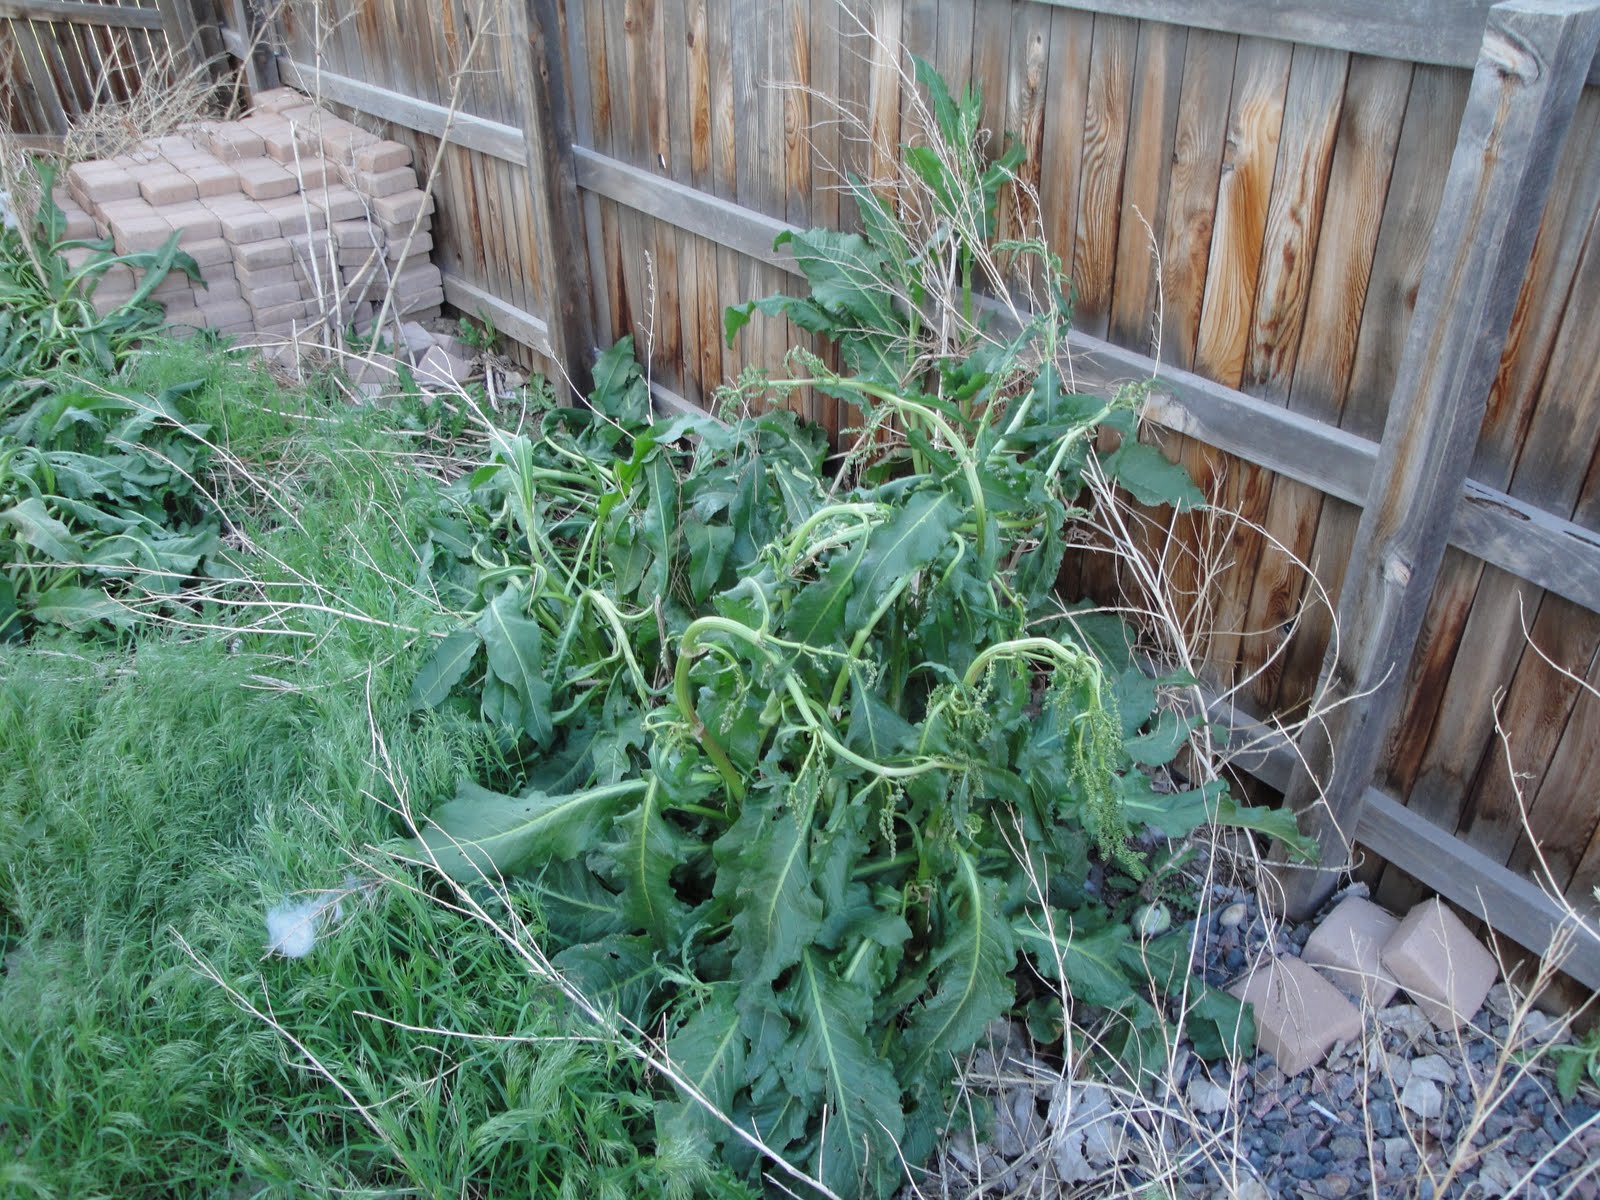
I don't know if everybody's doing it, but I certainly was. We had a busy time this weekend. I bagged up a lot of weeds and thatch from the back yard, mowed quite a bit more of it, and pulled some weeds in the front and back. There are just so many out there, it's tough to feel like you're even making a dent. Here's what I did, in a series of pictures:

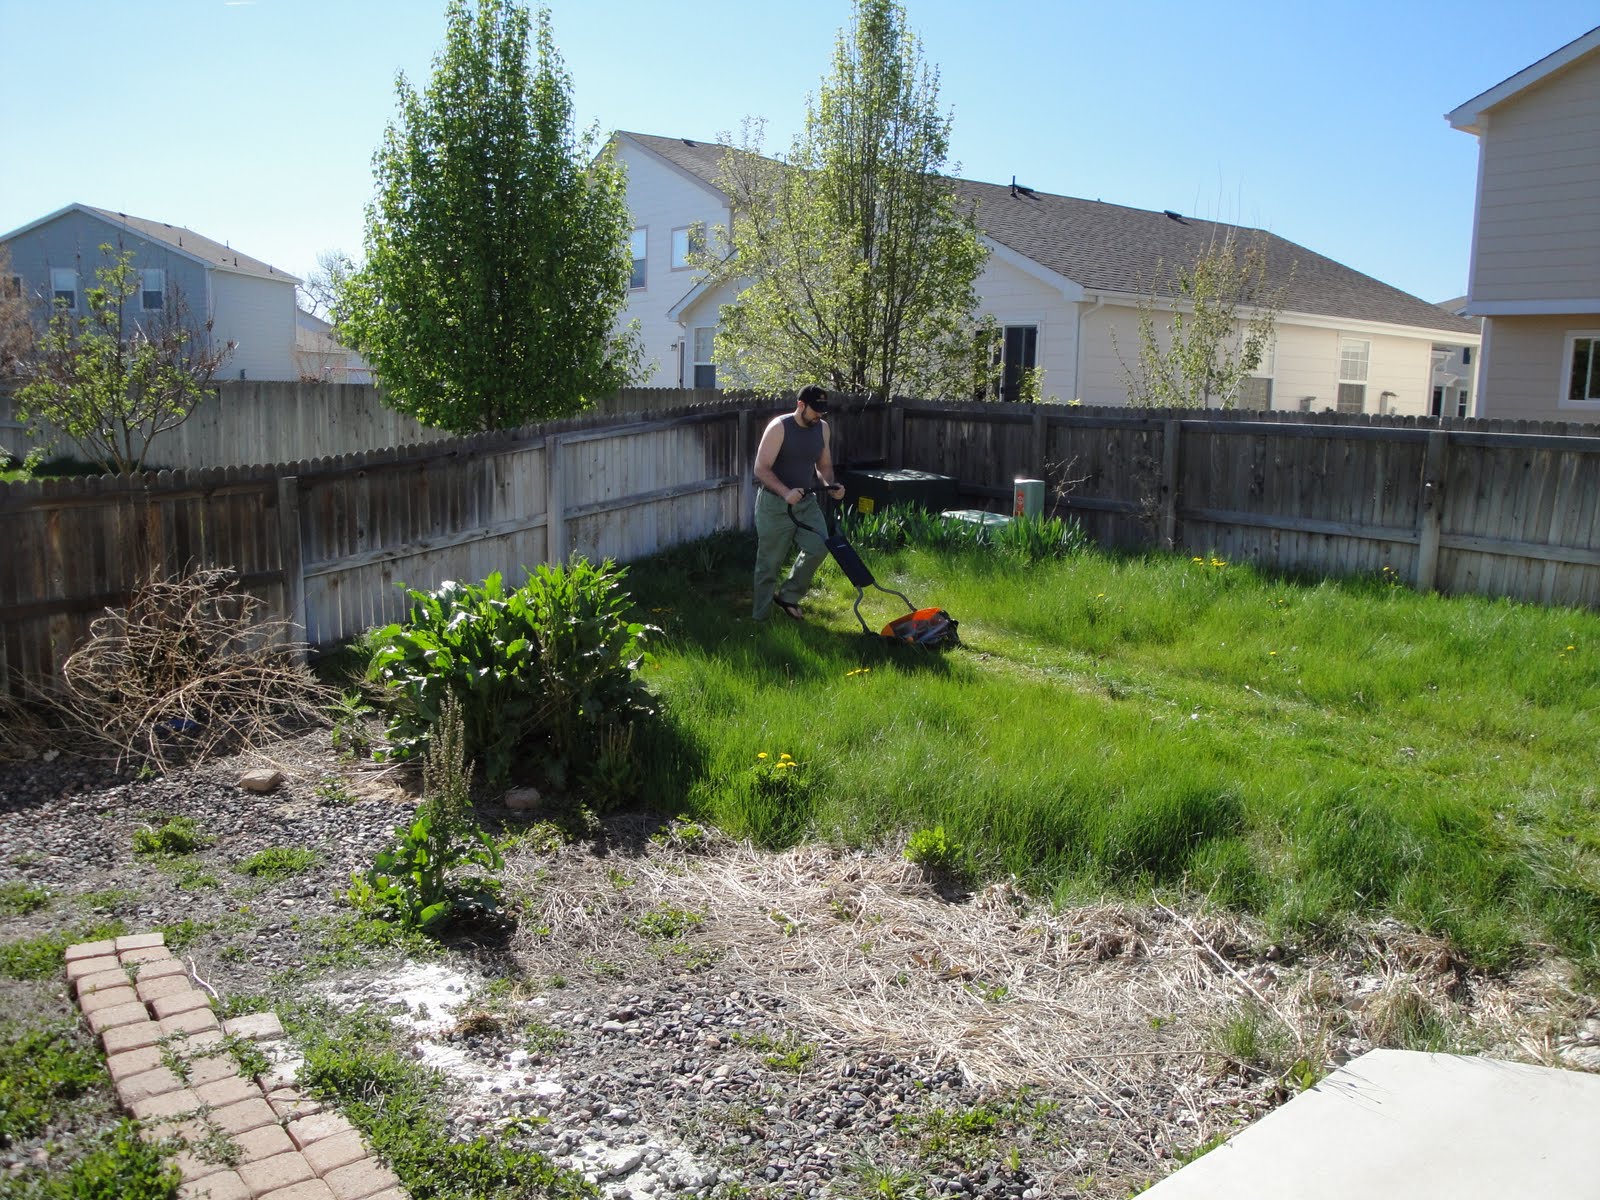
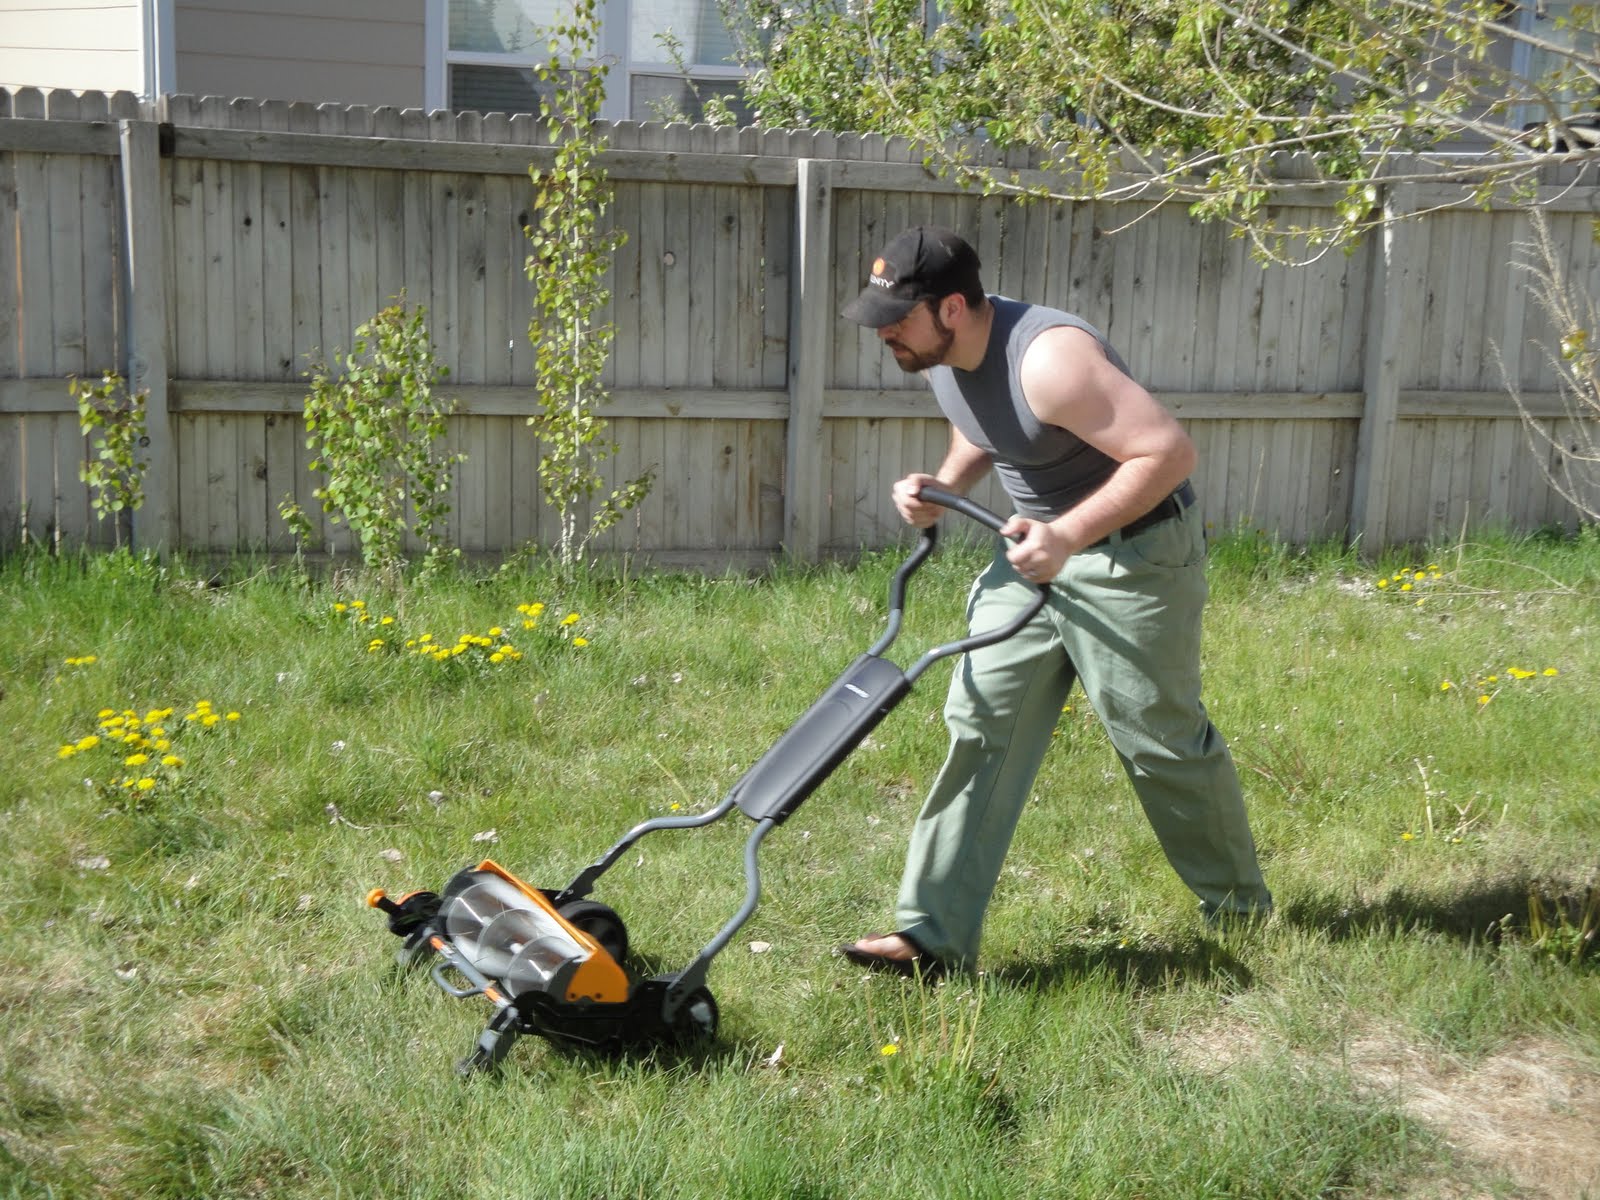
Yes, that's me in my purple dress shirt and slacks, cutting my lawn. Boo-yah.

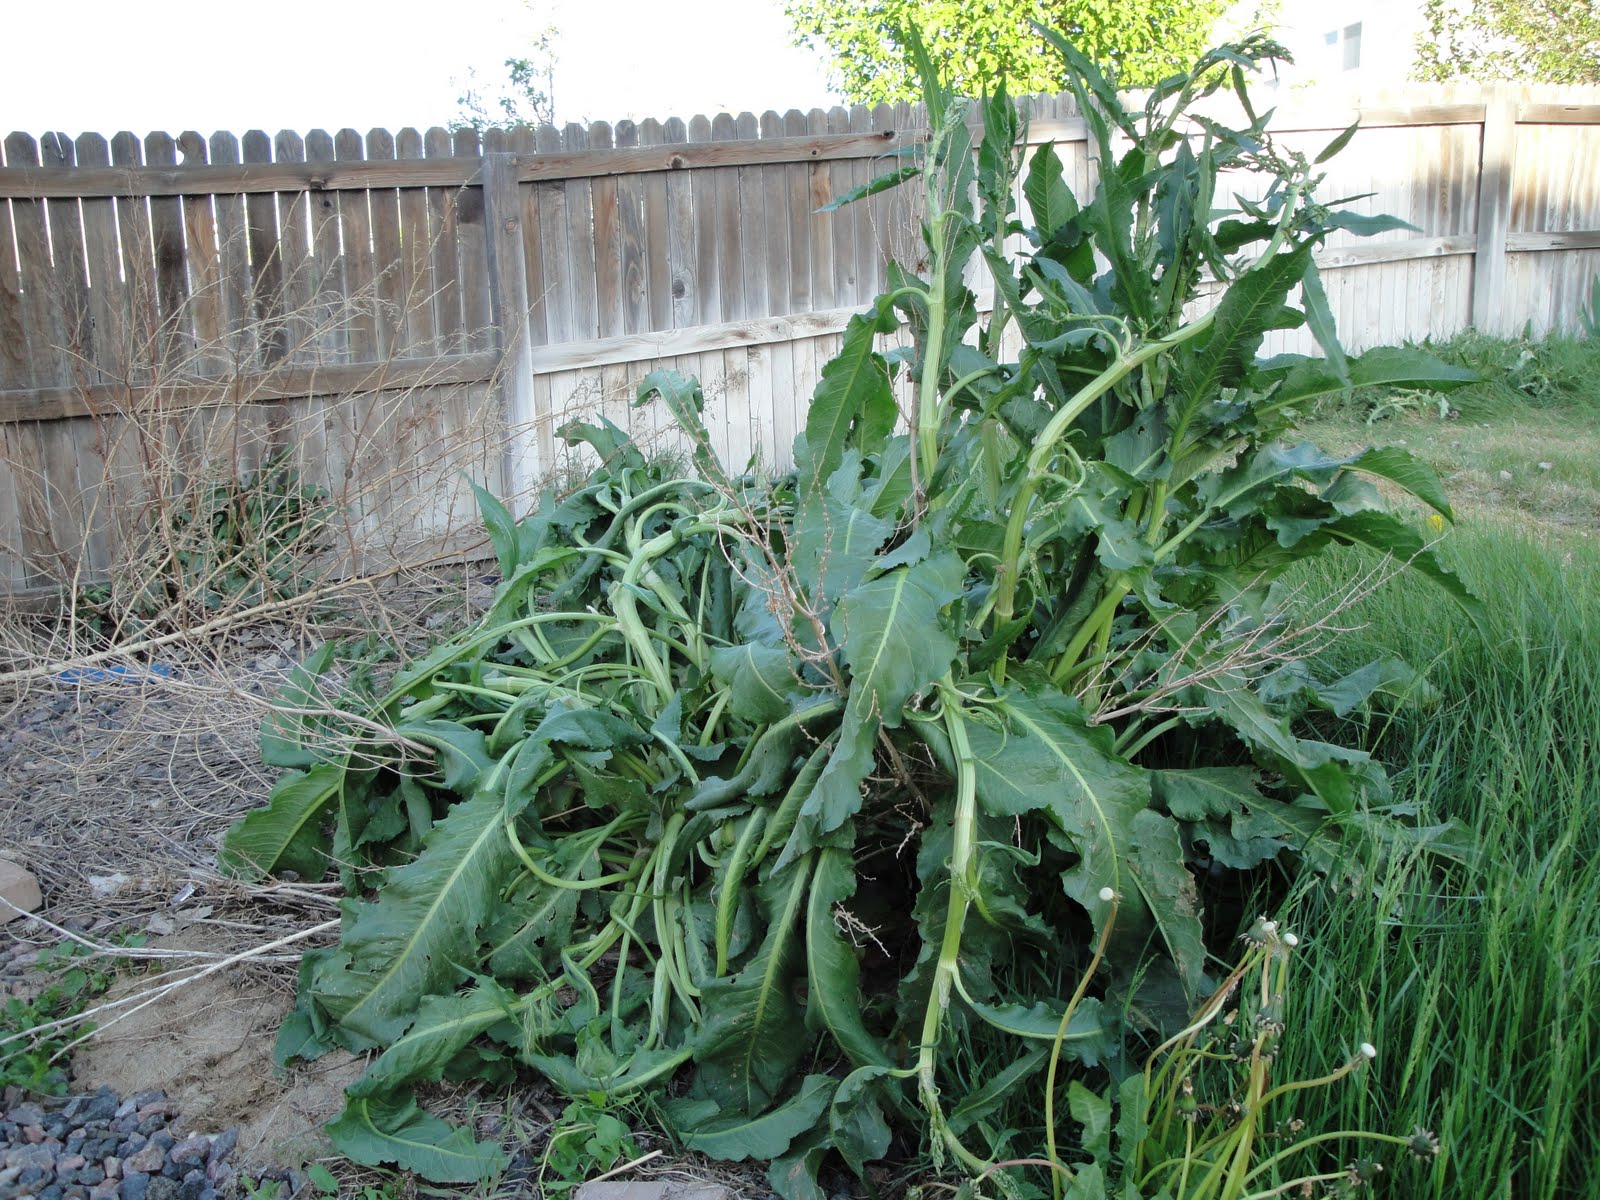
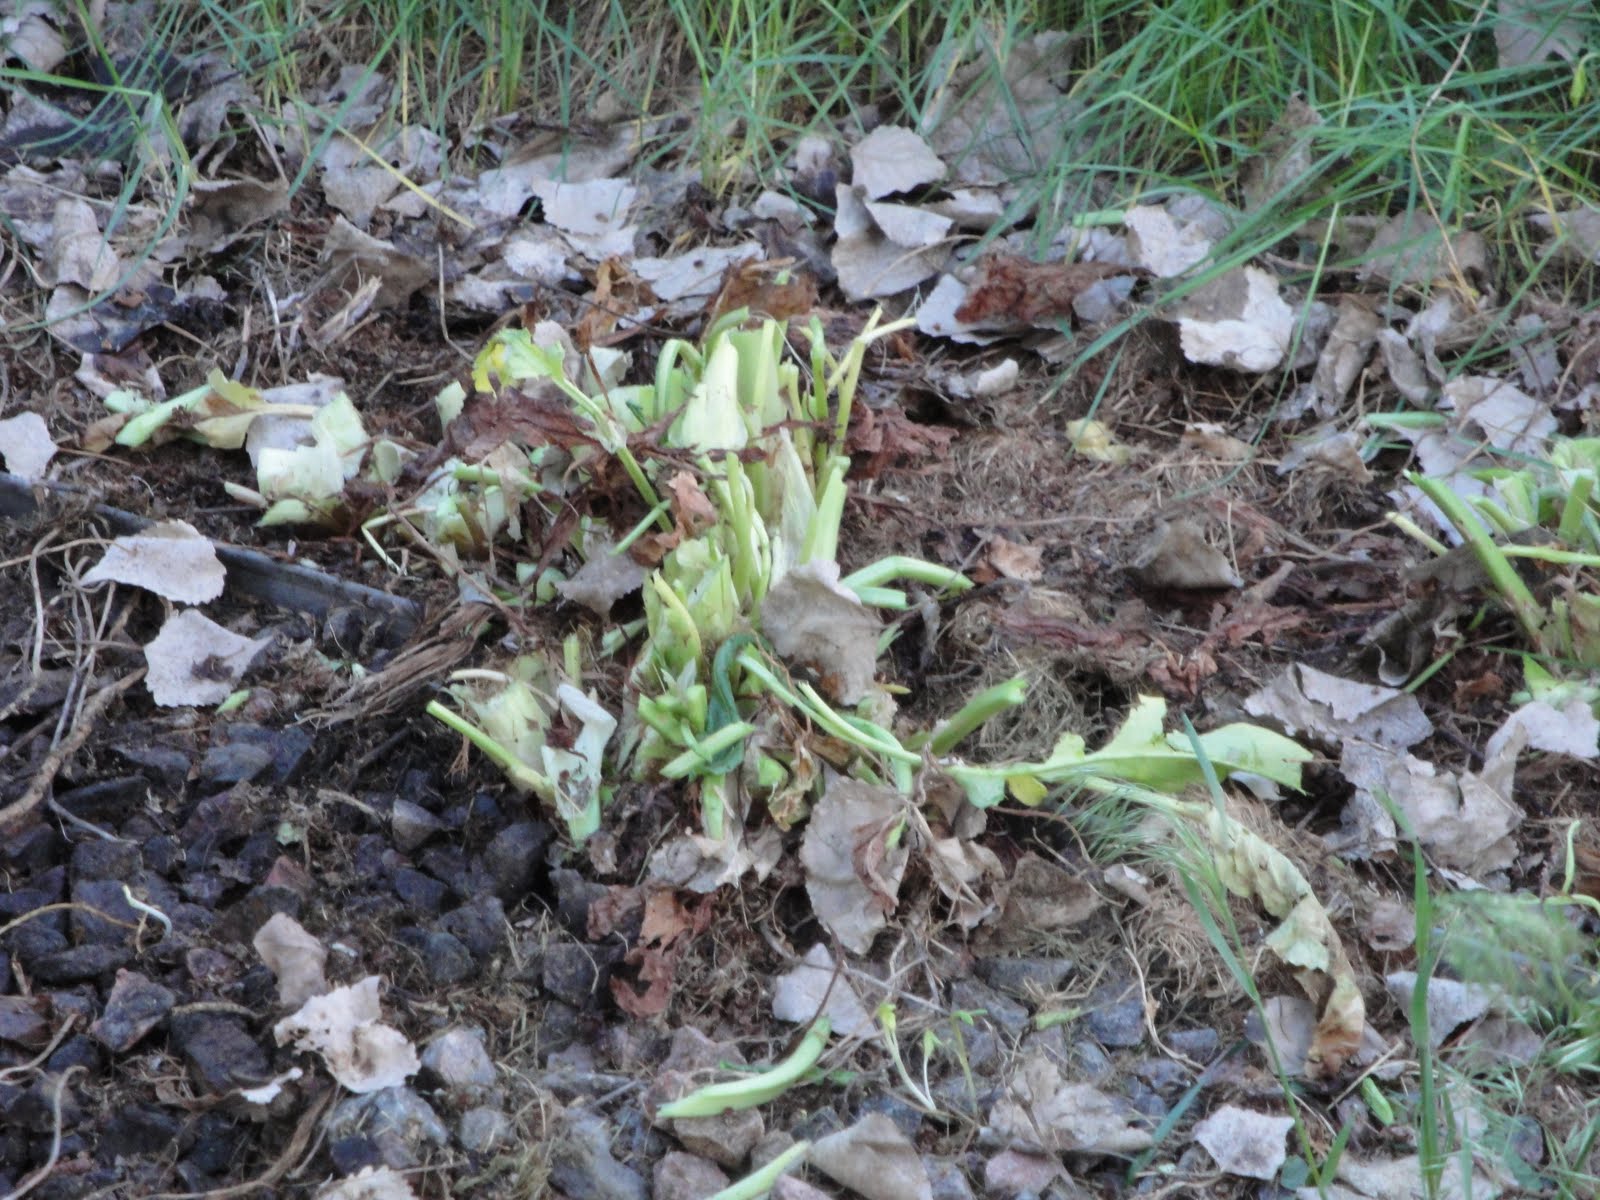
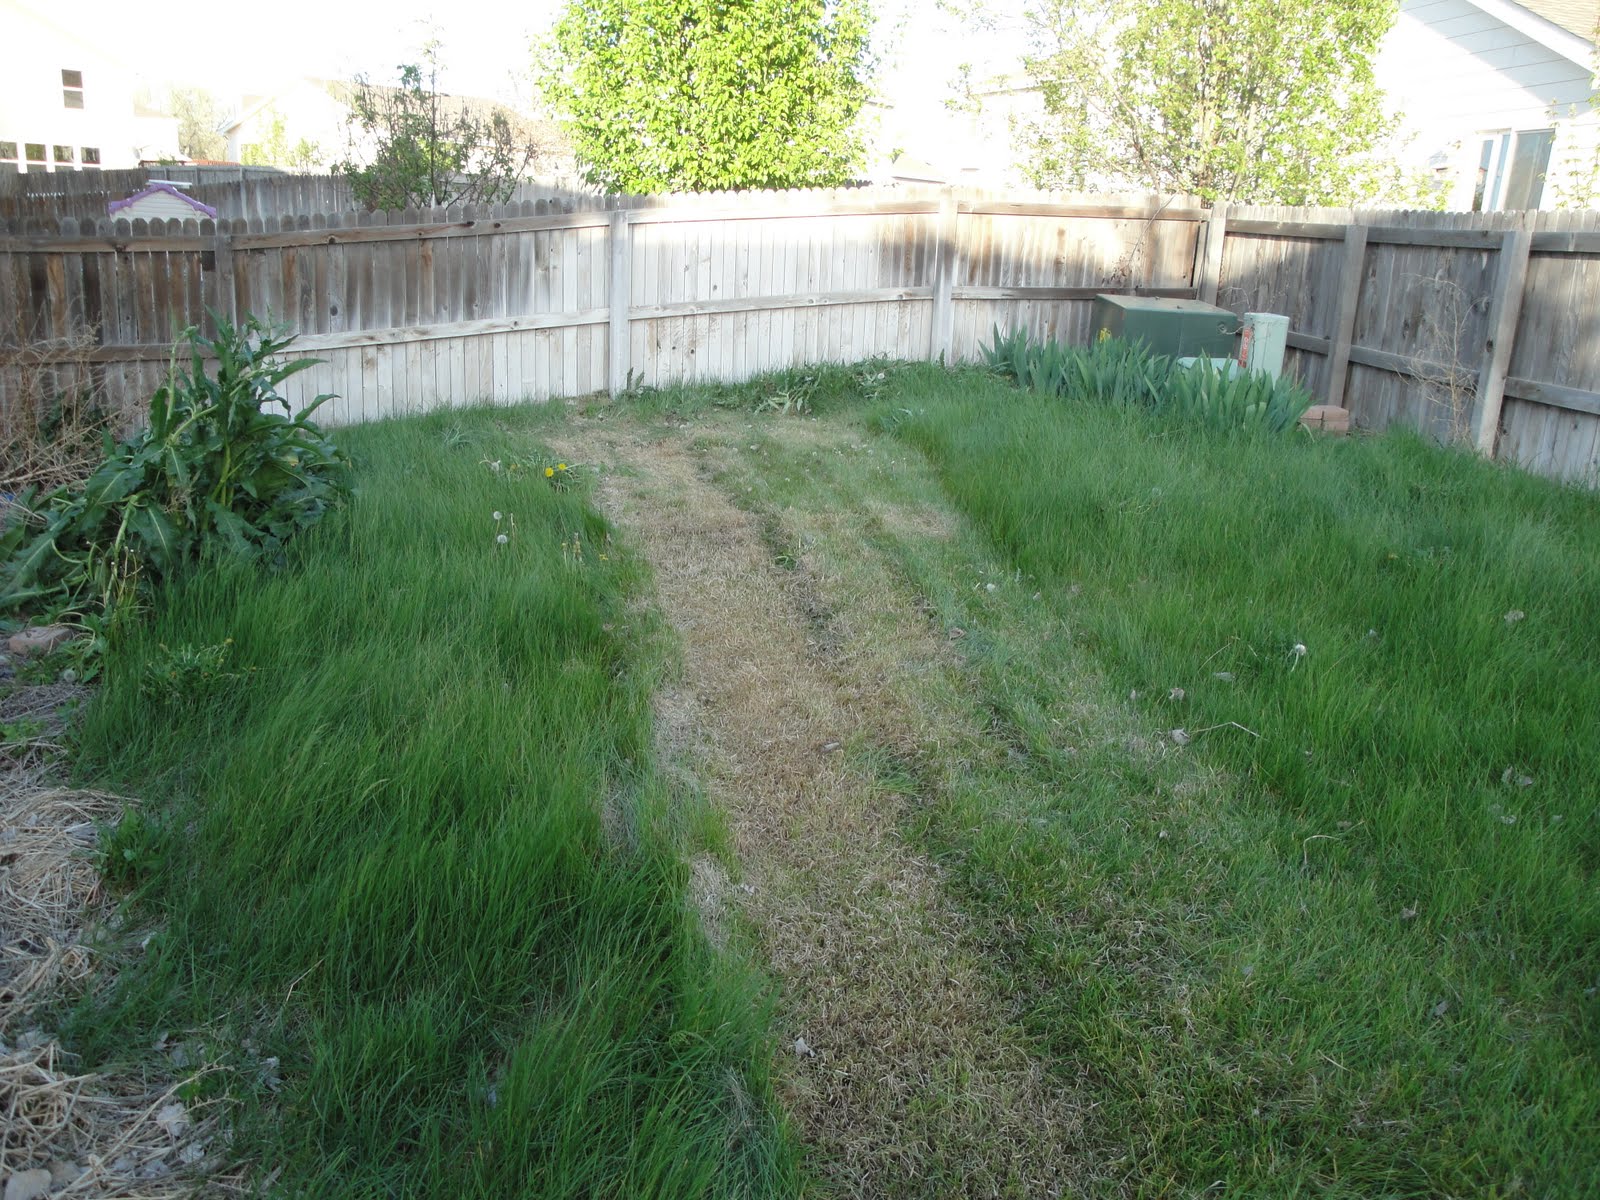
Yay, cut grass! This is where we stand right now in the back yard. I've pulled weeds and cut the grass in some areas, but it's a slow process. I'm trying to cut as much grass as I can to allow sun and water to get down to the ground so hopefully this stuff will all come back to life. It looks all the way dead here, but it is slowly coming back to life as I cut and water it. Once it's all weeded and cut, we'll be hitting it with some turf builder and some patch compound in the bare areas. We have some big plans for this yard, many of which are inspired by my older sister's yard (where we spent the day yesterday helping them unload and lay down 4 tons of rock).

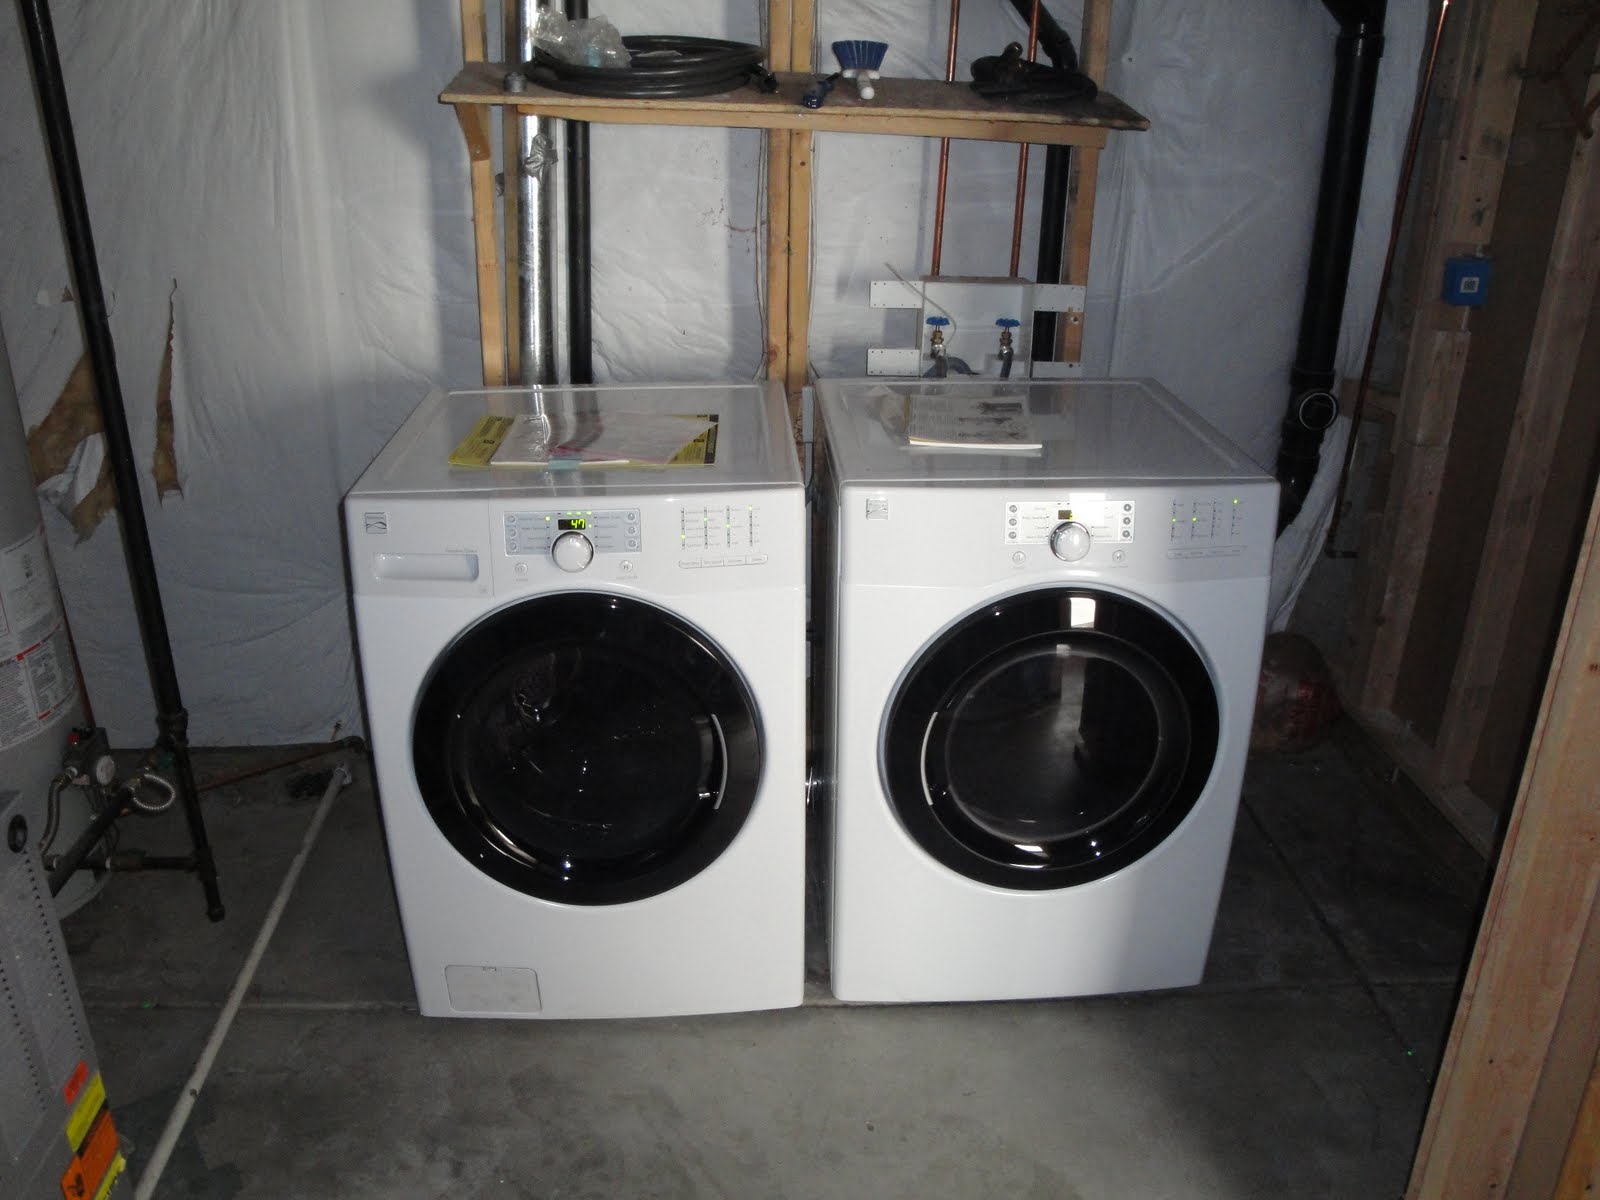
We also got some new appliances this weekend! The washer and dryer were delivered on Saturday morning. They're Kenmores and we're very pleased with them so far. They hold so much more than our old top-load washer did. They're also much quieter and a lot more water and energy efficient.

They're very pretty, but they need to be in a nice finished laundry room. That's on the list, but it's a ways down still. There are still a lot of things to finish upstairs before we get to worry about the basement.

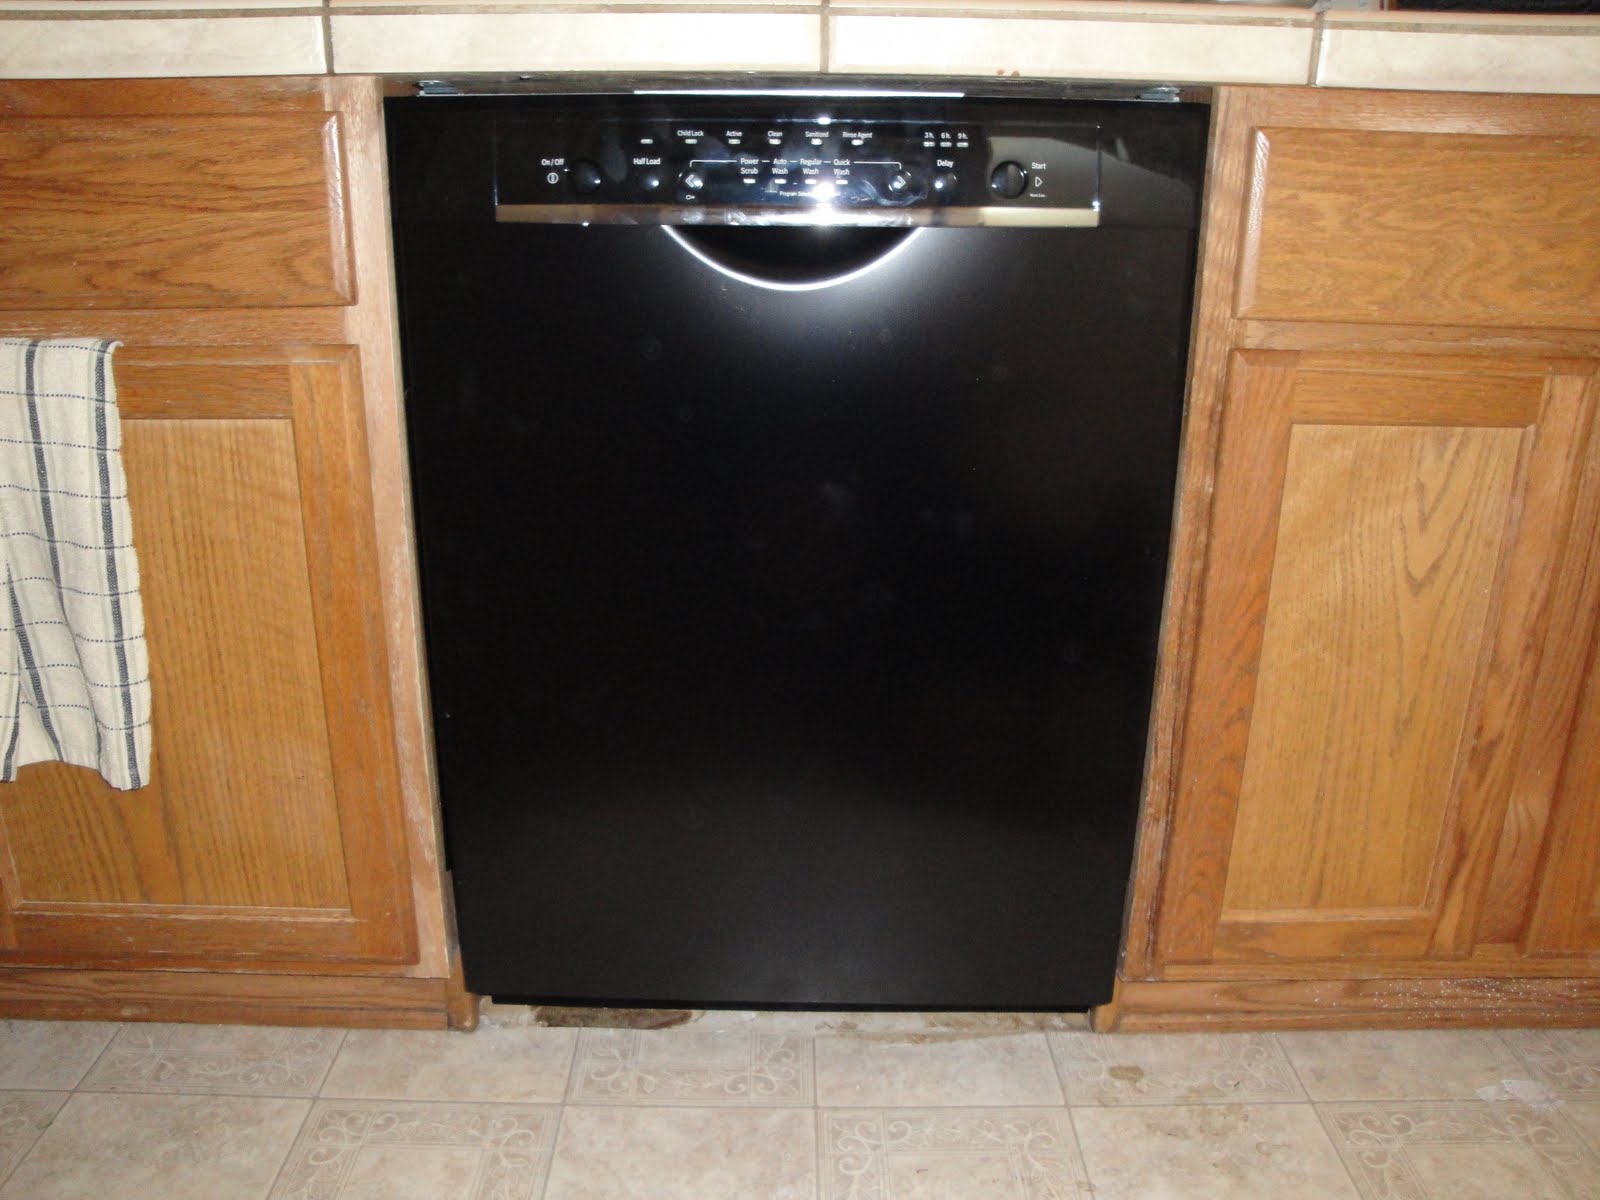
We also got another appliance on Saturday, but we went and got this one ourselves. It's a Bosch dishwasher. We went with Bosch because they have a good reputation, specifically for their noise level. We tend to pre-wash all of our dishes before they go in the dishwasher anyway, so Bosch's lack of a hard food disposer doesn't bother us a bit. The only complaints I was able to find on the reviews were centered around the Bosch not drying dishes very well. This is another thing we're used to dealing with. Bosch, as a rule, doesn't put heating elements in their dishwashers. People who are used to heat drying their dishes will be disappointed with Bosch, but people who air dry (like we have always done) won't notice a difference. Air drying takes less energy, and you also don't have a scalding hot heating element in the bottom of the dishwasher, which is very good for any plastic items you may put in your bottom rack.

We had dinner plans with some friends on Saturday, so I wanted to get the dishwasher to the house and installed as quickly as possible. That meant I got to do the transporting and installation myself. I don't really mind that, as I like to do things myself. Maybe you'd noticed.

Unfortunately, because of the time crunch, I didn't get to take as many pictures as I would've liked. I have quite a few pictures of the earlier parts of the process, but not many of any later parts. I'll show you what I do have at least.

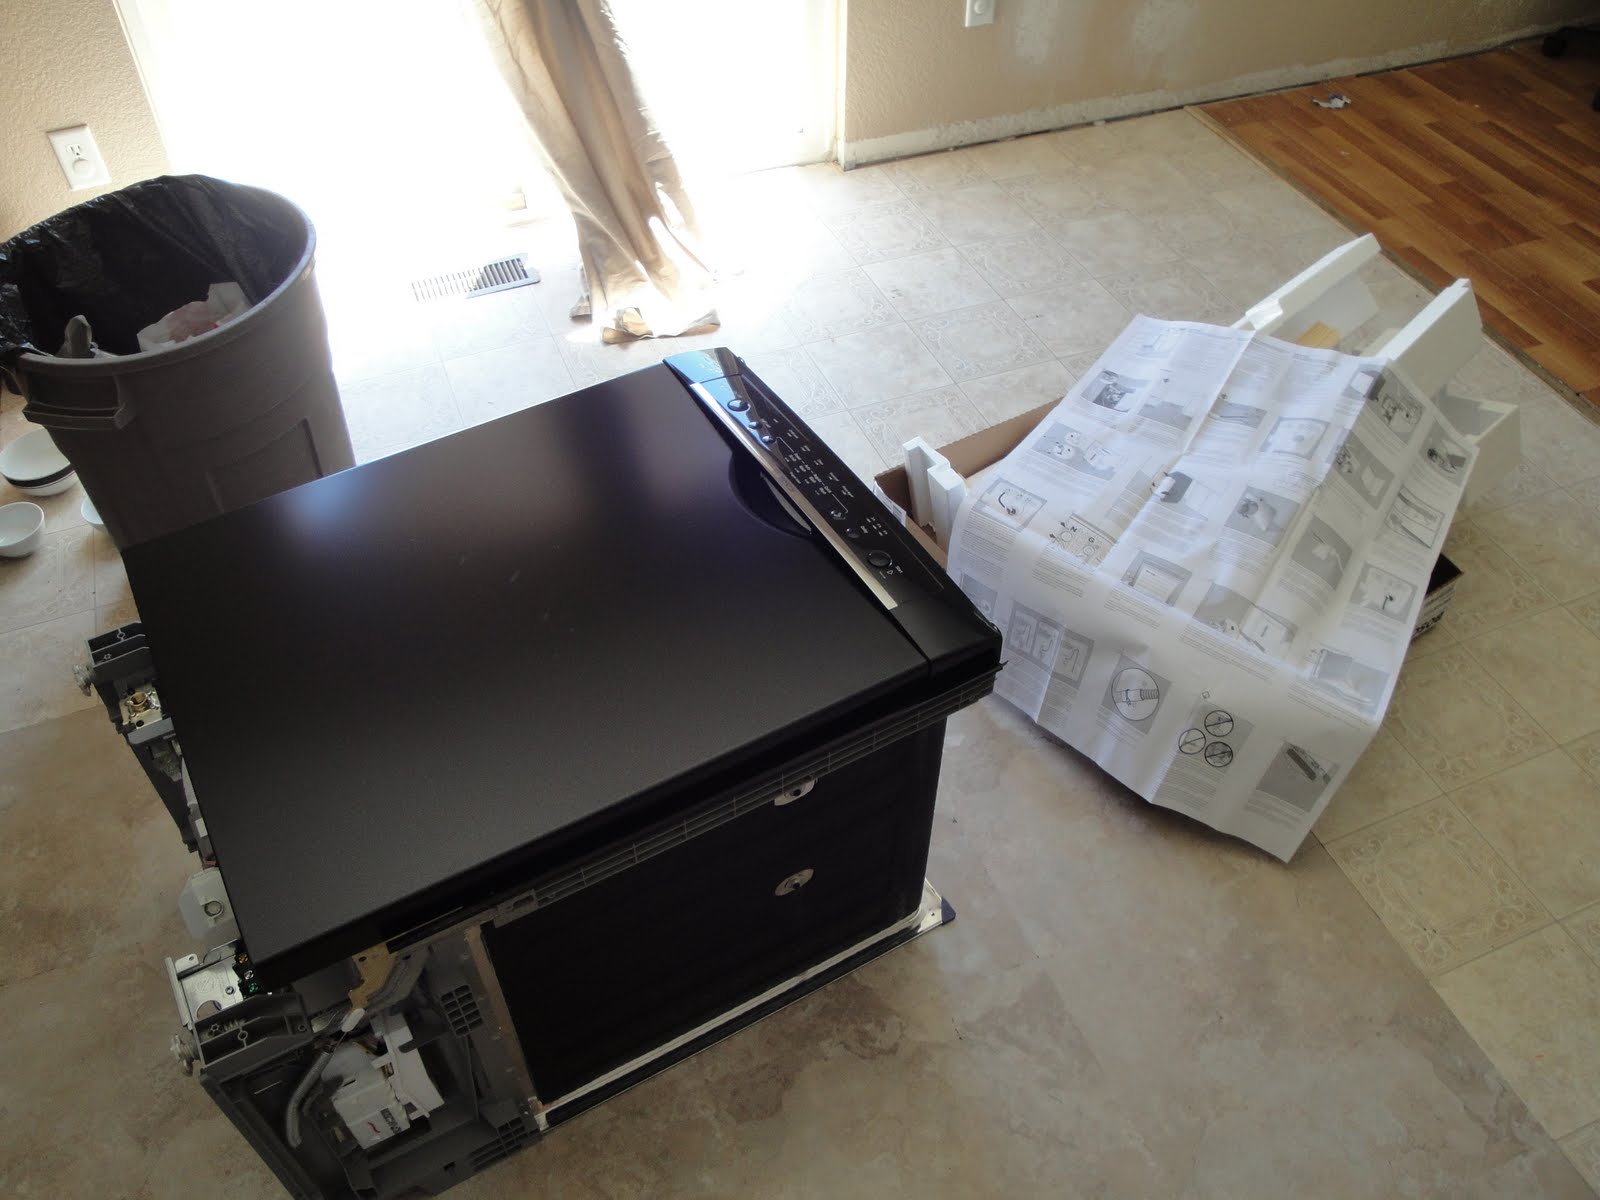
Here she is. She's very pretty.

This is where the magic happens. The brass ring on the left is where the hot water supply line goes in, and the metal panel on the right is where the power cord gets attached. Keep in mind, if you're going to be installing a dishwasher yourself, that the hot water supply line and the power cord are generally sold separately. The power cord is sort of weird. Apparently dishwashers don't come with power cords. Weird, right? I think it's sort of like other appliances (ranges and dryers specifically) where they aren't sure what kind of connection you'll have. As near as I can tell, dishwashers used to be hardwired into the house. They didn't plug into a receptacle, the wire just came right out of the wall. Kinda weird. This means that you'll need to wire the plug in yourself. Our dishwasher came with the drain tube at least, so we didn't need to get that. I think that most would come with that, since the drain outlet isn't a standard size or anything. So, without further ado, here's what little of the process I managed to photograph.

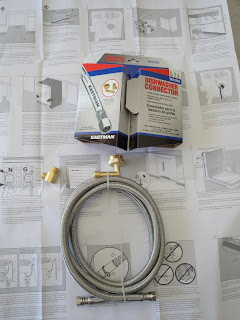
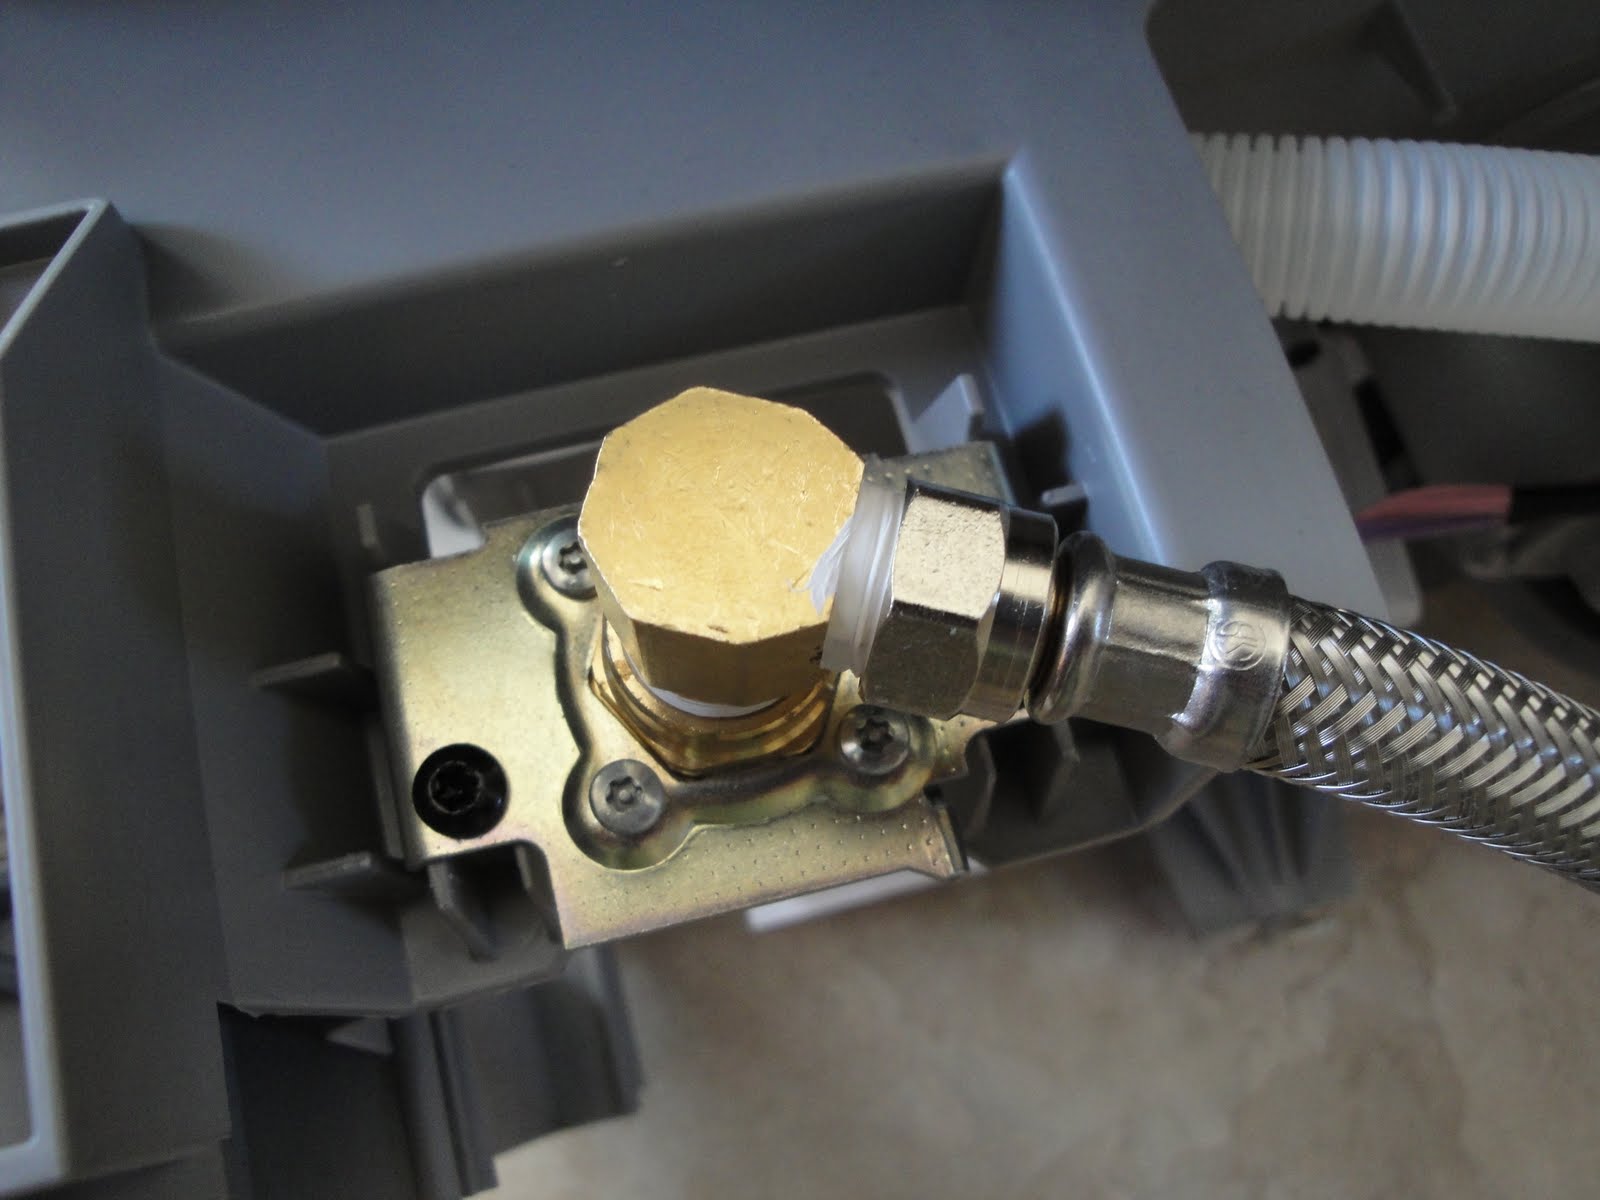
This is the water supply line. It comes with brass 90ยบ connectors that attach to the two most common types of dishwasher supply hose inlets. We used the smaller one, with a hefty bit of teflon tape on both ends. I've started using the tape on all of my joints, just to keep everything nice and tight and leak-free.

Tighten these down by hand, and maybe a little extra on the hose itself. The instructions are pretty clear on not over-tightening. I got the 8-foot hose for this one, per the suggestion of the lady at Lowe's. This inlet is on the front of the machine and you don't want to come up short with it. I ended up with some extra hose, but that's better than the alternative. I just coiled it up a bit under the sink and it's fine now.

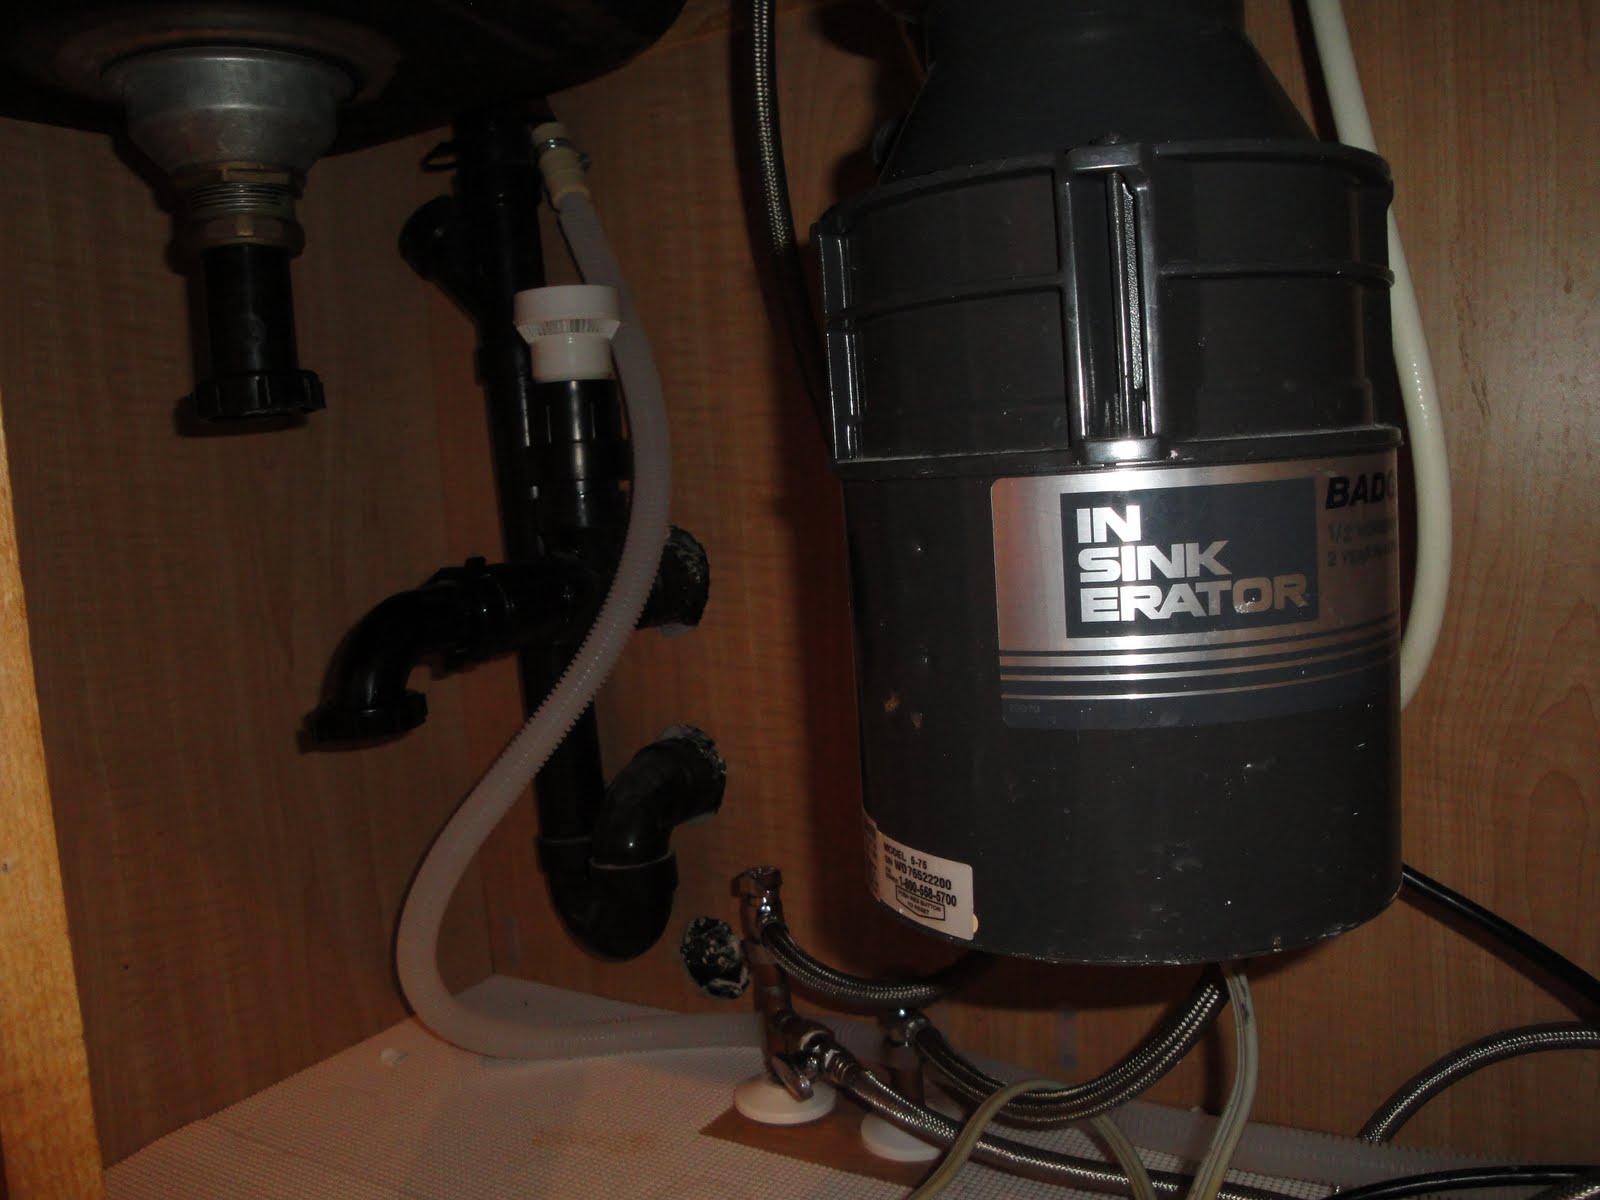
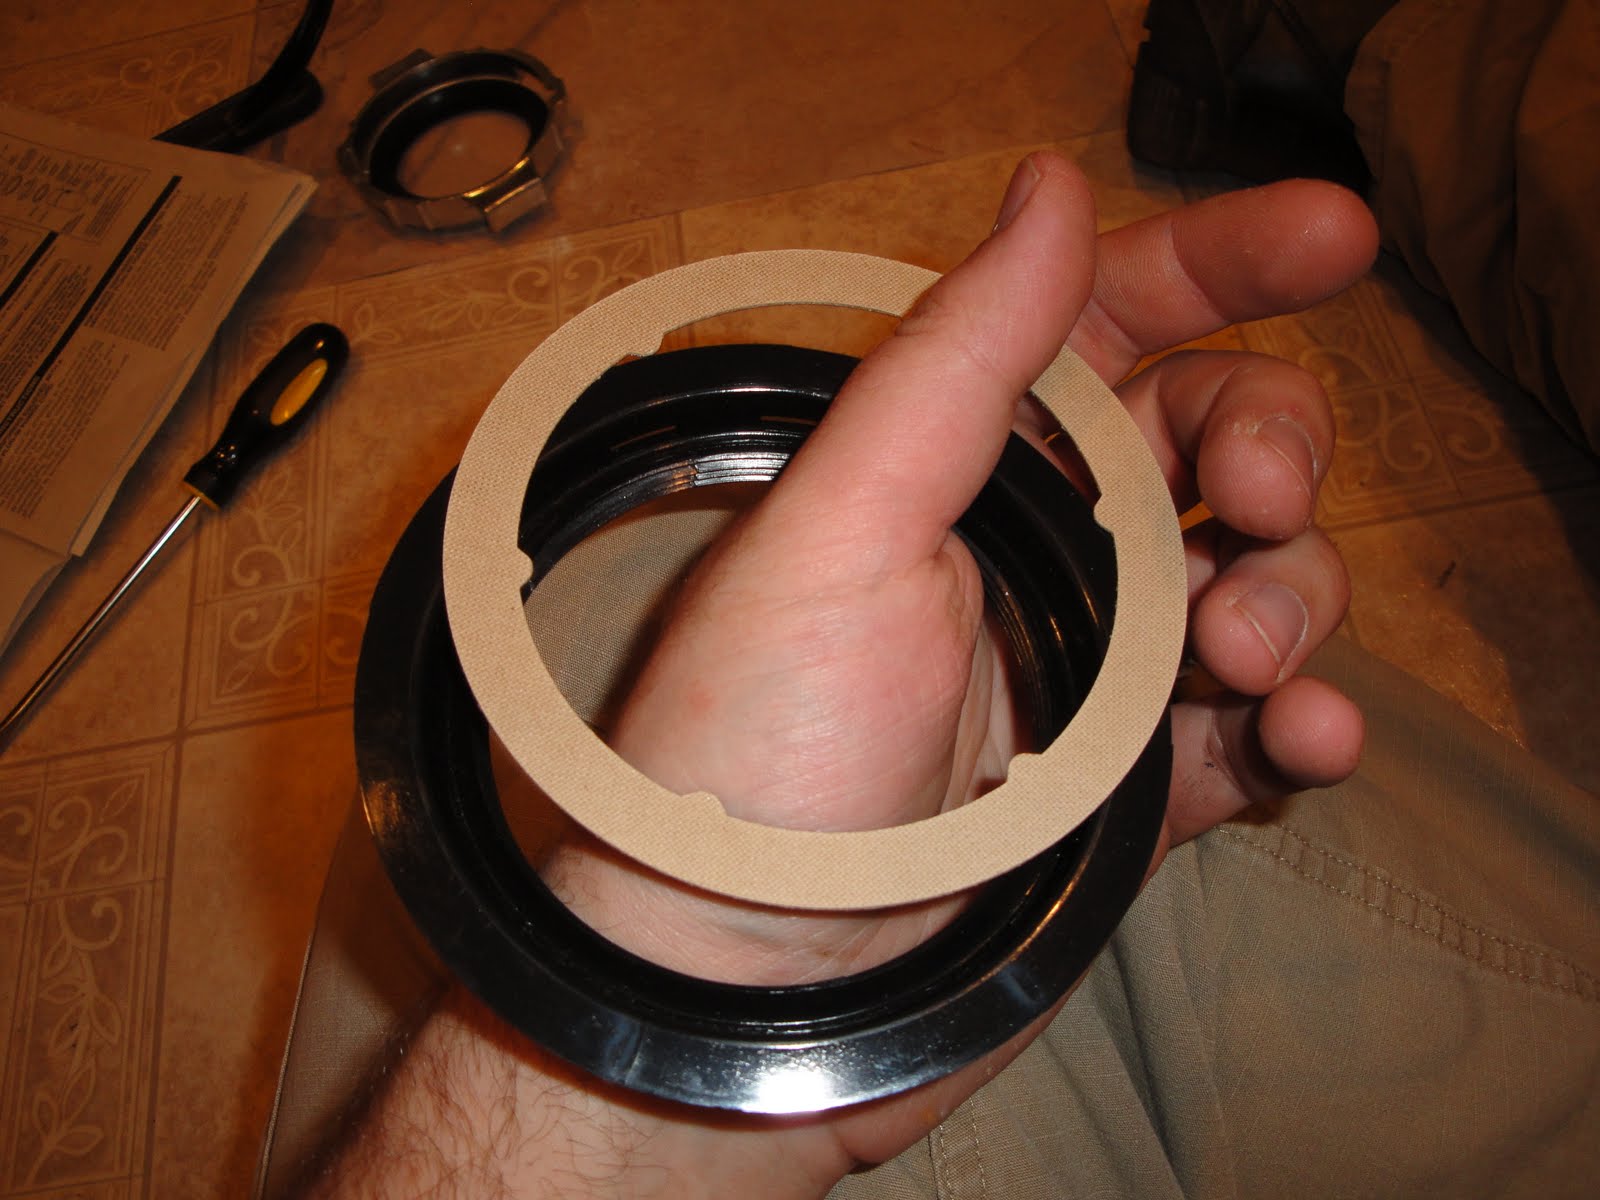
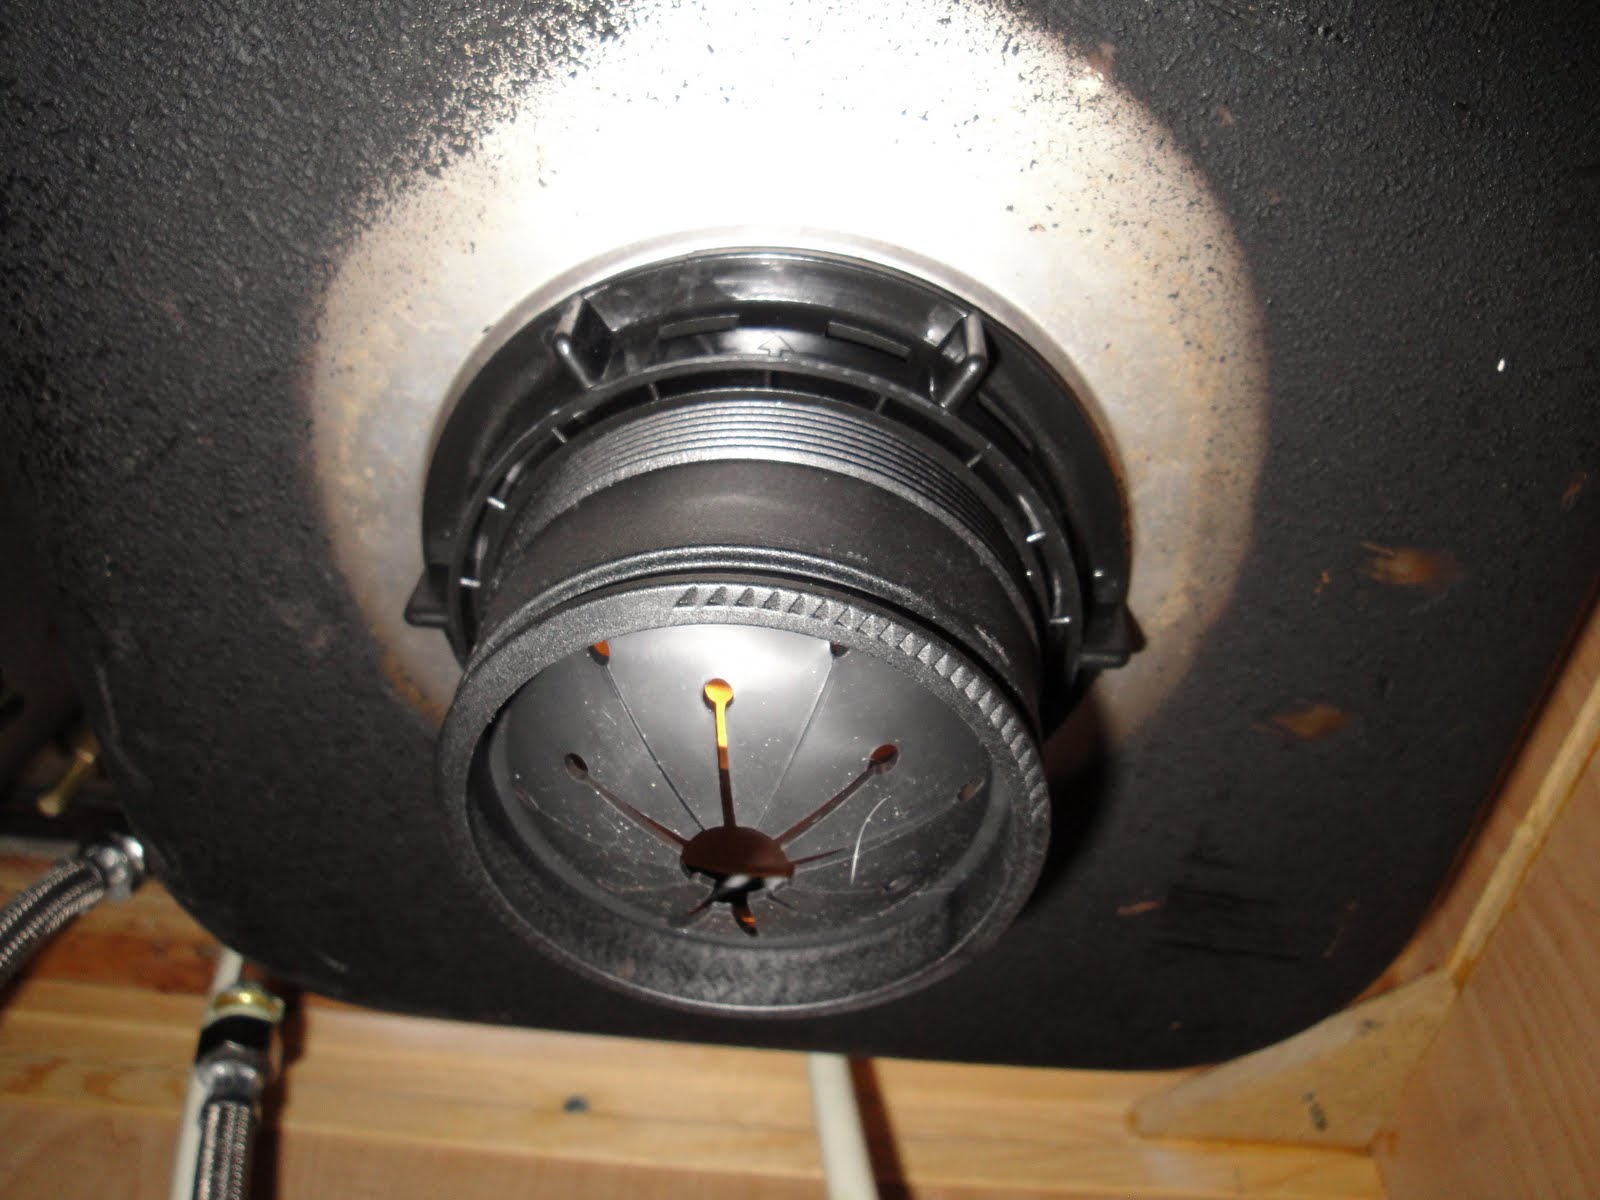
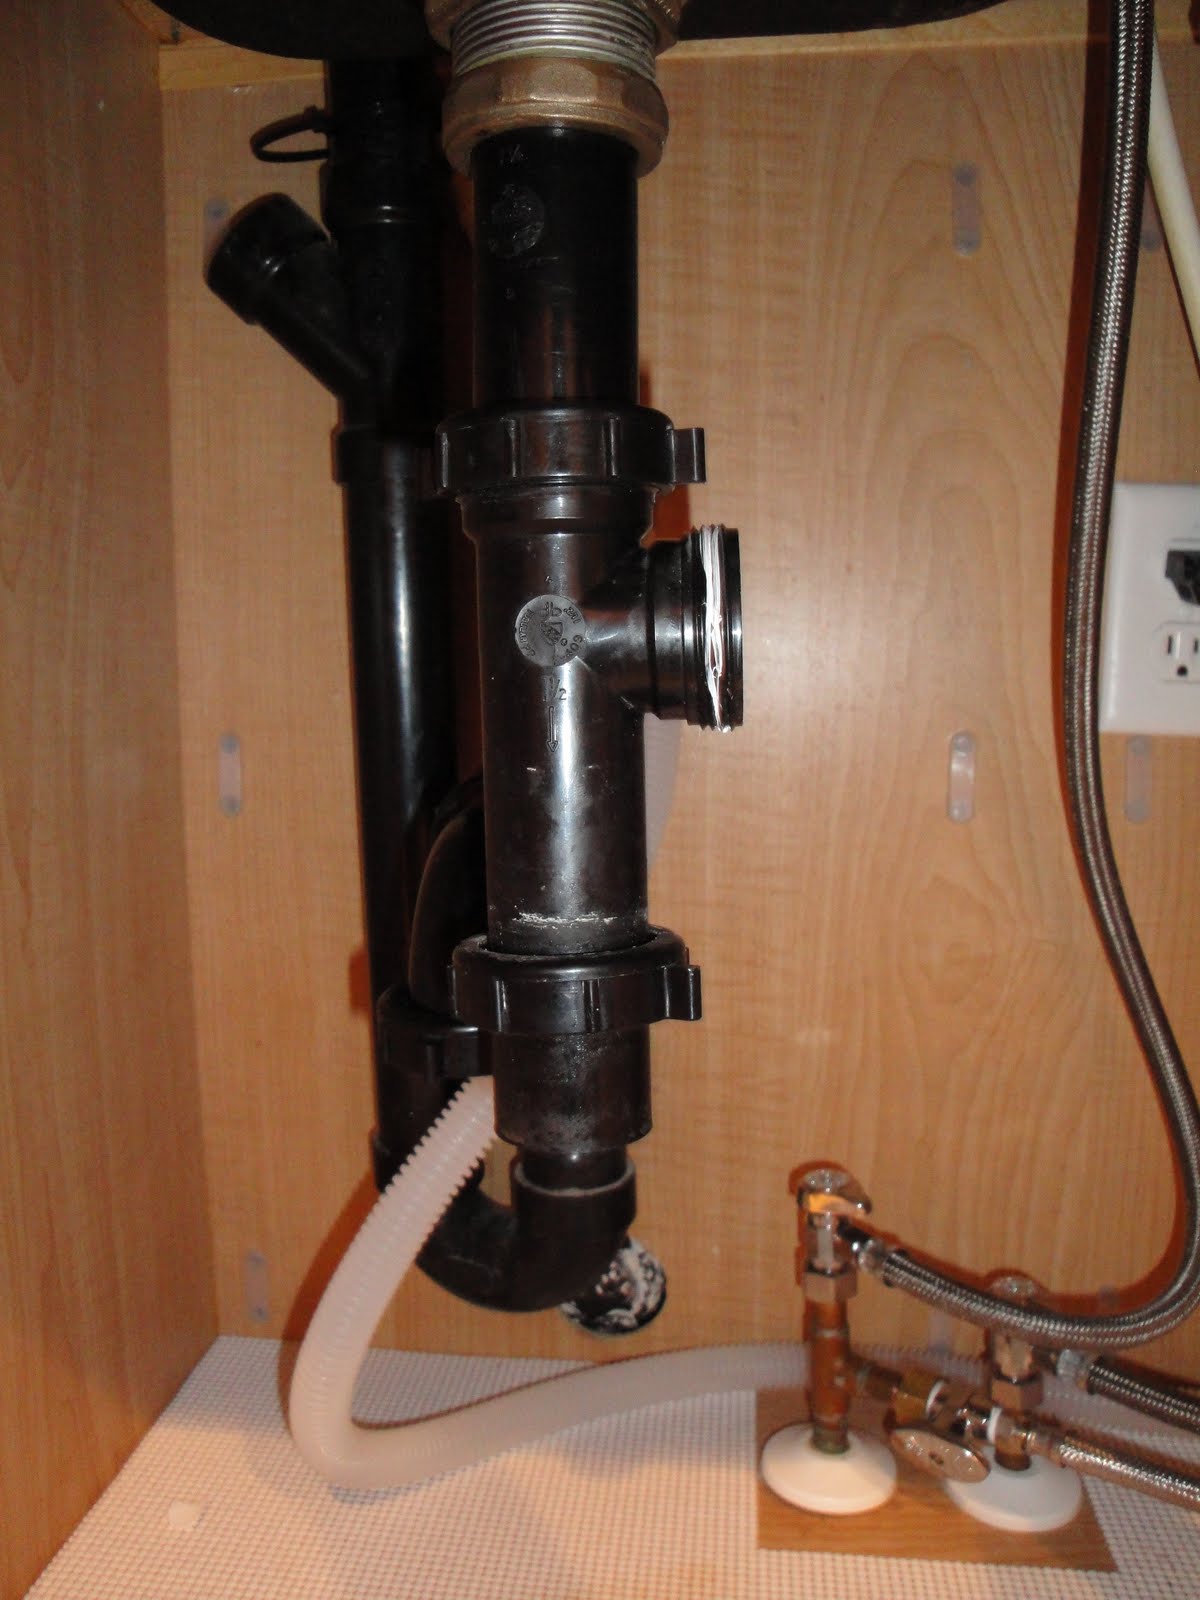
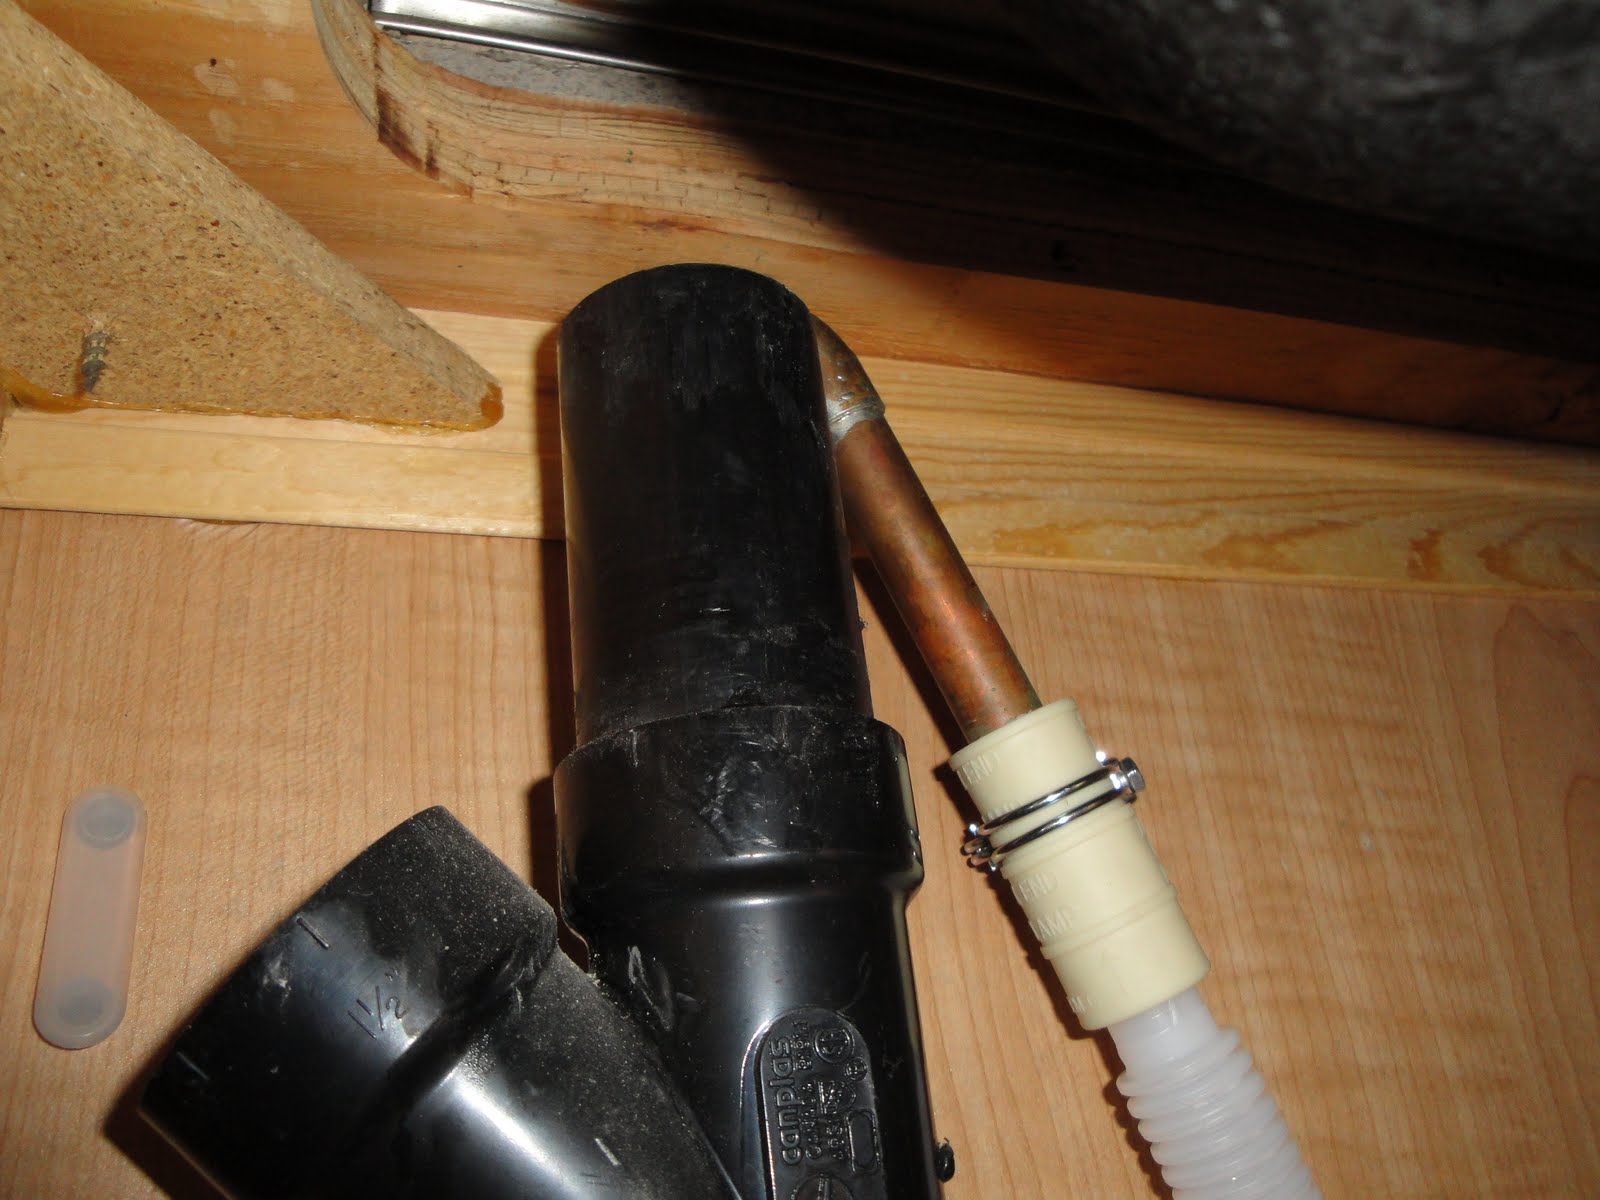
This is the drain hose that came with the dishwasher. It's plenty long enough to get to the drain pipe, especially once the dishwasher is pushed all the way in. I was a bit worried about it at first, since our drain pipe is on the far side of the sink from the dishwasher, but it worked out just fine.


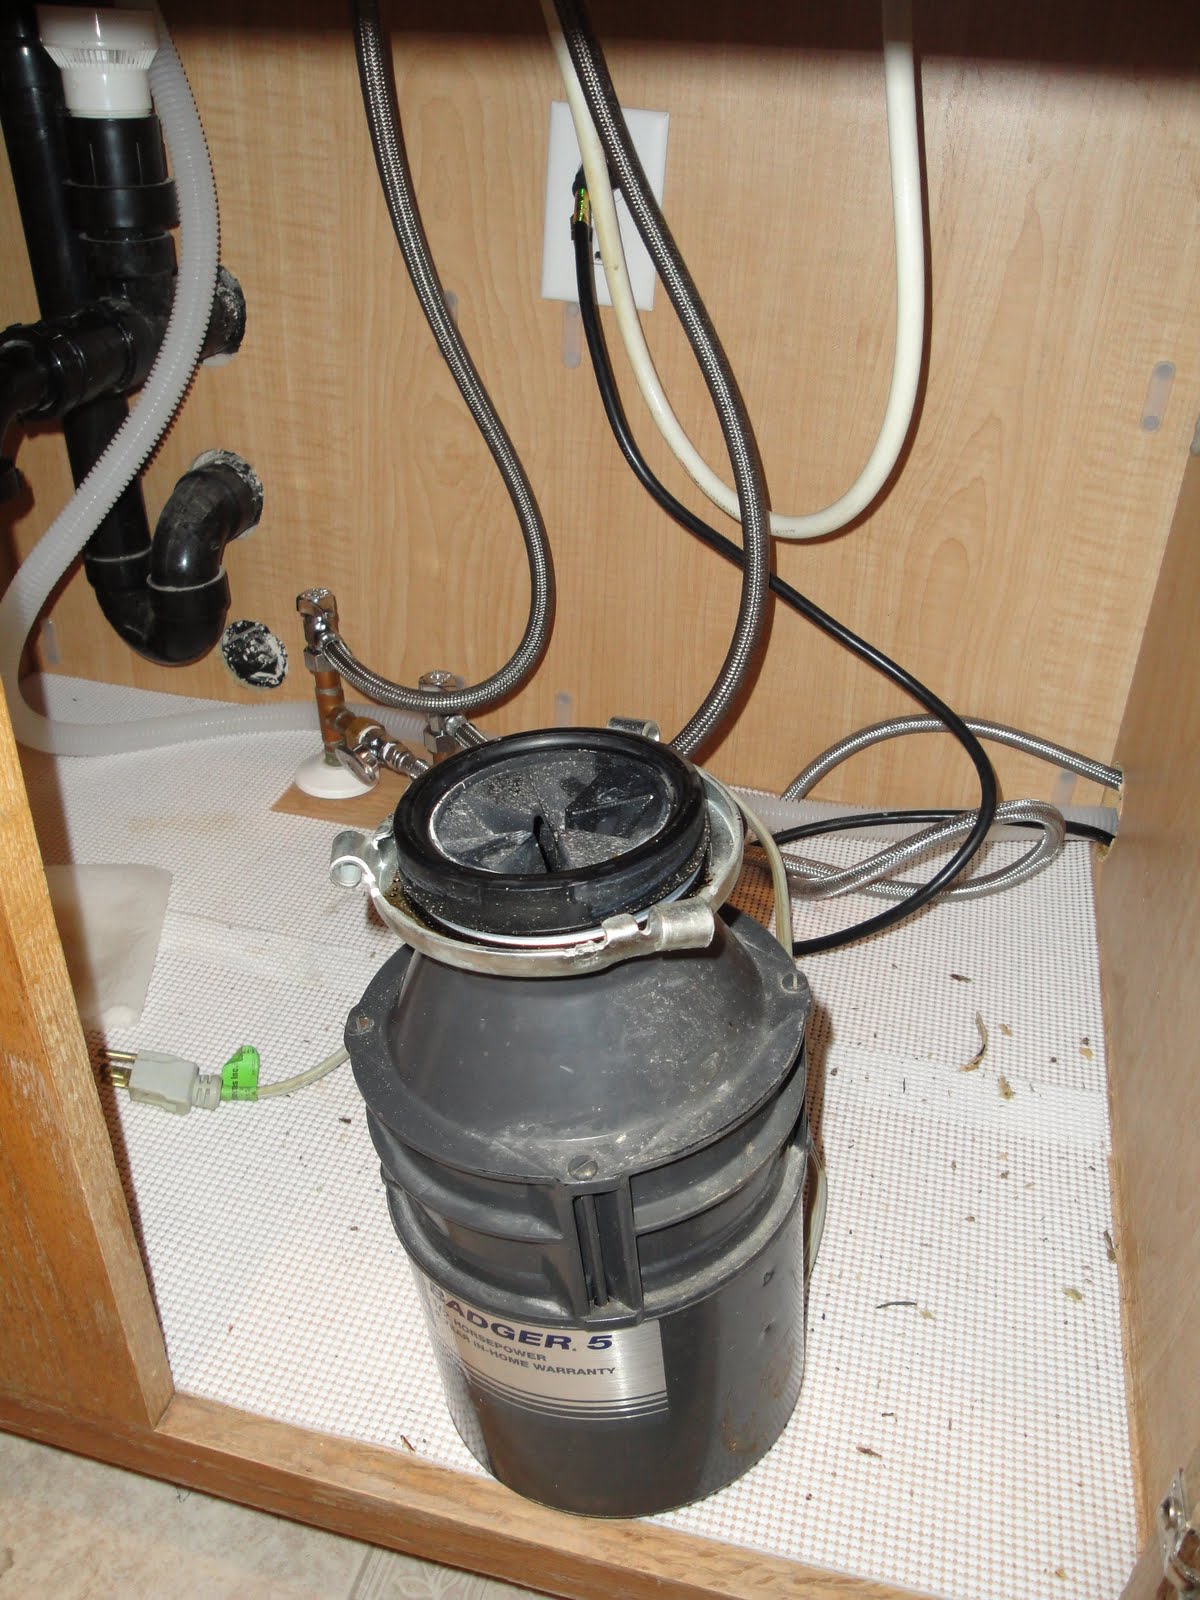
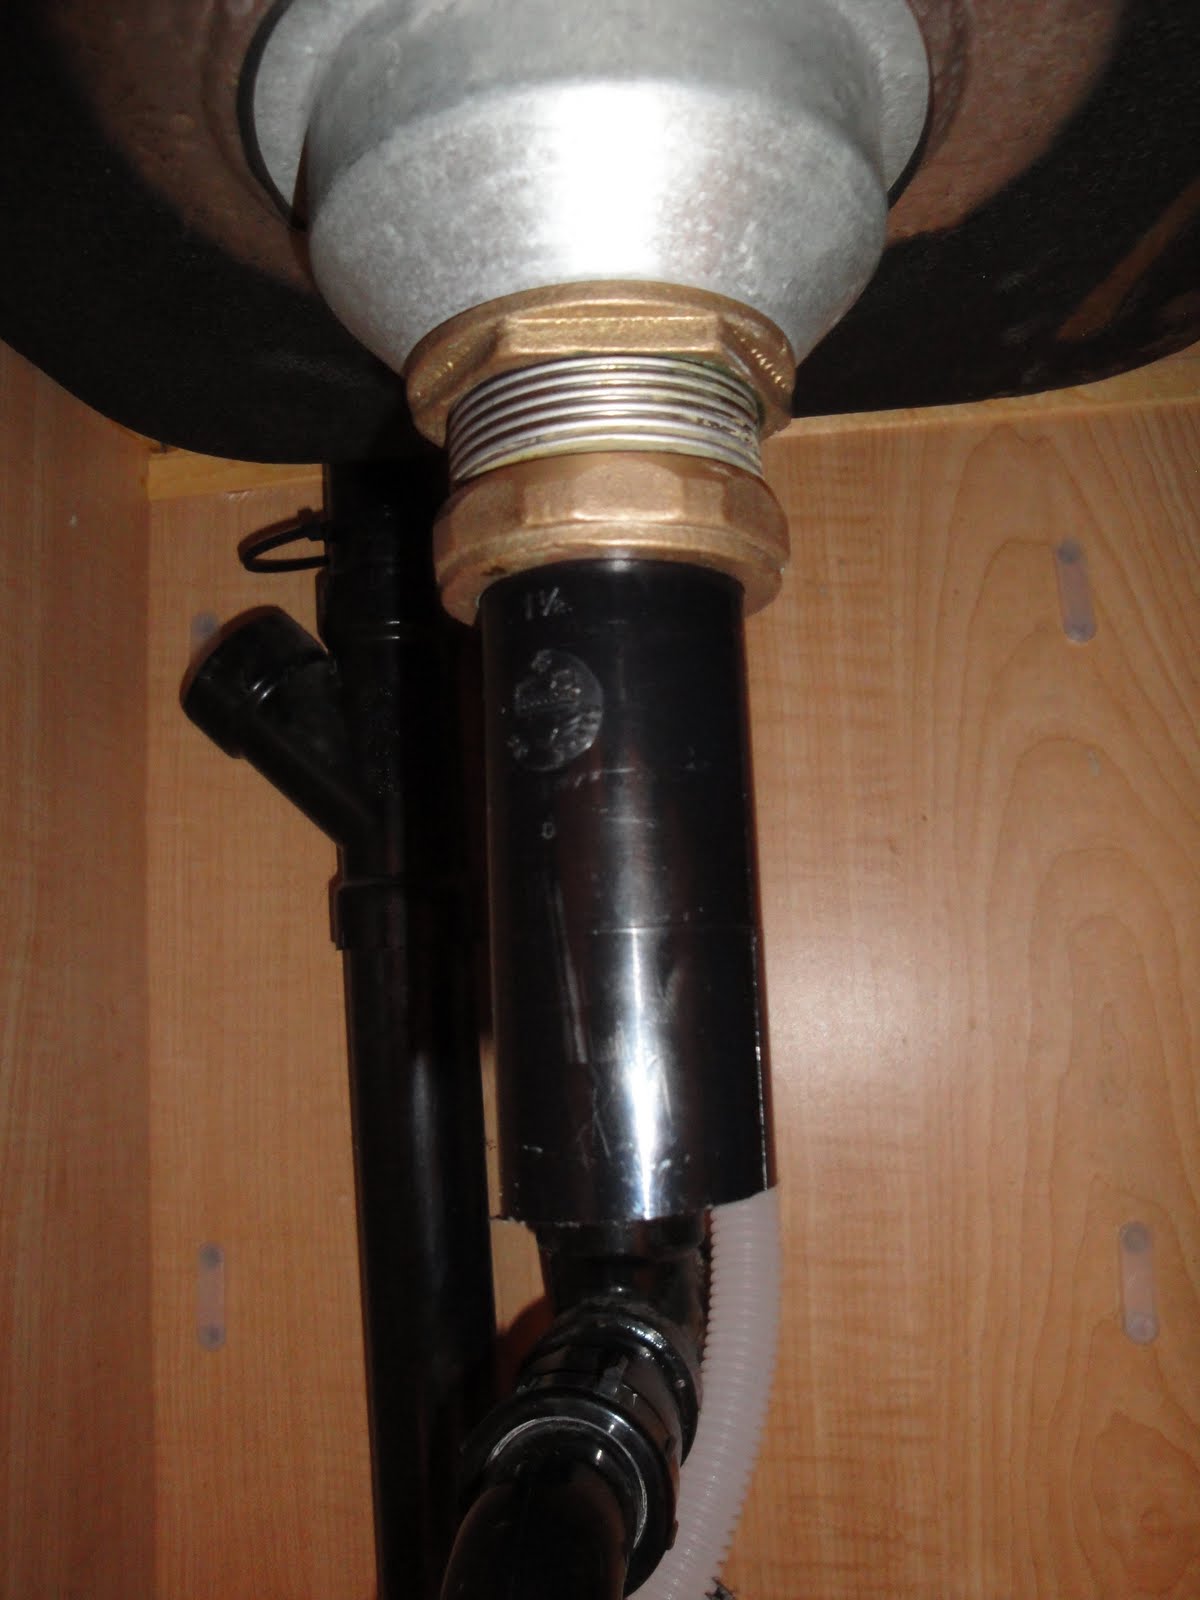
There are a few different configurations for the drain pipe, as near as I can tell. We have an open drain pipe where you can hook this copper pipe so the water will drain down, or you can hook the drain tube directly to the plumbing via the garbage disposal or another connector. When we get a new garbage disposal, I may move this over to it and cap off the other drain pipe. We'll just have to see what makes sense at that point. For this setup, push the hose onto the long end of the pipe and use a hoseclamp to tighten it down.

This one came with the dishwasher, but you can buy them separately if you want.

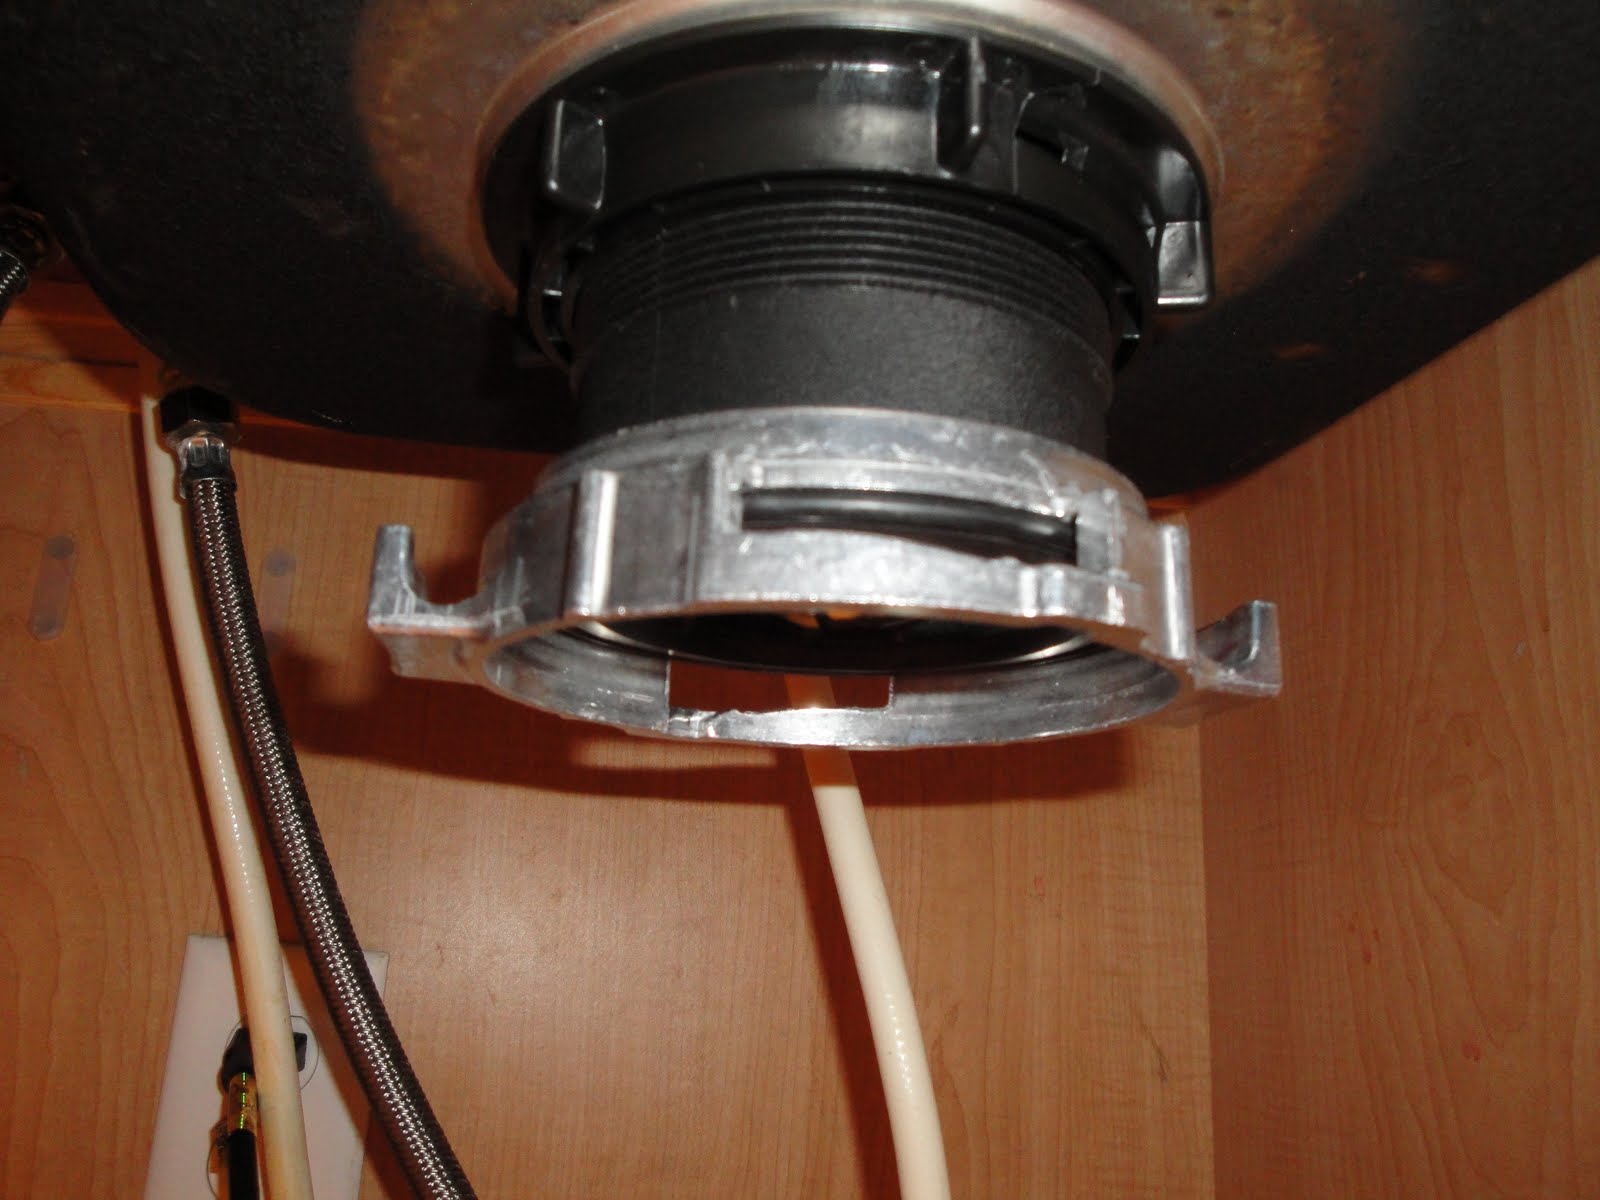
There we are. Just hooked up and over there. It really just seems a little loosey-goosey to me. I put a nylon zip-tie on there just to hold it together a bit better, but I'm still not very excited about this style of connection.

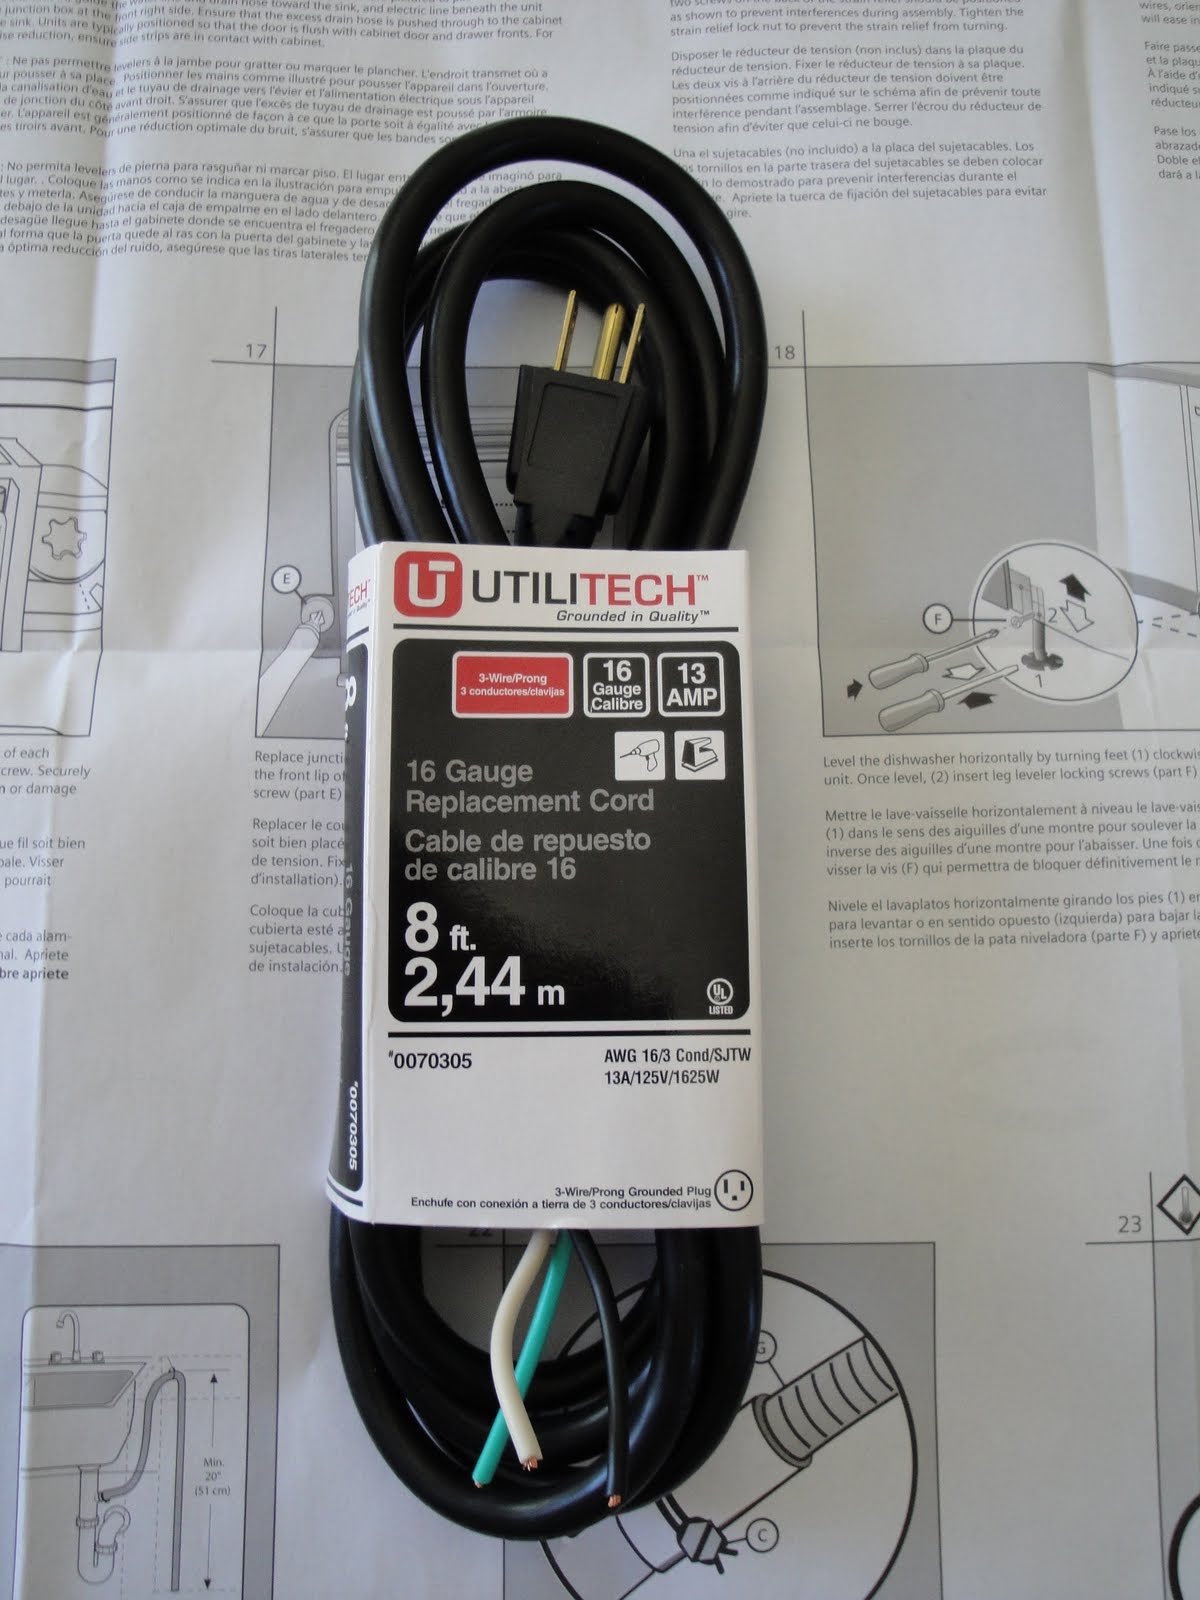
Now for the power cord.

You want to make sure you get one long enough (8 feet is generally going to be fine unless you have a really long way to go) and to get one that's grounded. Three wires is what you're looking for, here.

Unfortunately, I didn't get much else going here for pictures. I'll have to kind of rough-in the rest with a few before shots and some text.

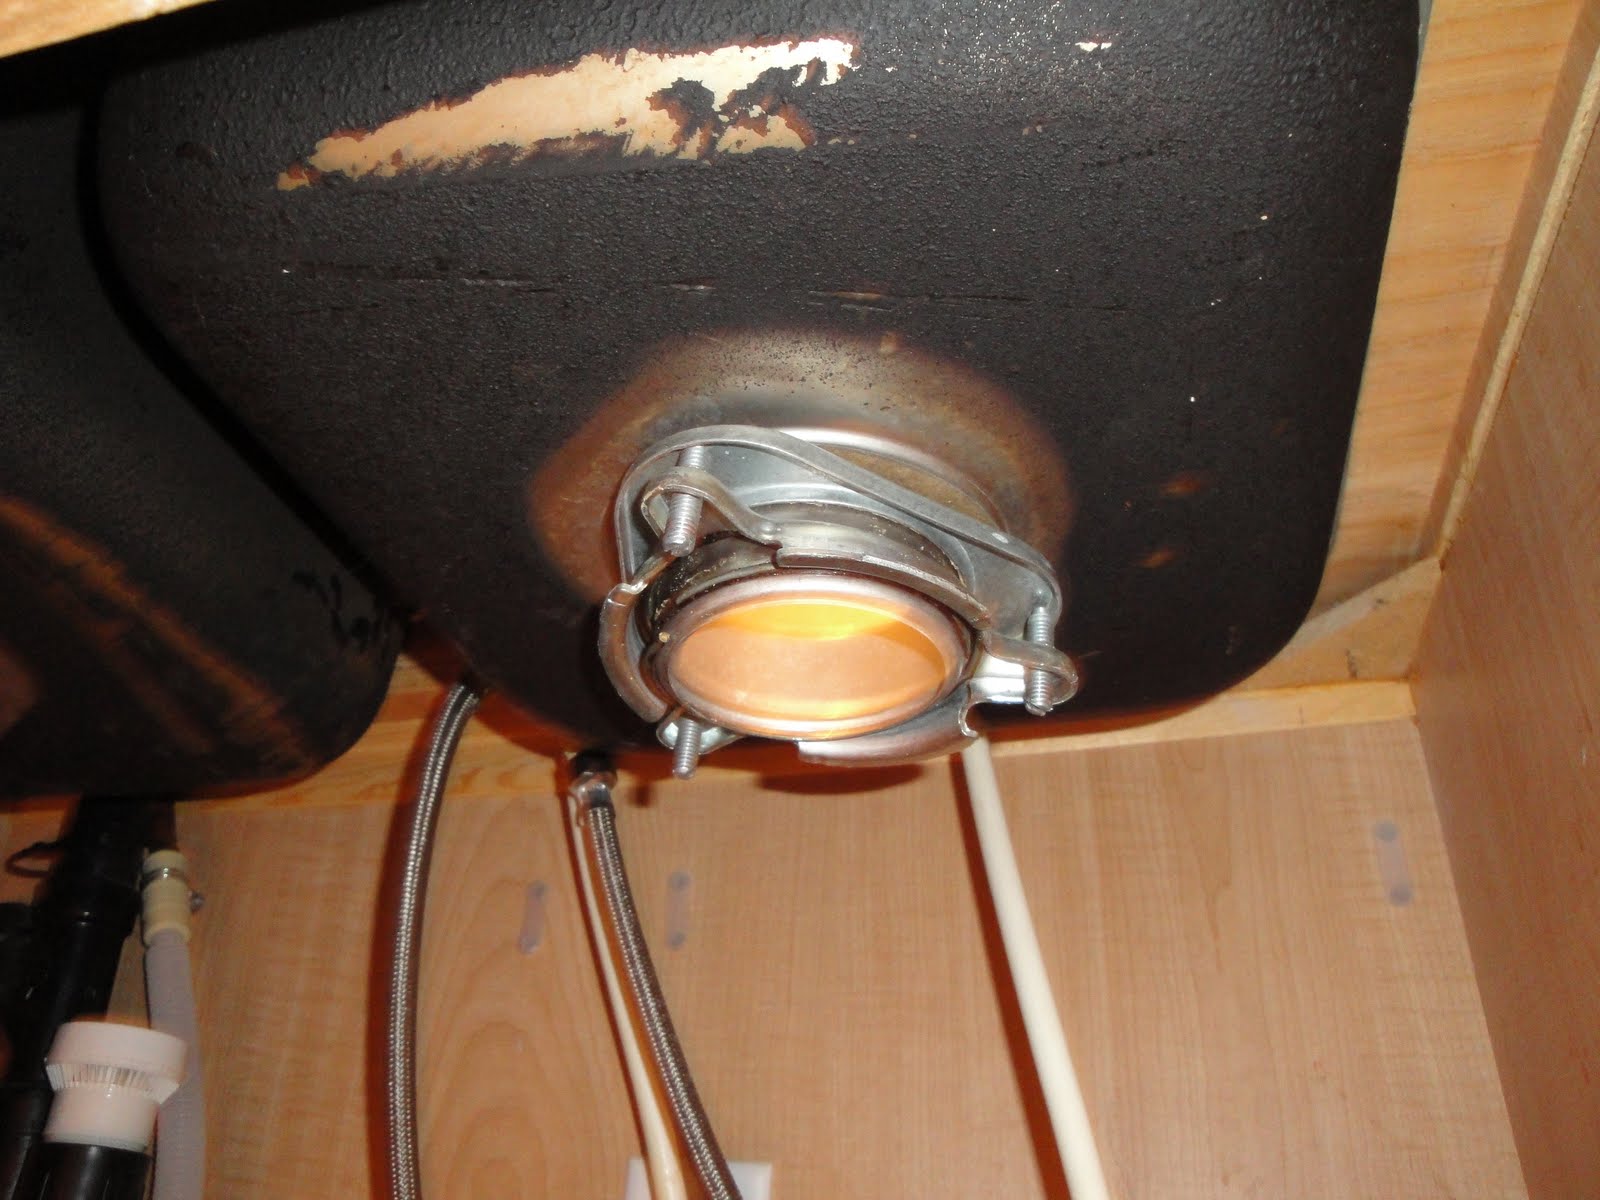
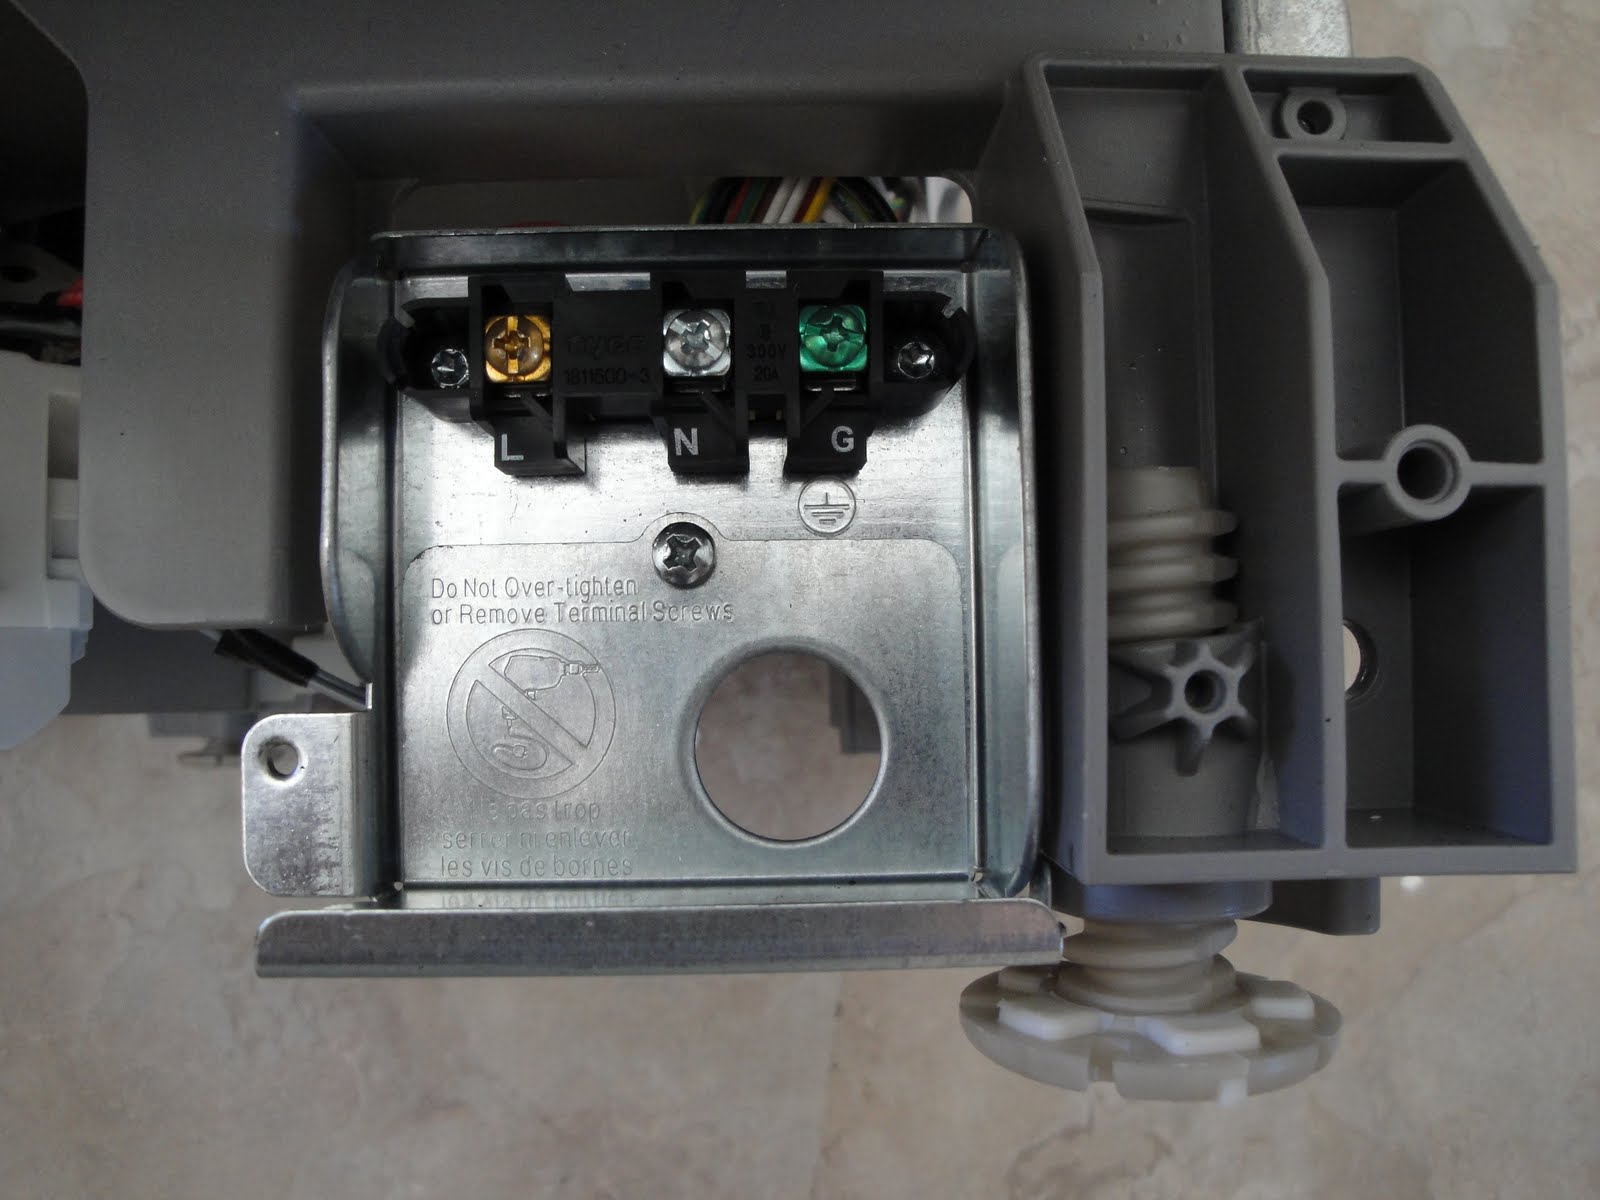
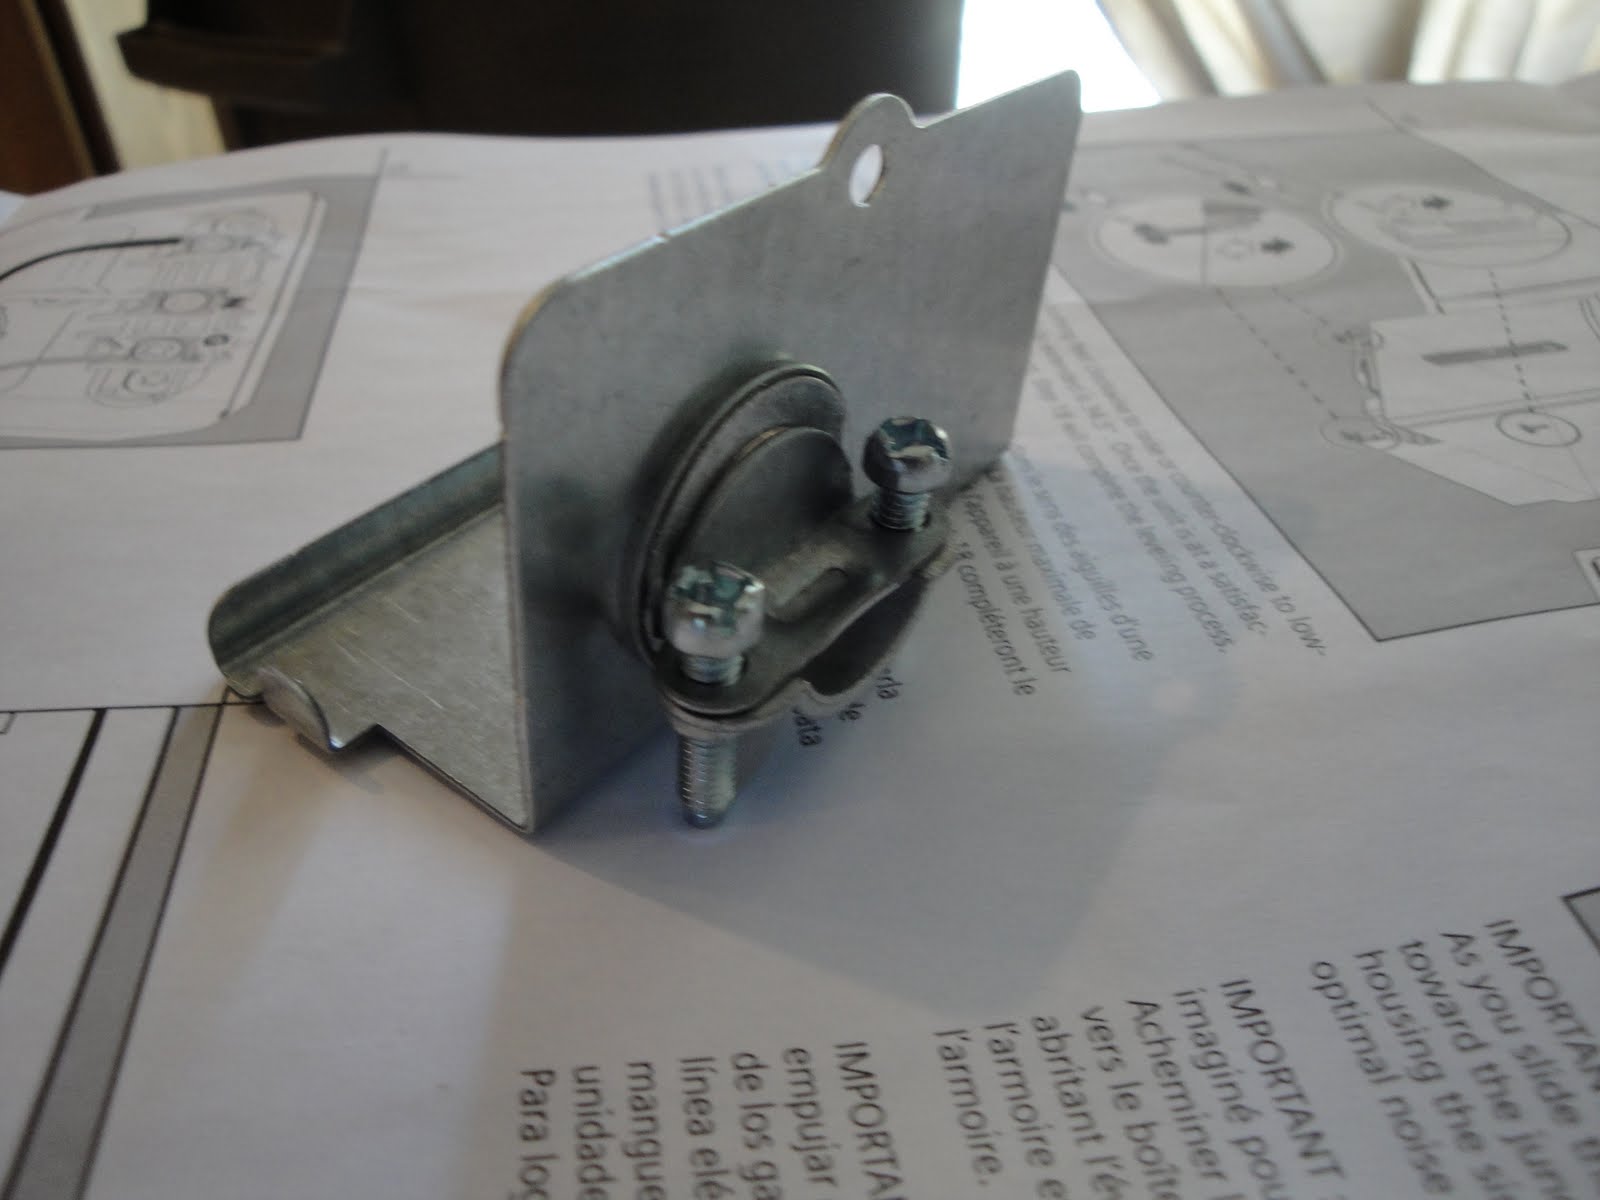
This is the electrical connection plate. The hole down on the bottom is where the wire comes through. There's a weird little connector thingy that clamps down on the wire to keep it from moving around. Here it is:

And the business end of it:

I don't know the technical term for this piece, but it's in the electrical aisle of your hardware store, near the conduit and everything. It's a tension-reducer so pulling on the cord of your dishwasher won't cause your cord to pull out of the connectors. Here's how it looks in practice:

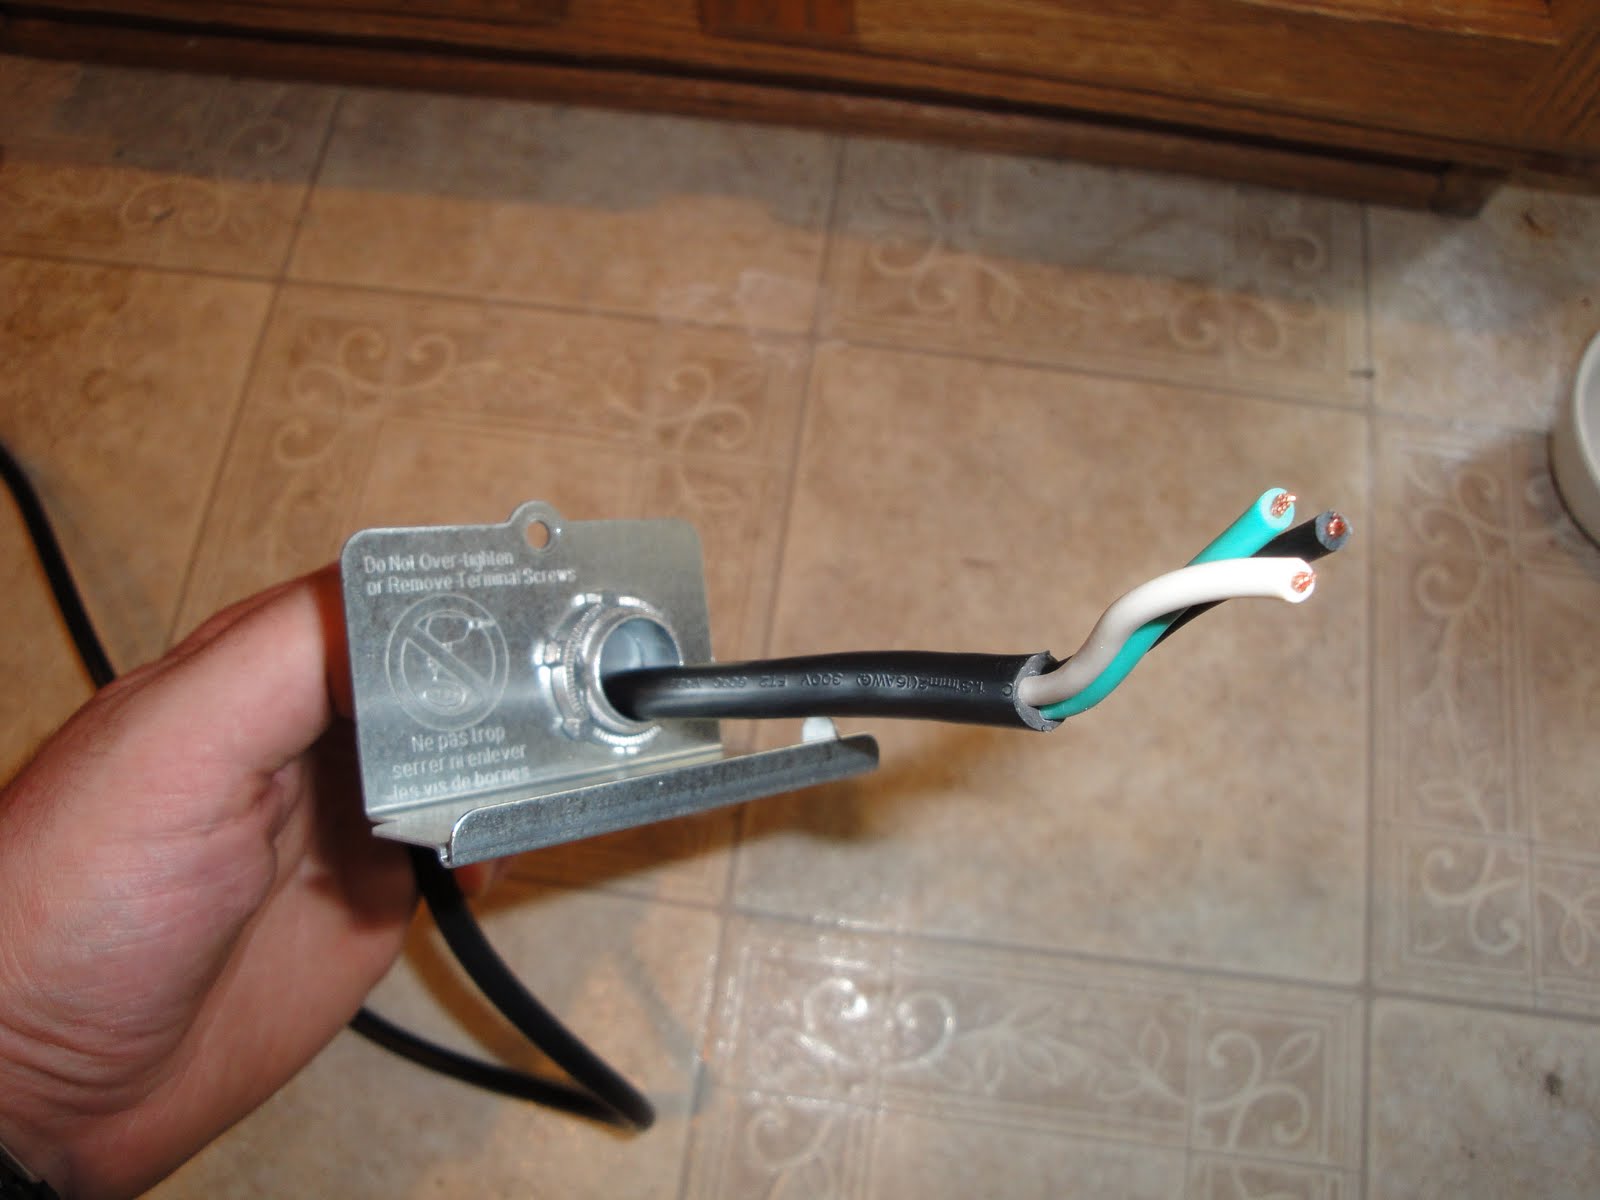
The screws clamp down on the cord pretty tightly, and it really doesn't move at all after that. The connector itself has a screw-on bit that comes off so you can put the threaded bit through the hole and then screw it on again to hold it in place. It's pretty simple and super cheap.

Ready for power! Unfortunately, this is the last picture I took. The rest is pretty straightforward, though. I changed the valve under the sink for a new 1/4-turn valve and that was a big pain. The compression fitting on there had bonded the brass ring to the copper pipe so I couldn't get it off. I ended up just using the old one again. Not ideal, but you do what you have to do.

Once that was done, I hooked the supply line up to the valve, hooked the drain pipe up to the back of the dishwasher (with another hose clamp), and hooked the power cord up to the front (make sure you don't plug the cord in until after you're all done messing with the bare wires). That was even pretty easy, to be honest. You strip the wires a little, stick them up under the metal screw plates and tighten them down. After that I ran a test cycle to make sure nothing was leaking and it all looked good. Woo-hoo!

So now we have almost every appliance we could want. The fridge is working great, we're borrowing a small microwave from my sister, the oven is still going strong, and now we can wash all the things we make dirty by living in our house. The next few projects are going to be more lawn stuff I think, and I want to get up on the tall ladder and finish cutting in on the front room. Once we do that, the tall ladder can go home with my parents and we can start touching up paint and texture and all throughout the house. Thanks for reading, as always.

Thursday, May 20, 2010

I'm taking a ma-sha-tay

That's right, I'm using a machete for yard work. It's designed to hack through thick vegetation and that's exactly what I'm using it for. Here's the big pile of weeds in the back yard. It's so big that the shade from it has completely killed the grass that was in the area previously.

It's actually 2-3 big clusters all in the same area. Once I did a little of this:

I got it cleared out enough that the stems were pretty much all that was left. This thing was beefy, and even more dense than I originally thought. Some friends have suggested that it might be some kind of wild rhubarb, and there was certainly a little bit of red in the stems down near the base. Regardless of what it is, it had to go.

Chopped down to the ground. Now I have to take out a shovel and dig out the roots as best I can. There are rocks and a metal divider right in the middle of this thing, so it isn't easy to get down very far. I'm also trying to use a square shovel and a couple hand tools to do it, so it's tougher than it would be with appropriate tools.

Yes, I think that gardening makes me a badass. No, nothing you say to the contrary will convince me otherwise.

All clear! The grass under the weeds was completely dead, so dirt is all that's left. I raked up a lot of dead grass from this area, too. I also dug out some of the larger dandelions from the area. There are holes in the turf now, but I can seed them once I get the grass mowed down to a decent level. This weekend is going to be a lot of work back here and a lot out front as well.

This is the pile of debris I pulled out of just this relatively small area of the lawn. I tried to thatch a bit, but the long grass makes it tough. I'll be mowing a lot and then raking out all the excess. No exactly sure what all to do with it, but it may end up in some big trash bags on the side of the house until trash day or until I can get my dad to help me haul it to the dump. There still enough crap back there that another dump trip is going to be necessary anyway.

Tuesday, May 18, 2010

Deforestation

Here's an overhead shot of the southeast portion of our property from a few months ago. It's not easy to see scale or anything, but here it is anyway.

You can see the giant weed pile there towards the left, and the sort of dead grass area in the middle. The live grass also looks relatively short here, which is surprising given how huge it is now. Here it is back in january or February when we first started looking at the house:

Nothing at all back there. The grass is long but matted down, and there aren't any weeds in sight. It's sort of astonishing to me how much has grown back there in such a short time, especially since we haven't been watering or anything. The bad part is that the weeds are what have been growing, but still.

And here we are as of yesterday. I can now fully recommend that Ortho weed killer. This stuff took these 4-foot tall weeds we had in the back yard and wilted them. They look defeated. Here's what I'm talking about:

I almost feel sorry for it. it was a mighty beast, growing from essentially nothing to a giant mass of vegetation in just a few short months. I am now fully aware of the meaning of the phrase "Growing like a weed." This thing, when...tumescent...was a full four feet tall. And it wasn't the only one. Here's another one in the same general area of the yard:

Hopefully the fence will help to give a sense of scale. I really wish I had thought to get pictures of these either while I was spraying or beforehand, but hopefully you get a sense of their sheer mass. The weed killer did a number on them, though. Every dandelion in the yard got the same treatment and they are all shriveling up as well. The grass appears to be faring perfectly, though. Honestly, I couldn't be more pleased with the Ortho. The sprayer is neat and easy to use, and it felled these monsters with just one application.

So, here are a few more pictures of our lovely lawn, for your enjoyment.

This is the front yard. It's a little tough to see since this is post mortem, but almost the entire yard is composed of dandelions. Ugh. Now that they're dying, we should be able to pull them out much more easily.

Here's a picture of me mowing with our shiny new mower. The weed in the foreground also appears to be pretty alive at this point, so maybe that will do as a "before" shot. In case you're wondering, I'm the lumpy-looking pale one in the hat. I need to work in the yard more and get some tan on those arms.

I'm doing a few passes on the grass with the mower set to 4" and it's still taking a lot of passes to get the grass chewed down. The reel mower is fantastic, though. As long as I'm pushing forward, it's cutting. It also cuts the pieces into a pretty decent mulch, even when the grass is super long. It did jam up a bit when I brought it all the way down to 2" but that's mostly because it had the other 10+" of grass clippings and old thatch still on the ground where it was trying to work. Most gas mowers I've used would get a bit huffy about such working conditions, too.

You can seem some bloomin' dandelions in this shot, too. The grass under the tree in the back needs to be thatched pretty badly, just to remove the matted-down dead leaves if nothing else. I really think a good raking and mowing will have this place looking great. Those are some aspen trees along the back fence, and we're thinking we might tear them out. They're pretty, but the runners are a big pain. If you aren't familiar with aspen trees, they don't drop seeds like most trees, their roots move outward and then push up through the surface to turn into a new tree. Most aspen groves you see are really one continuous root system with a lot of "blooms" I suppose you could call them. I believe the largest living organism in the world is an aspen grove here in CO, since they're all linked together.

Here's my swath. It took a long time to cut it down, but you can see how long the grass is back there.The shorter grass looks dead because it all had super long grass shading it so it couldn't get any sun. It's really thick and dense back there, though. I think a little sun and some water will bring it right back.

That's all I have for now. Thanks for reading!

Monday, May 17, 2010

On Lawns and Lawn Mowers

We've been noticing that ours is easily the skeeziest lawn on our cul-de-sac, and we want to get it looking at least marginal. This weekend we took a few minor steps to deal with this issue. We got a little bit of weed killer, some Truf Builder and a spreader, and our very first lawn mower. First thing's first.

We got some Ortho weed killer that wouldn't kill the lawn since the lawn is more dandelions than grass at this point. I figured we could spray them down and help shrivel them up before going in and pulling them out. The cool thing about the Ortho was the sprayer. I can't yet speak to how effective the weed killer is, but the sprayer was very neat. Here's the link: Ortho Weed Killer I'll edit or post a new entry once I know whether it was effective. This morning, some of the weeds already looked like they were dying. The dandelions, which normally open up as soon as the sun hits them, were closed and looked sort of pitiful. I'm really hoping this worked because we have a major weed issue.

Once we get the weeds out of the lawn, I'm going to go to work on mowing the grass down to a reasonable level. The grass in the front isn't very long (I think maybe the neighbors helped keep it in line) but the backyard is like the freakin' Congo. Grass that's easily 12-18" tall in large sections. We need to get that chewed down to a sufficient level to where we can thatch it. There's a whole lot of dead grass in there and it all needs to come out. It's going to be tough work, but I'm really looking forward to having a pretty lawn.

In that vein, we picked up a reel mower. I hadn't used one before, but it appealed to me for a number of reasons. The first being that I work a desk job. I like getting out and doing physically demanding things as much as I can, especially if I have to be doing it anyway. I have to be outside mowing my lawn and it isn't going to be easy even with a $600 self-propelled mower, so why not spend a fraction of that and make it a legitimate workout? The other benefits are pretty huge, too. First off, it's quiet. Very quiet. I could mow at 4 AM without waking up the neighbors, I'm sure. I can pop in my headphones and listen to music or a podcast or whatever while I mow and actually hear it. Compared to what I used to have to do with the gas mower when mowing for my parents (big earmuff headphones with the volume all the way up) this will be a big step up. Also, no gas or oil or anything to buy, no nasty fumes, no spilled fuel on the driveway or in the lawn, and apparently the reel mower is actually better for your grass. The cut is actually a cut (between the spinning blade and the stationary blade) as opposed to a tear like with a rotary blade mower. If you look at the tops of the blades of grass cut by a rotary mower, they're ragged and brown. I don't know anything about lawn care, but apparently that's bad. The last thing I liked about reel mowers was their small size and low weight. I can literally pick up our reel mower and shake it to get the grass off. I don't know that most people could do that (I'm a good-sized dude) but for me, it was very cool. It means I don't have to hose it down to get the grass off and then worry about it rusting. It also means I can just hang it on a hook in the garage instead of needing to give it a valuable piece of floor real estate.

So, given all of that, we went with this mower:

Fiskars Momentum Reel Mower


It's pretty fancy, and cost more than most of the other reel mowers we saw. Still, it has a few features I really liked. It's adjustable from 1" to 4", and the adjustment is a really easy thing to do with one hand and no tools. I doubt I'll be doing it a lot, but it's already helpful for the back yard where we need to cut it at 4" first and then do passes at lower heights to work it down to a decent level. So far, it's looking good. I'll take some more pictures of the front and back yards tonight and show you what I've done so far. The other thing I liked with this mower was that it has a nice wide cutting path, and the blades aren't between to front wheels. The blades also don't actually touch each other, they just get ridiculously close. Like .003" close. This lack of contact will mean longer times between blade sharpening. That's definitely a good thing, since that's pretty much the only maintenance these things need. The heavy blades and the chain drive also help maintain momentum, making it easier to push through tall grass. I haven't done a comparison, but it seems like Fiskars really stepped it up a notch with this mower. I'll let you all know how I like the mower after some continued use, but so far I'm really impressed.

Okay, that's about it for the outside. I'll have pictures tonight, along with info on how well the weed killer worked.

As for the inside, the network pieces came in and are working beautifully. The pantry shelves are wire and we want to put a 1/4" piece of vinyl-coated MDF on there to keep smaller items from slipping through. I'm looking to do that tonight as well. I also ordered the replacement drawer and the new cabinets for the kitchen, so we'll have more space available in there. The kitchen is still small, but a little organization will go a long way for us.

The blank wall space between the kitchen window and the sliding door is just begging to be turned into useful space. Two 21" x 42" cabinets will hold a lot of goodies in there. Our cabinets were made by a company called Merillat and we found a local dealer for them. They're still making our style and color of cabinets, so we just ordered some new ones from them. I'll be putting them in myself, so that will be a blog post for sure. Adding that extra space will really help a lot. We finally unpacked all of the kitchen boxes and pretty much everything fits into the existing cabinets but it's tight and tough to keep things organized properly. Having some more space will let me organize everything the way I like it, which I haven't been able to do pretty much ever.

Thanks for reading!