Just a few quick things. Last night I rolled some paint onto the front door and it looks really good! It has a little bit of a rough texture to it still, but I figure I can add a few more layers of paint and then sand it nice and smooth.
I also put some paint on the wall where I re-textured. It still looks sorta meh, to be honest. I don't think I'm going to re-do it again, though. I'm just going to keep trying to learn and repair as I go. I can spend the next 6 months doing and re-doing the texture and it's never going to be perfect. At some point I just need to call it good and move on.
So that's about it for now. Everything needs another coat of paint before it's worth taking pictures, so I'll do that and get back to you all soon. Thanks for reading!
Tuesday, June 29, 2010
Monday, June 28, 2010
A bird in the hand...
Okay, I actually didn't touch the bird. It wasn't technically in my hand so much as it was in a bag I was holding in my hand. Suffice it to say, that was close enough. No idea what I'm talking about? Well read on, gentle reader.
I accomplished a few things this weekend. With some tips from my cousin Eddie, I got to work on painting the front door. It's coming along nicely, I think. Here's what I had at first:
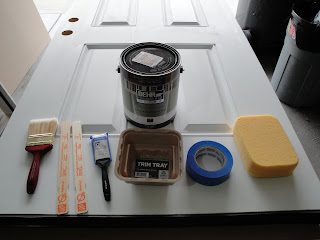 Brushes, mostly. Eddie suggested foam rollers and brushes and I'm really glad he did. it makes it so much easier to get good coverage without streaks and all.
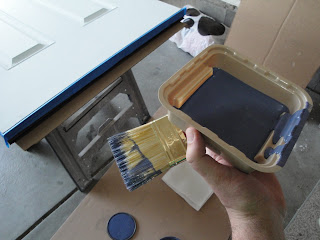 Unfortunately, I used a brush for the first coat and it was a little rough. These trim trays are really handy, but I really didn't need this much paint. I may need this much paint for the whole door. Maybe.
 This first coat went on pretty streaky, but I'm planning on doing a great many thin coats so I'm not too worried about it.
 You can sort of see the grooves in the panel areas. They're really pretty and fancy but they are a pain to paint properly.
I'm just going to keep doing more of the same on the front of the door until I'm satisfied with it. I'll bust out the little foam rollers once I finish with the panels and I think that'll go more quickly.
Also, remember this gem?
 Yeah, that's been like that for a while. I got a wild hair this weekend and decided to fix it all up good and proper. First thing I did was to pull out the nails that were holding it in there and then pull the rest of the piece out. Our siding is all made of a hardi-board siding which is actually a cement-based thing instead of pressed wood pulp or whatever normal siding is made out of. It's actually really nice, and wasn't too expensive.
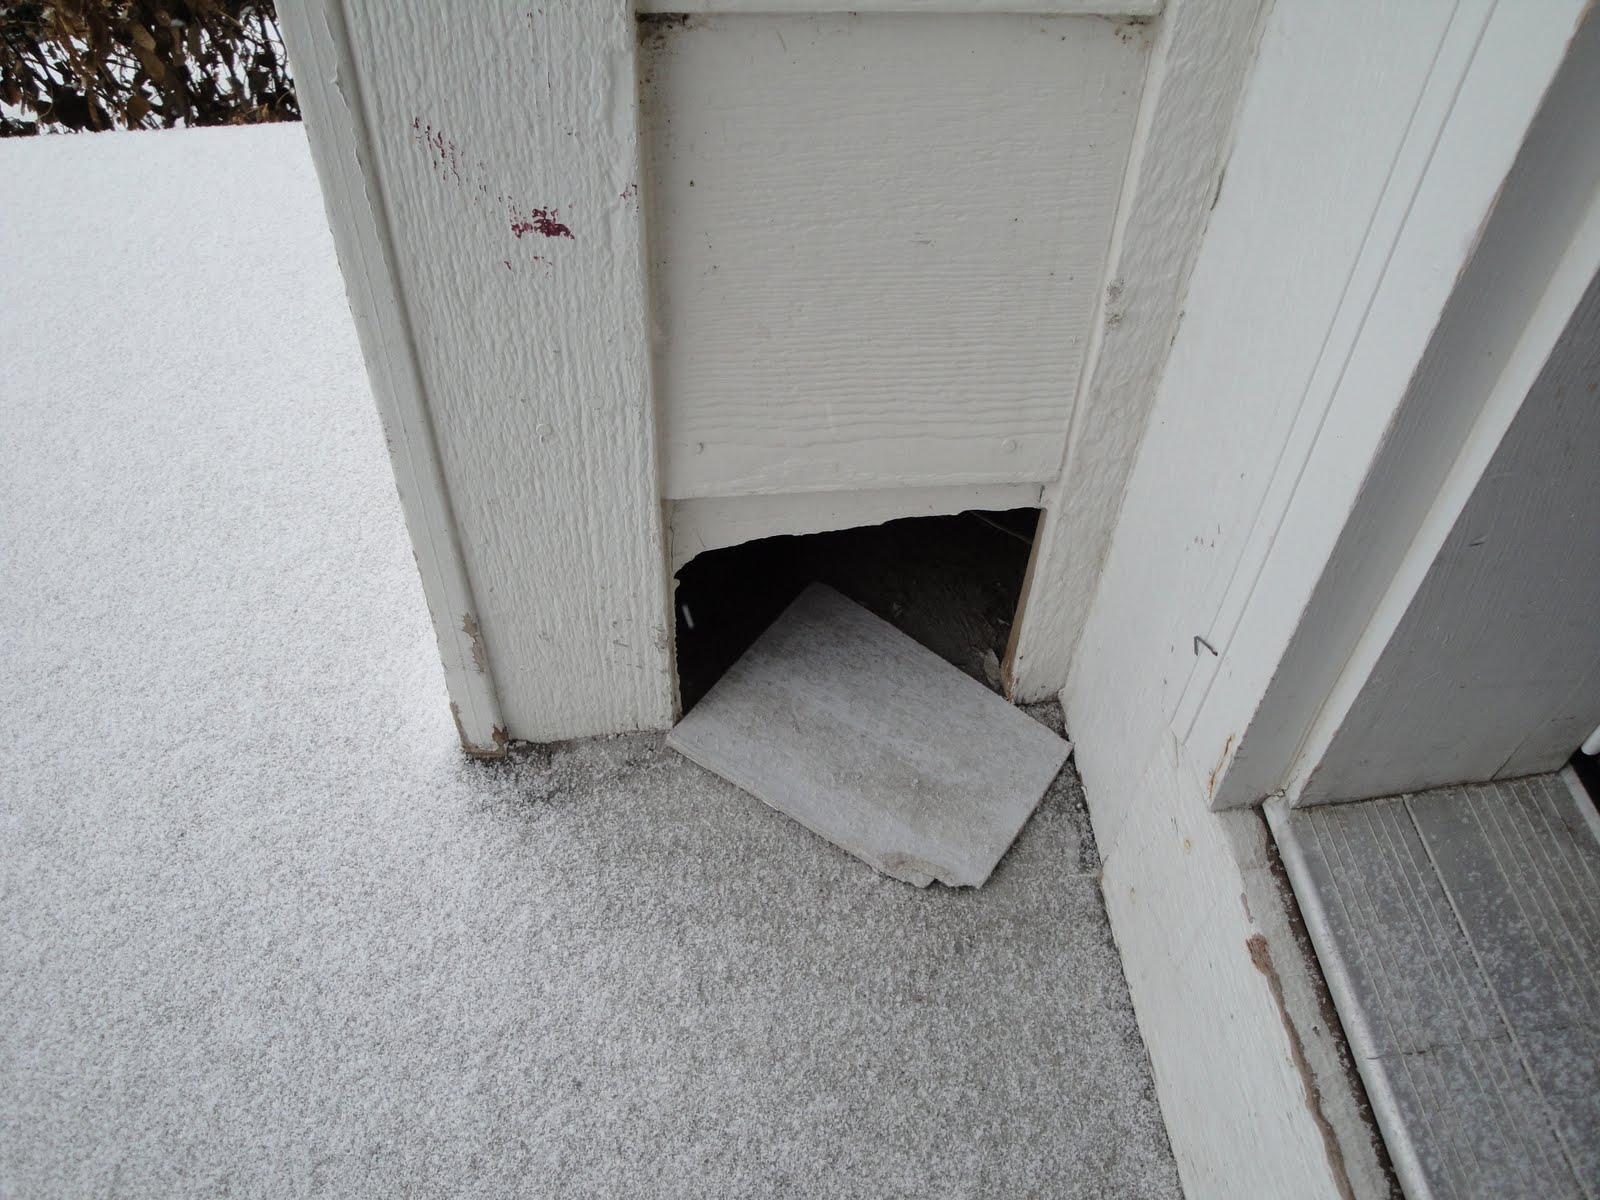
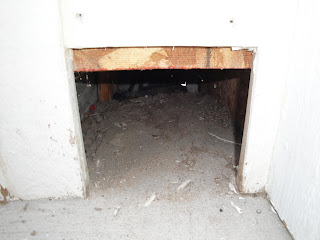 Okay, I took off the broken piece and...wait. What the heck is that?
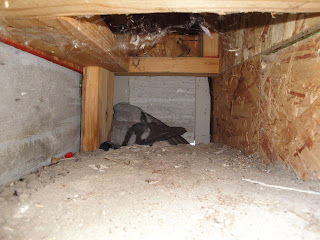 That's right, it's a freakin' pigeon. Very dead, very much inside the walls of my house. Not cool. I grabbed a shovel-ish thing and weaseled it in there to pull him out. Super gross.
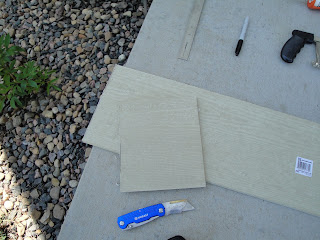 Here's the hardi-board stuff. It's $7 for a 16' length but I found a broken piece about 4' long and they gave it to me for $1. Woot! it's still about 8 times as much as I need, but whatever. I used the broken piece as a template for the width, and (because this is a cement board) I used the "score-and-snap" method instead of buying an expensive carbide blade for one of my saws. I'm saving money right and left! With a little shaving (a rasp would probably work, but you'd likely ruin the blade) with the knife I got it to fit into the space.
 I had to cut some of the top off because the gap is pretty narrow and it wouldn't wedge in there otherwise. Still, it fits pretty beautifully now.
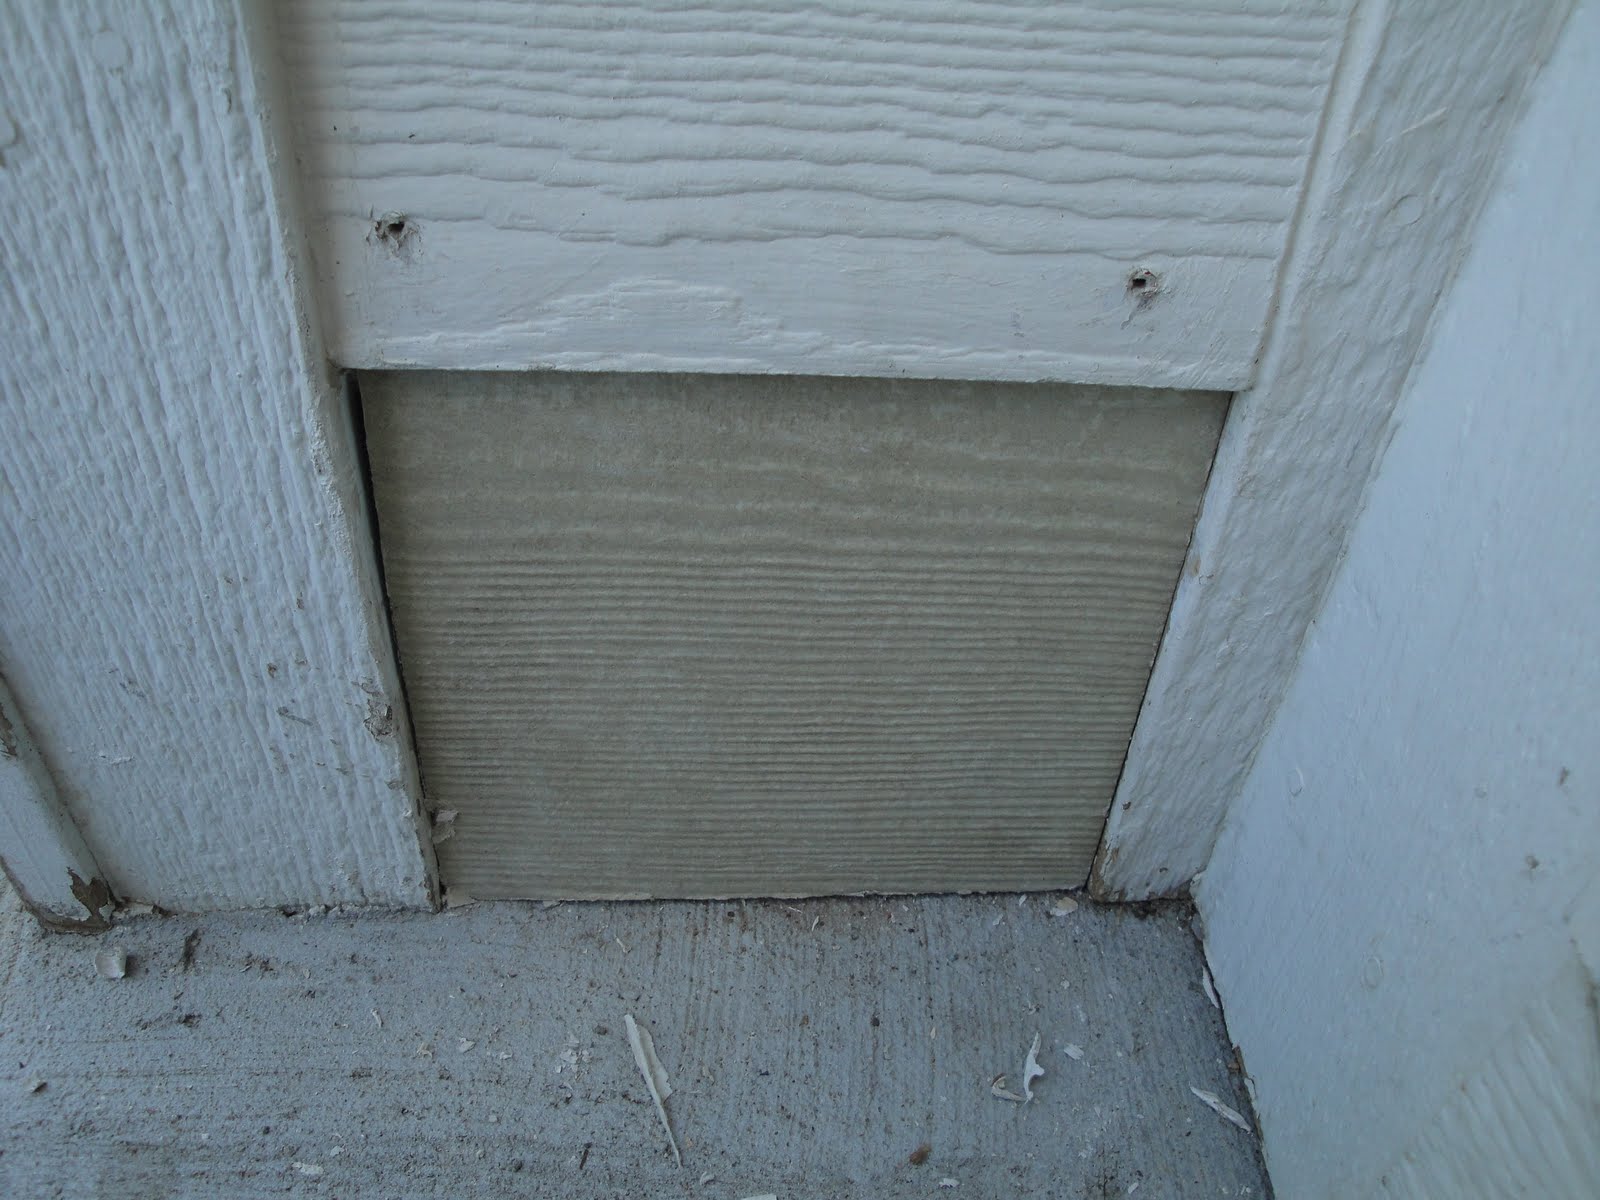
 You can see I put the nails back in there a little lower so they'd still grab the top of the repair piece. I'm also sealing all the edges (not the bottom yet, but I'm thinking about it) with caulk to fill the gaps and keep water out of there.
 Ta-da! Look how nice that looks now. There are no more giant holes in our house. At least not any that aren't supposed to be there.
Not too much else going on, really. Did a little mowing and noticed an incredible number of weeds in the back yard. They must've popped up over the last week or so because I didn't notice them last time I mowed. I cut our watering back significantly and I think I figured out the sprinkler panel. It kept turning on whenever it felt like it, which I think is not so good. I'm hoping that it's okay now, and that a reduced watering schedule will work well for us. We'll just have to keep experimenting. Honestly, everything in the front is looking pretty good right now. I don't think we have too much more we need to do up there for a while yet, which is sort of a weird feeling. Maybe we'll have to get to work on the inside of the house or something? Whatever we do, you know you'll hear about it. Thanks for reading.
I accomplished a few things this weekend. With some tips from my cousin Eddie, I got to work on painting the front door. It's coming along nicely, I think. Here's what I had at first:


I'm just going to keep doing more of the same on the front of the door until I'm satisfied with it. I'll bust out the little foam rollers once I finish with the panels and I think that'll go more quickly.
Also, remember this gem?


Not too much else going on, really. Did a little mowing and noticed an incredible number of weeds in the back yard. They must've popped up over the last week or so because I didn't notice them last time I mowed. I cut our watering back significantly and I think I figured out the sprinkler panel. It kept turning on whenever it felt like it, which I think is not so good. I'm hoping that it's okay now, and that a reduced watering schedule will work well for us. We'll just have to keep experimenting. Honestly, everything in the front is looking pretty good right now. I don't think we have too much more we need to do up there for a while yet, which is sort of a weird feeling. Maybe we'll have to get to work on the inside of the house or something? Whatever we do, you know you'll hear about it. Thanks for reading.
Friday, June 25, 2010
The Doors
We are now in possession of our two new doors! Neither is hanging yet, but i think we can get significantly closer on them before too long. Here are some pictures of the new front door:
 Here's the whole thing. It's going to be the "English Channel" blue color I showed you way long ago. I'm going to put a coat or two of paint on it tonight so we may be ready to hang it sometime next week. I'm really excited!
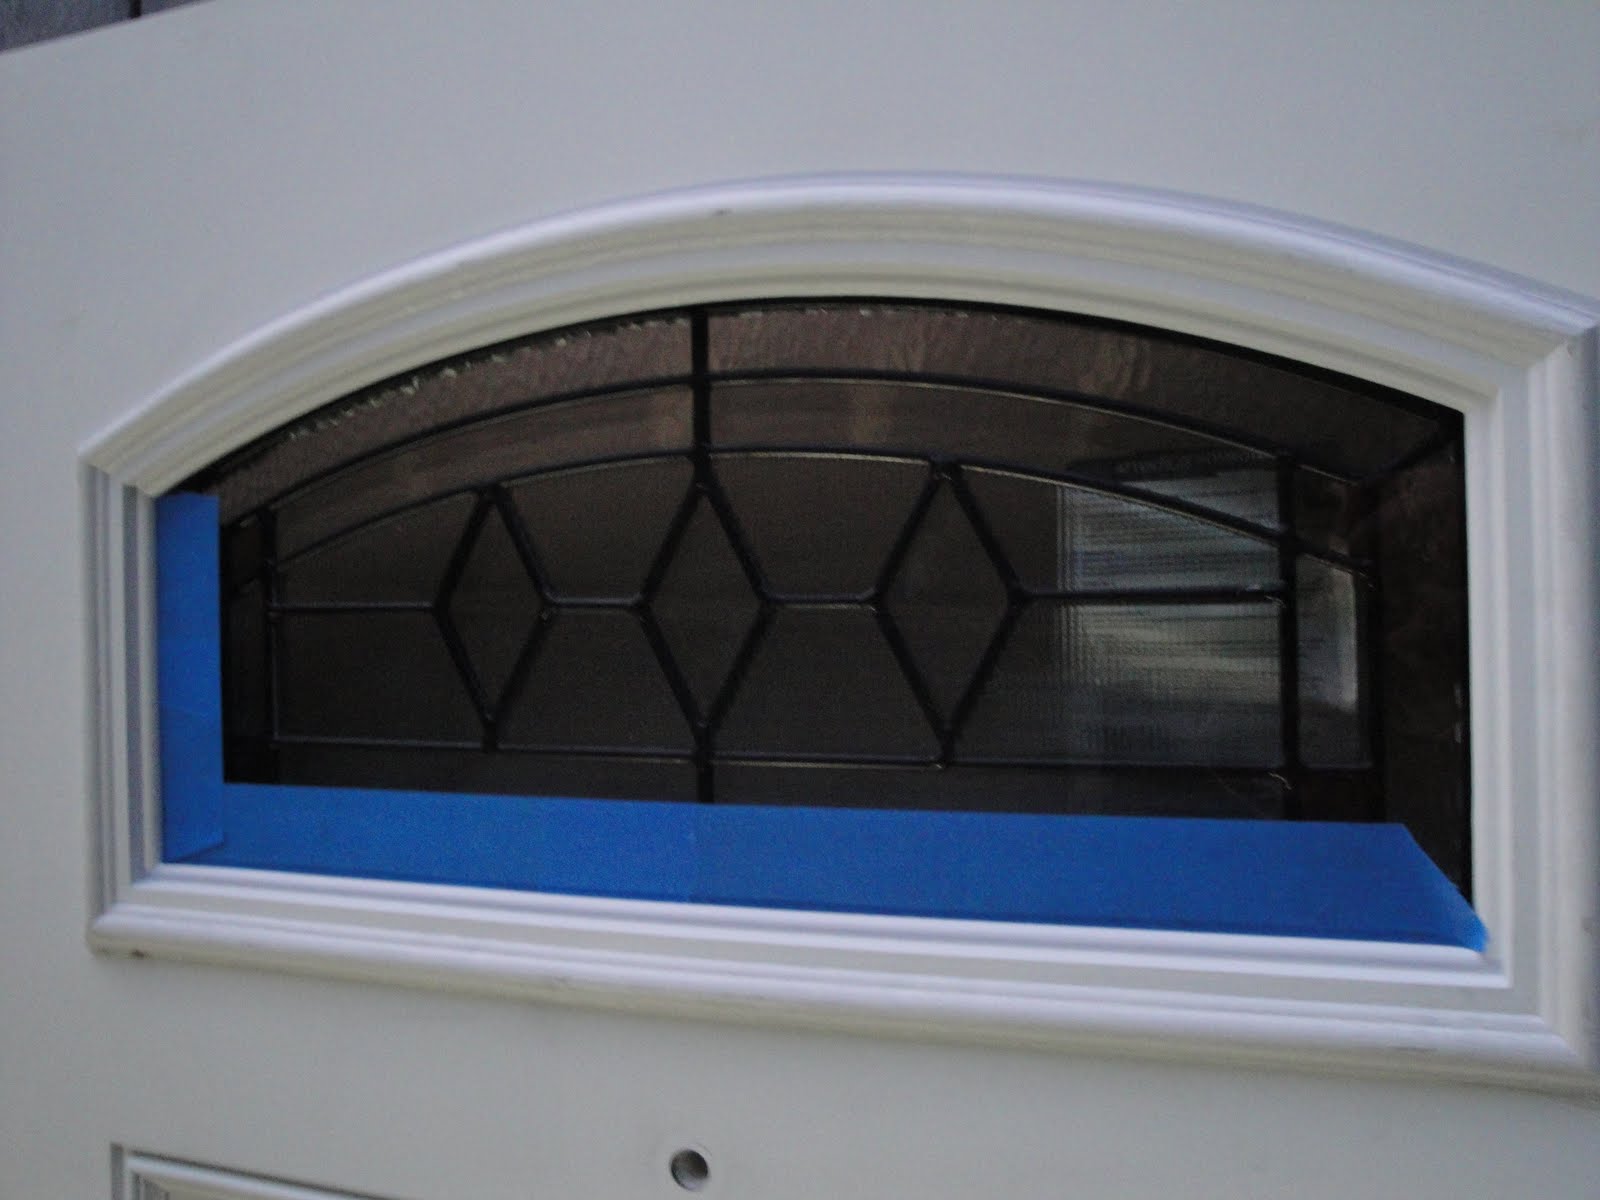
 This is the lite (the only time it is acceptable to spell it this way, mind you) at the top. It's a triple-pane tempered safety glass with Argon and Mithril in it or some such. Supposed to be very insulated and very safe. I also really love the design in it.
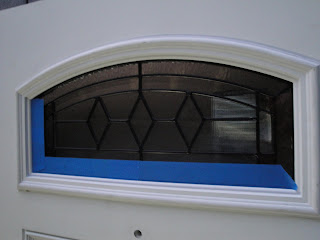 The hole down there at the bottom is where the peephole goes, but I removed it for painting. I'm taping up the window so I don't get any paint on it.
 Ta-da! All clear. I also used my utility knife to clean up some of the stray glue that squeezed out from the border around the window. I'm trying to get it really nicely prepped for paint so the paint will go on smoothly and stay looking good for a long time. I'm planning on 3 coats at least, just to ensure that the I get seriously protective coverage. A front door takes a lot of abuse, generally speaking.
 I also wanted to show you the back yard patio furniture that we got. It's really comfy and we're liking it a lot. We still need to Scotch Guard the cushions to make them waterproof, so we may do that this weekend as well. There's a loveseat to this set as well.
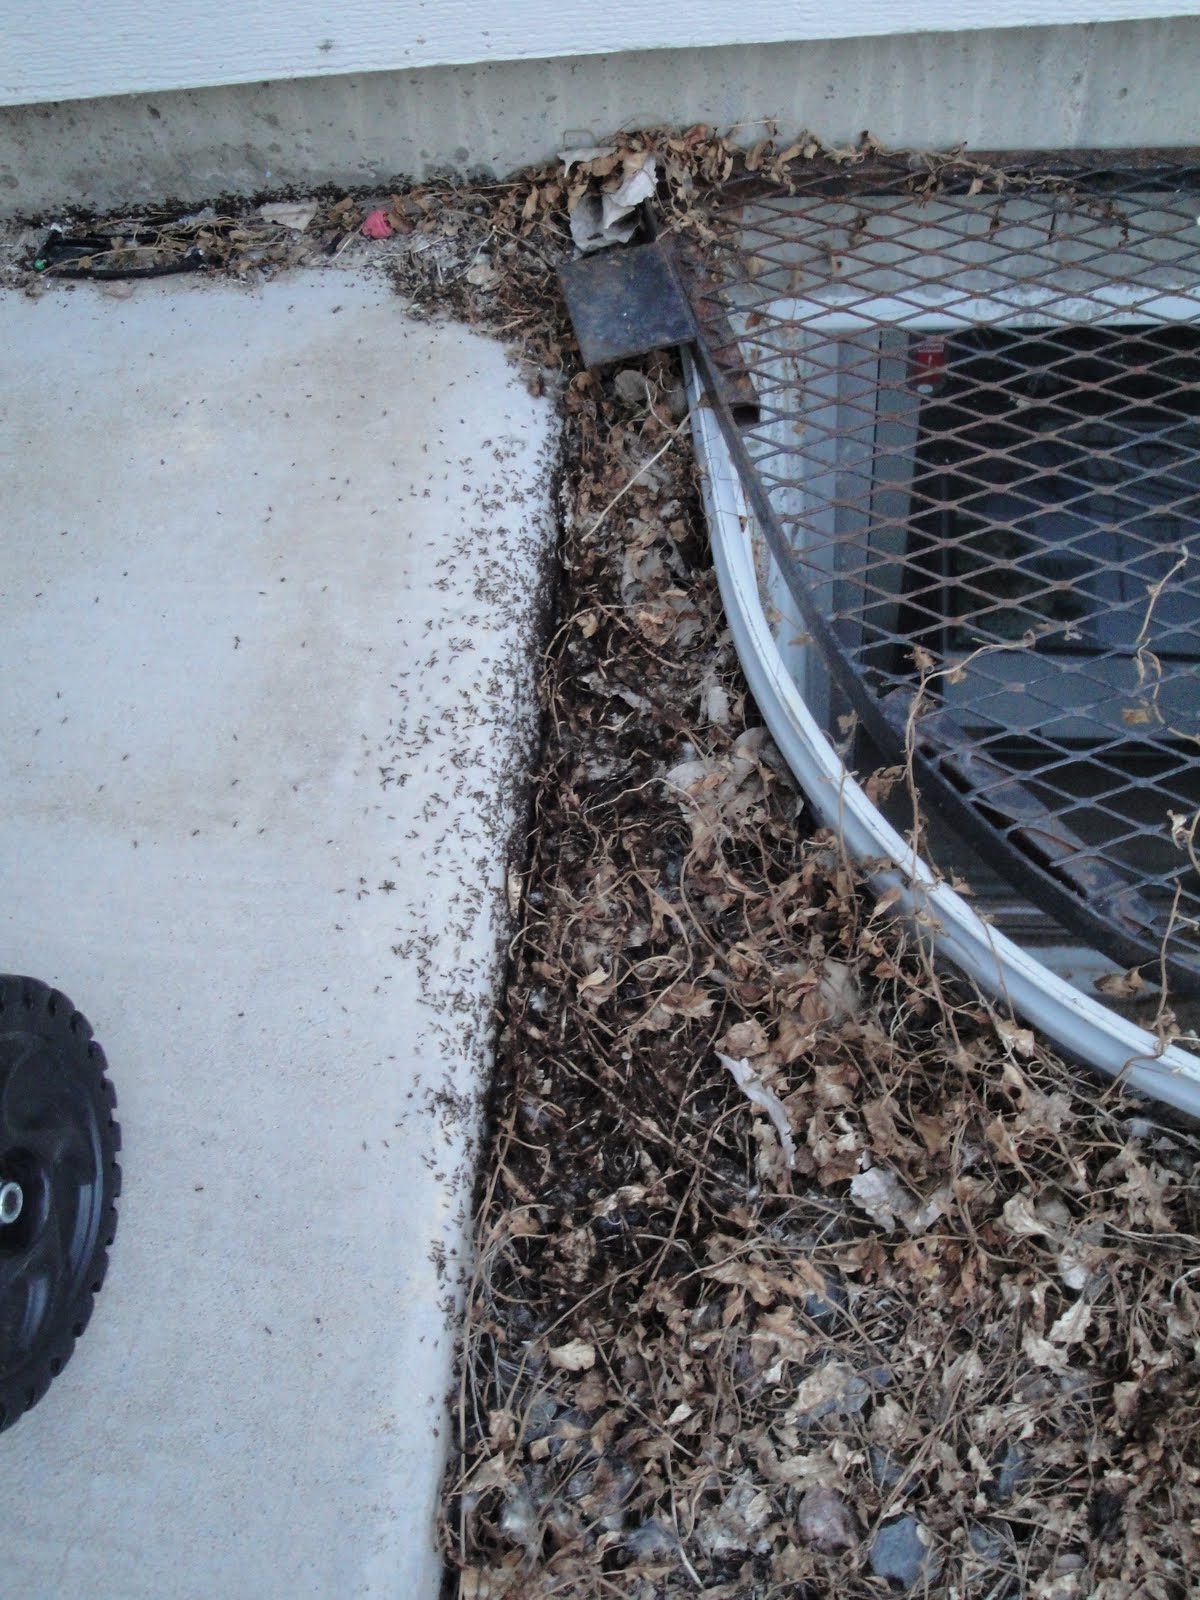
Also, the ants are all gone finally! Last night when my dad came over to help me transport the new front door, we looked at the back door as well to see what we'll need to do. There were ant bodies everywhere. It was seriously off-putting. I didn't get a picture, but this is pretty close:


Also, the ants are all gone finally! Last night when my dad came over to help me transport the new front door, we looked at the back door as well to see what we'll need to do. There were ant bodies everywhere. It was seriously off-putting. I didn't get a picture, but this is pretty close:

(Dramatization)
I don't think I mentioned it last time, but after the boiling water, I also sprayed some white vinegar into the crack where they were living. White vinegar is the best thing ever in the world for homeowners. You can clean stains with it, wash windows, clean carpet, kill pests, and even make a tasty salad dressing.

Jenna's miniature greenhouse continues to thrive as well. We need to find a place to put these guys pretty soon, as they're already looking a little big for their britches. I'm thinking we can move the best of them to large pots on the back patio and maybe have some salad in a few months. Woot!
That's more or less it for now. I'll post pictures of the painting process and everything soon. Thanks for reading!
Wednesday, June 23, 2010
To see your enemies driven before you...
What is good in life? Not ants, I say. There was still a little activity this morning so I hit them with a big pot of actually-boiling water today. The water I used yesterday was really hot, but not quite boiling. I'm hoping that this second application of burning death will solve the problem but I will, as always, keep you posted.
Starting from there, I got a little feisty this morning. Does anyone else ever do that? Just get a wild hair and decide that 7:00 AM while you should be getting ready for work is a great time to re-organize your tax documents from 1997 or something? Maybe it's just me.
Here's the situation. We have a four bedroom, four bathroom house. We are currently living in one and a half bedrooms and one and a half bathrooms (the guest room where we sleep and half of the office, with the upstairs hall bath and the main floor powder room). For this reason, living in the house isn't feeling significantly less cramped than living in the apartment. All of our stuff that was in boxes is still in boxes and we haven't done much aside from adding a yard. I'm kinda thinking that we should at least be using two full bedrooms. Maybe it doesn't make any sense, but it's what I'm thinking at the moment. So anyway, we've been thinking about how to improve the office. We got those file cabinets now and we're going to put a nice big desk in there.
Still, the room is cramped and full of boxes and such. We don't really have a permanent place to put the things from the boxes right now, but I'm really feeling the need to get them out of the office if nothing else. Obviously everything is going to have to come out of there when we replace the carpet, but we don't know how long that'll be. We can pull everything out for a few days and then move it back in without too much difficulty, I think. Really, we're spending a fair amount of time up in there and I just want it to be nicer. In that vein, I'm going to clear everything out of there and move it into the basement or the hobby room, depending on how easy our access needs to be.
I'm hoping to get some paint on that texture to see how I like it, and we're going to pick up the new front door this week. We went to the HOA meeting last night and it was pretty uneventful. We just have a lot of stuff to do and not a lot of time to do it in. We're so busy with family and friends these days that a night off to work on the house seems like a real luxury. At some point I'm going to have to learn to start telling people "No" when they ask if I'm free. Doesn't seem like that's just yet, though.
That's it for me. Thanks for reading!
Tuesday, June 22, 2010
DIE DIE DIE
We have ants in our backyard. More accurately, we HAD ants in our backyard. We now have a pile of twisted corpses and wailing ant-orphans. Bwa-ha-ha! Before you think I'm some crazed ant-o-phobe, let me explain my thoughts on buggy bits. When they are outside, that's their world. I won't go out of my way to get rid of them, as a general rule. Some things, like big nasty spider webs and such, I'll tear down for aesthetic reasons, but mostly I like to live and let live. As soon as they come into my house, though, all bets are off.
This is the situation. We had a big ant colony outside the back door, right up against the back of the house and the patio. Here they are:
 It's like a big squirmy pile of exoskeletons right there on my very own personal house. Because of their location, some of the more enterprising members of the colony decided to sneak in through our "Top Quality, Totally Secure and Not At All Having Holes In It" sliding glass door. The cat food lives right inside, so they climbed in through some crack or another and got into the cat food crumbs. They probably returned to the ant-hole as conquering heroes, hoisting their crunchy tuna bits over their heads in victory. This will not stand.
I boiled some water and poured it right on their little heads. And thoraxes. Thoraces? No idea. Anyway, I think they're all dead now. I may boil some more water and pour it on them again tonight if there is any renewed activity. If that doesn't work, I have a few other options, so we'll go over those as we get there.
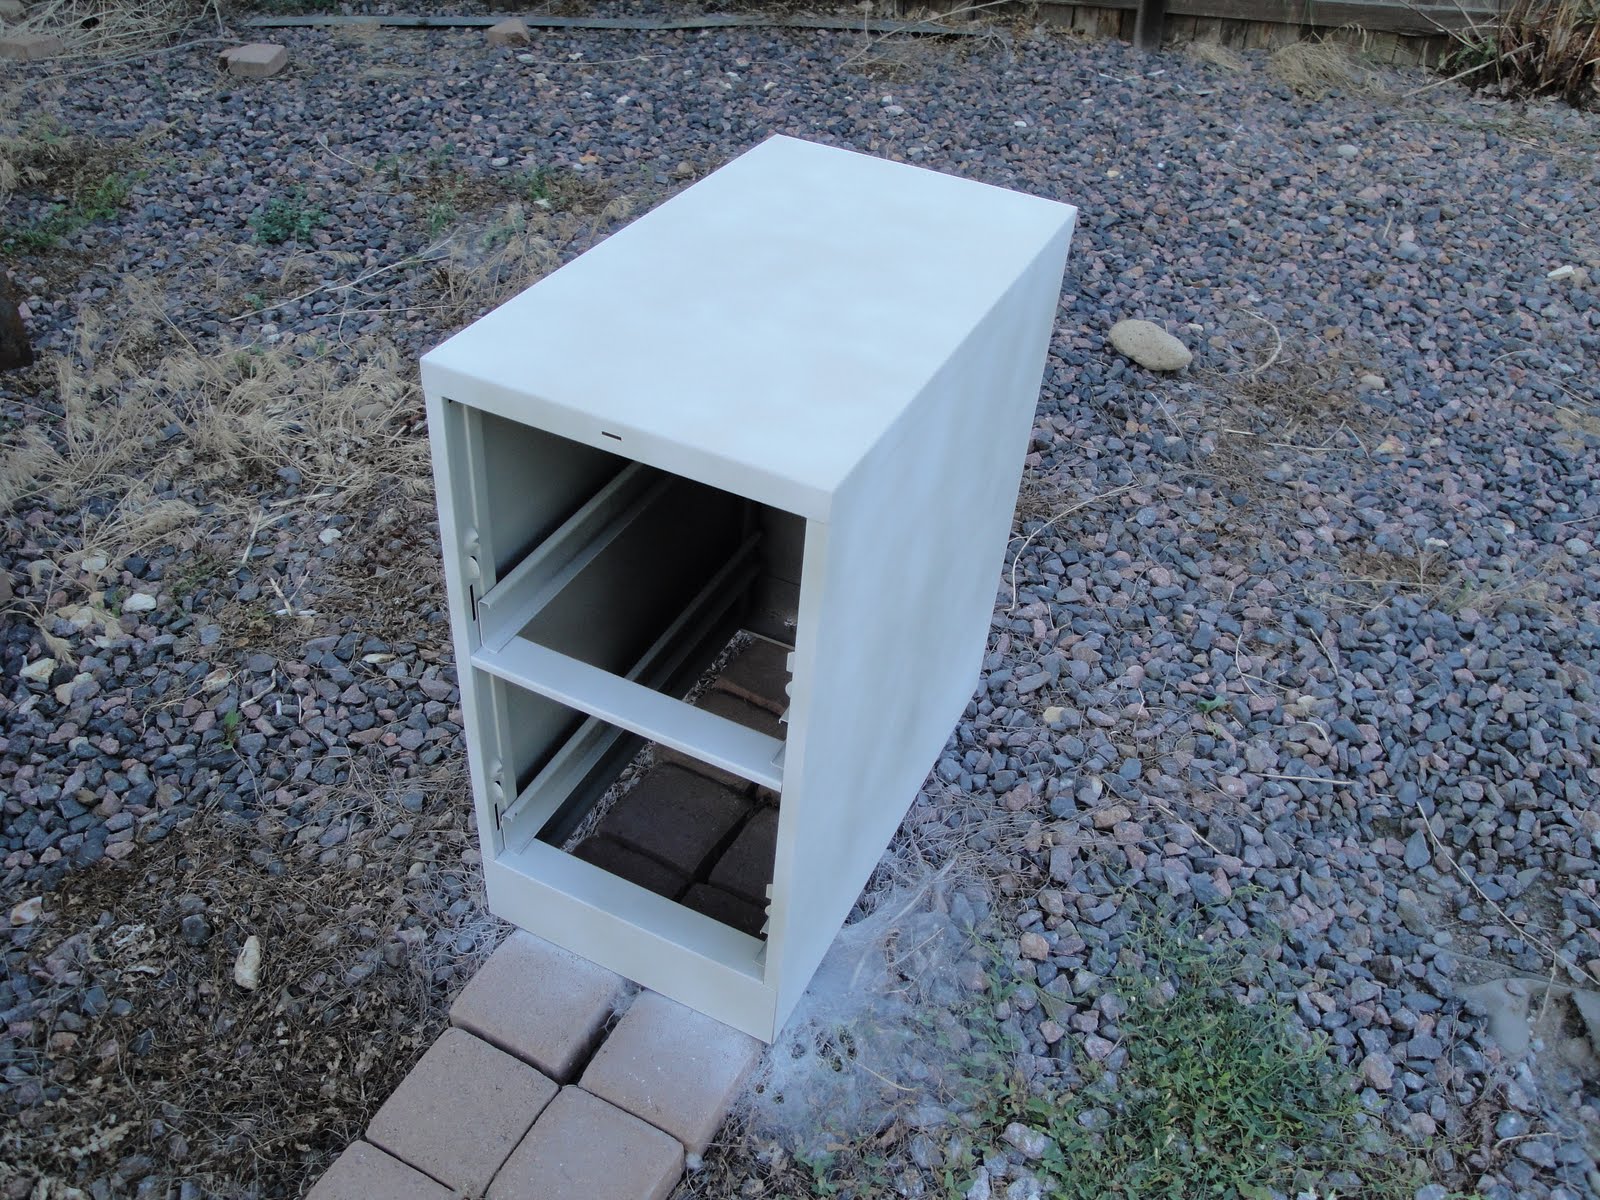
Also, I spray-painted the first of the file cabinets last night. It's taking an unconscionable amount of paint to cover, but that's probably due to the breeze last night. On a calmer day, more paint will stay on the cabinets, I hope. Still, it's looking better already. Look at this establishing shot:
 That's some freakin' composition right there. Anyway, that's the paint I'm using. We're going with a flat white paint and a flat blue for the stencil, and then I think we'll do a satin clear coat on top to protect it all and give it a little bit of a sheen.
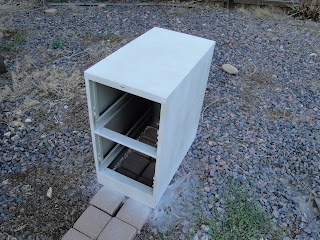 This is after one coat of paint. It's patchy, but I figured I would do multiple light coats and avoid any drips. It worked really well, so I don't have any drips or anything on there. I'm just going to have to do like 8 coats of freaking paint on this thing to get it where I want it. Le sigh.
Here it is after layer number 3 or 4:
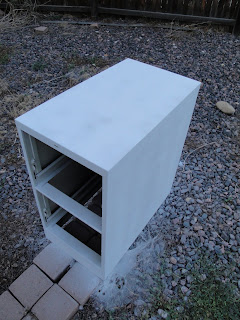 Still a little splotchy, but better for sure. I pulled it inside to dry in the garage as it was getting a little dark. See that spider web next to the pavers under the cabinet? Yeah, that thing is downright sinister. I'm not intentionally messing with it, but I think there's an overachiever living under there somewhere and he's probably not very happy with me right now.
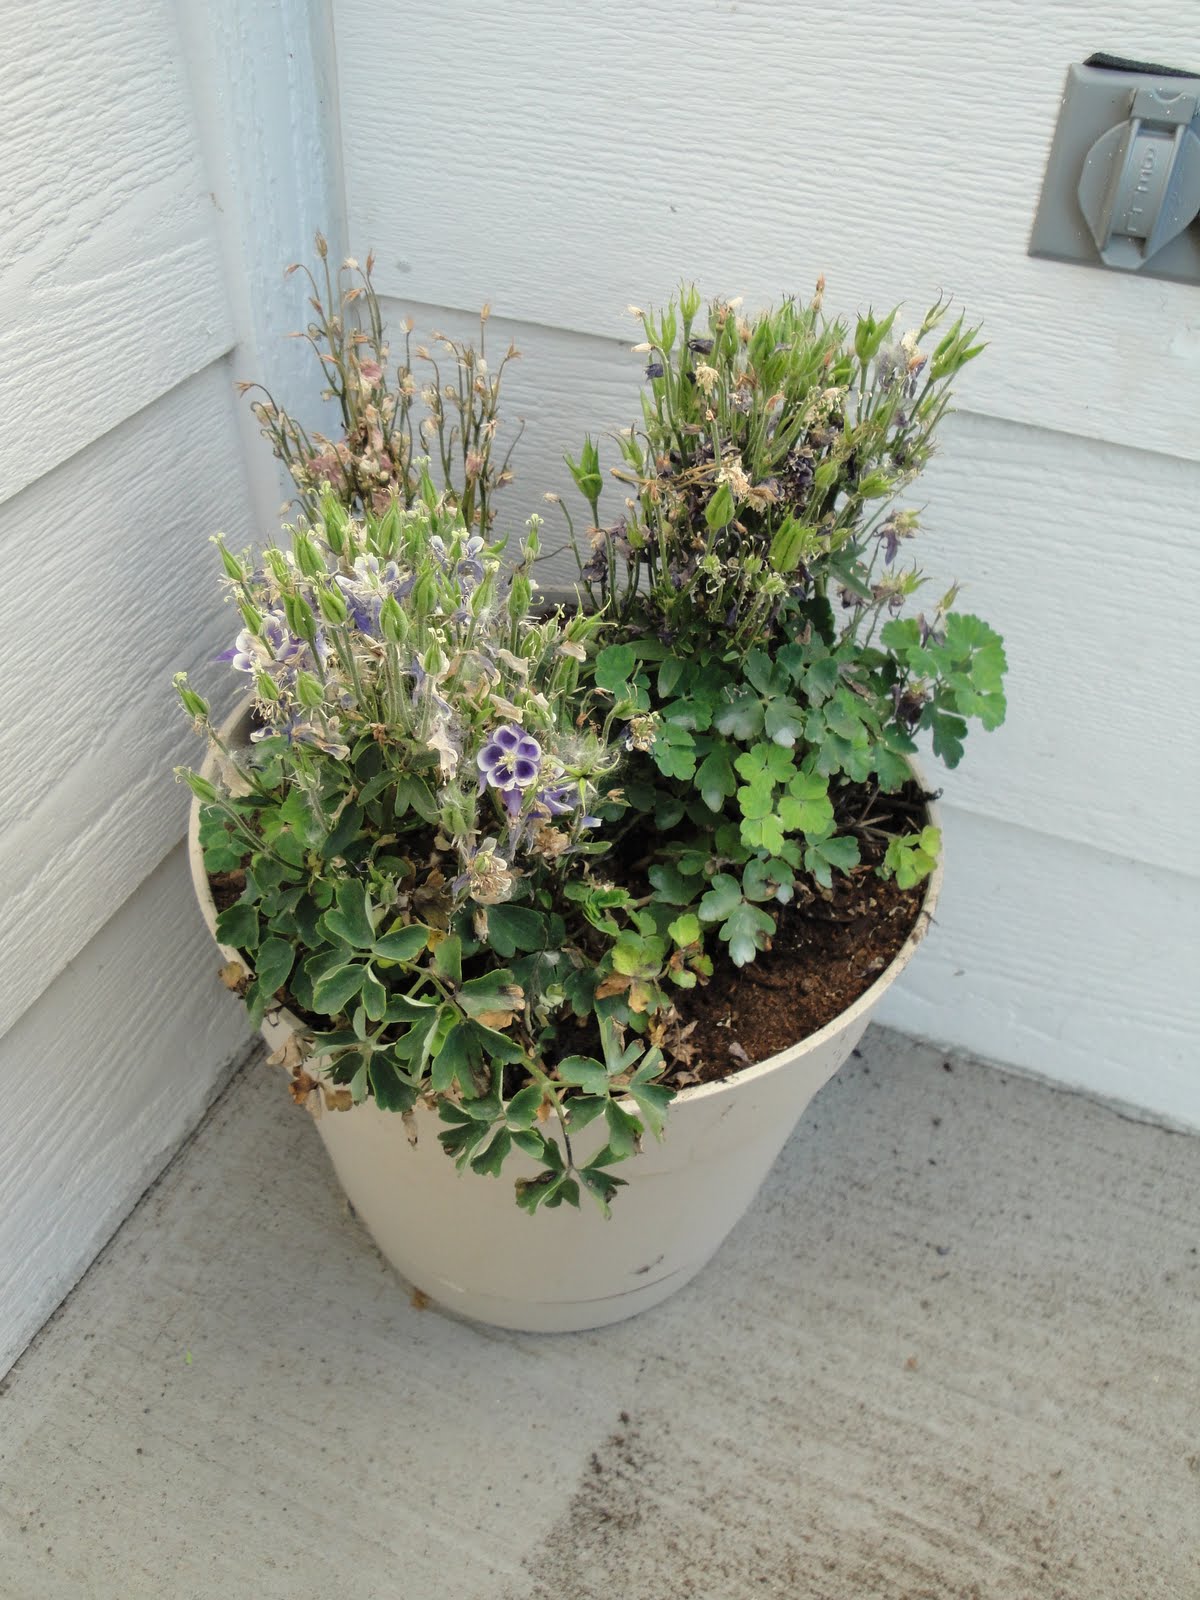
Oh, I also grabbed a picture of our front porch flowers:
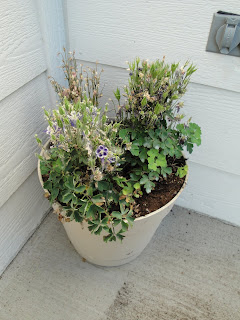 The front one is alive but the other two are looking pretty gnarly. I'm going to keep watering and all, and hopefully that'll bring them back or something. I'll keep you all posted, of course.
Thanks for reading!
This is the situation. We had a big ant colony outside the back door, right up against the back of the house and the patio. Here they are:
I boiled some water and poured it right on their little heads. And thoraxes. Thoraces? No idea. Anyway, I think they're all dead now. I may boil some more water and pour it on them again tonight if there is any renewed activity. If that doesn't work, I have a few other options, so we'll go over those as we get there.
Also, I spray-painted the first of the file cabinets last night. It's taking an unconscionable amount of paint to cover, but that's probably due to the breeze last night. On a calmer day, more paint will stay on the cabinets, I hope. Still, it's looking better already. Look at this establishing shot:

Here it is after layer number 3 or 4:

Oh, I also grabbed a picture of our front porch flowers:
Thanks for reading!
Monday, June 21, 2010
Not So Much
Yeah, I had big plans and high hopes last week. I had a steely-eyed conviction that would make Lowe's employees tremble in fear and awe. I also apparently had way too many video games to play to get anything done. So, most of the week went by without any progress. We did make some progress, though, and you'll be treated to a painstaking description thereof so it seems like more work than it really was.
We planted the new flowers in a pot on the front step and it looks like two of the three plants are dying, despite my best efforts. I fear they may be overcrowded and I'm pretty terrible at remembering to water them. The one that's surviving is my favorite, at least. They're columbines, but they're little bushes on flowers instead of the normal stalks. They're really very pretty. Easily my favorite flower, so I'm hoping they survive and do well.
Also, we're trying to get the office sort of organized. Right now it has a folding table with two computers on it and the rest of the room is pretty much just boxes. We're going to get the boxes out of there and put in a real table for the computers. In that vein, we got some file cabinets. We've wanted to file our paperwork for al ong time, but didn't have the file space. Cabinets are really expensive, too. Like $120 for a 26.5" deep two-drawer one. Thankfully, we put my mom on the case and she found some for us for $50/ea on Craigslist. Woot! They're 'putty' colored, so we're going to paint them. We're doing a base of white with a stenciled design in the same blue as the accent wall. I'm really thinking they'll turn out well, so I'll post pictures of them as we go. Here they are as is:
 They're actually nice and clean, and very well made. The brand is HON, which I think is a pretty good one. The only thing I know is that they beat the pants off the other file cabinets we own, and cost way less. These aren't super pretty yet, but I think we can fancy them up a bit. I have some ideas about them, and we'll just have to see how it all pans out. The plan is to use these as a base for our computer desk, but I'm actually thinking we may want to have them on their own and just make a regular desk for the computers. We'll just have to see how it all looks when we get the room cleared out and everything.
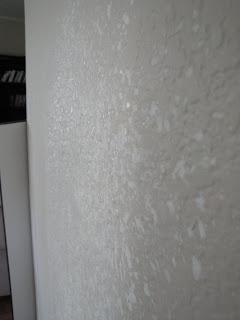
The other one thing I got done this past week was to fix some texture. Because of the nature of this beast, the pictures are going to be pretty much useless to you. I'll post them anyway, but it's all just going to look like walls.
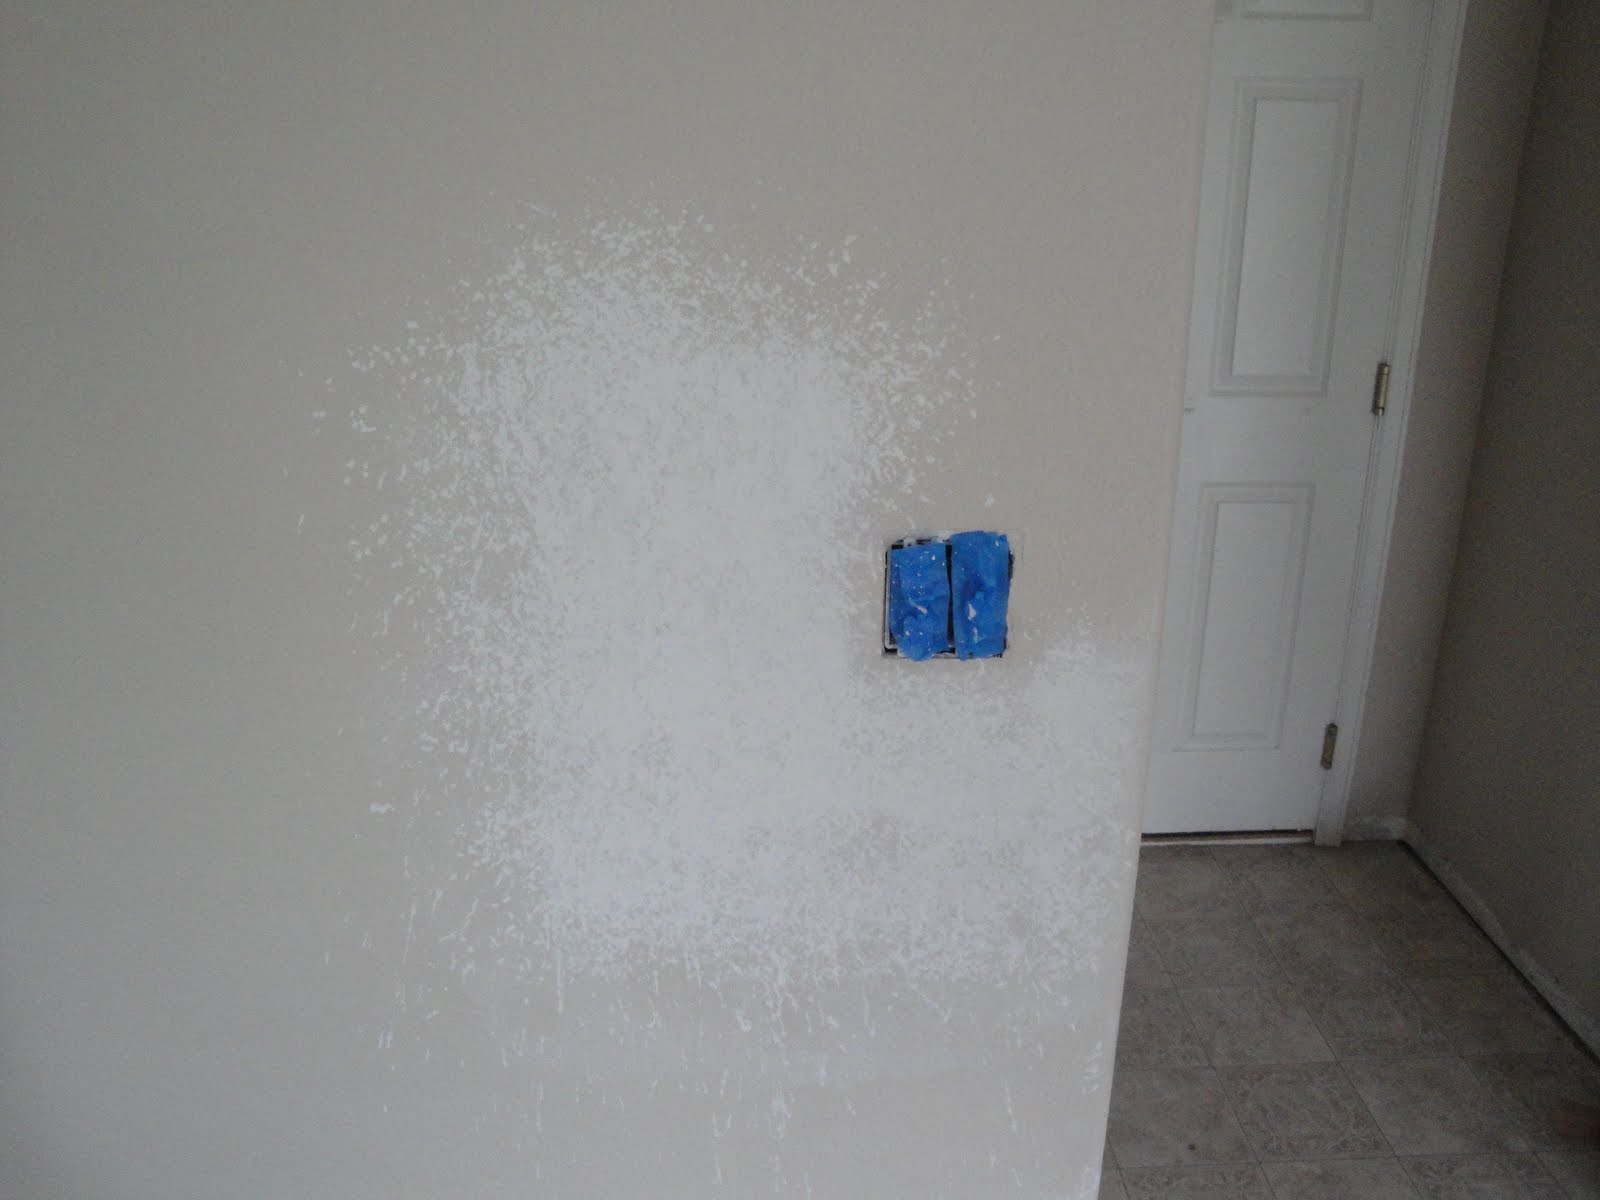
 This is the wall before I started. Rather, this is the wall after I patched the hole, textured, didn't like the texture, sanded, then re-textured then still didn't like the texture and had the handy-man do it. Since I'm a persnickety sort, I still wasn't overly pleased. He did a heck of a lot of texture around the house and most of it really just looked flattened. Instead of creating new texture, he filled in the low spots and removed what texture there had been previously. It's not an easy thing to do, but when I'm paying someone to do work, I want a darn good job, you know? So anyway, it's back to me doing it myself, as is my custom.
 These are the tools of the trade here. You don't need all of them necessarily, but I tend to use them all at some point.
 This is the texture I've been using. It has an adjustable nozzle on it, and that really helps. I had been using the light or medium settings and wasn't really pleased with my results. Switching to heavy made a big difference for me. I'm also thinking that doing a good bit of heavy and then switching to light to fill in some more would be a good way to go. We'll just have to see how it all works out, I guess.
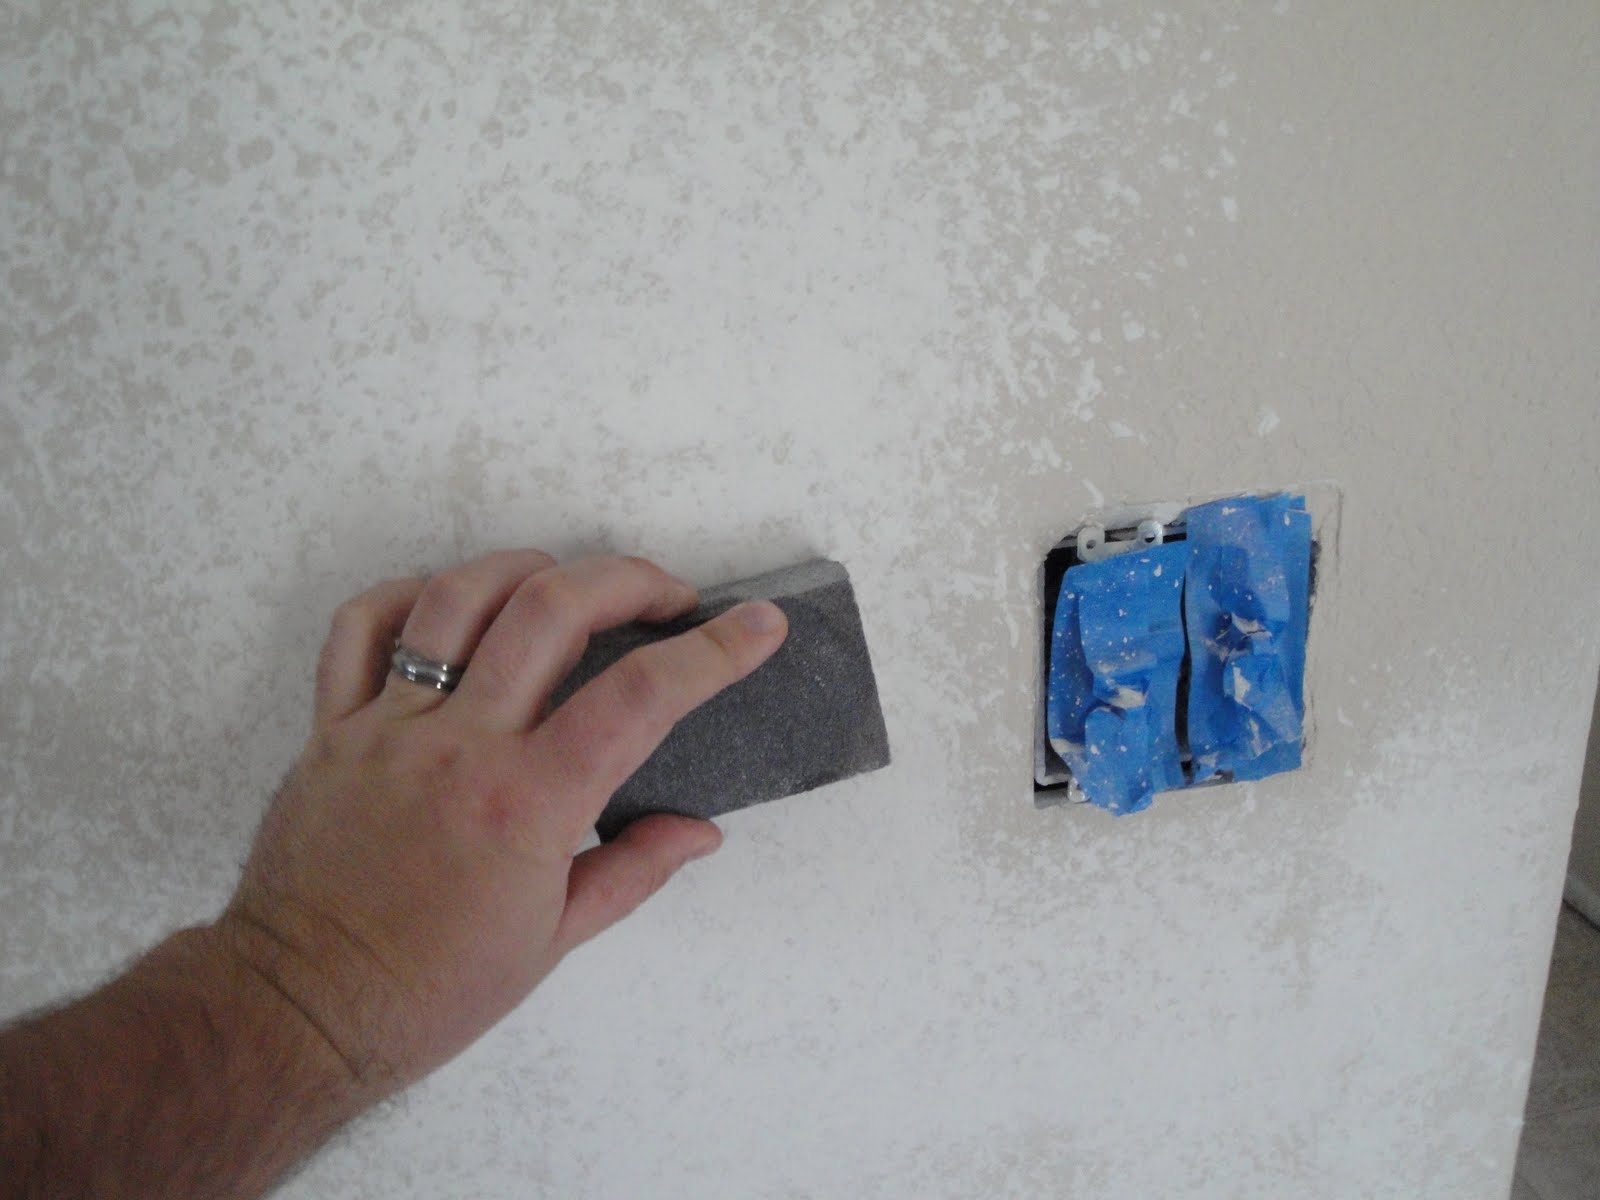
 Start out by sanding your surface. You want it to be pretty smooth when you start so you don't get too many layers of texture on top of each other. Look at the walls the pros did for you for an indication. It's smooth with texture on it, not texture with more texture on it. I like these little sanding blocks, myself. they're cheap and they come in a lot of different grits. I use a medium grit to smooth texture, generally.
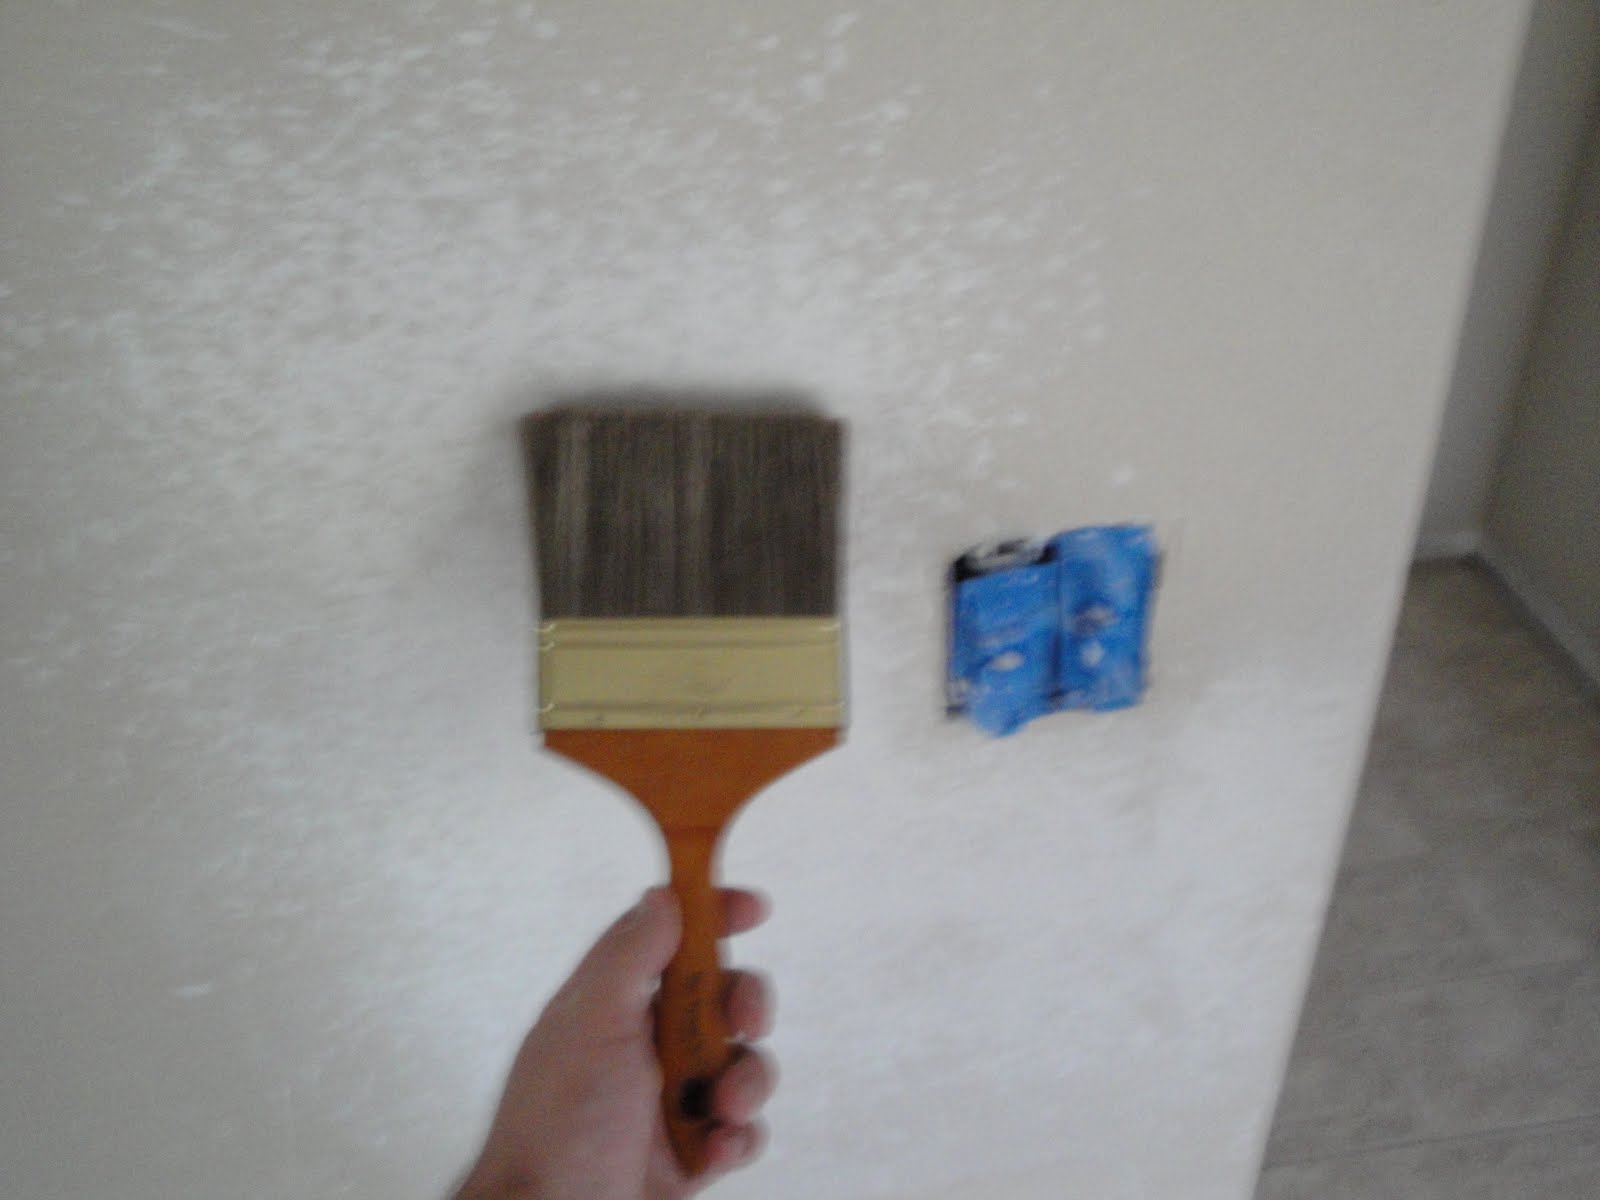
 This is the Big Woolie. It's a 5-inch paintbrush that doesn't get used for paint. It's only for brushing dust off of things. This is better than trying to wipe it with a damp cloth or just blowing on it or whatever because you get the vast majority of the dust off but you don't have to wait for the wall to dry before spraying texture. It's great.
 Turn your nozzle to heavy and put the can about 10-12" away from the wall. The heavier the texture, the closer you need to be. This part is going to be hard to see, but I'm going to try to explain it as best I can.
 Yeah, that doesn't really help. Here's your best bet: Get a cardboard box and go practice spraying in your back yard. I used the wall in my garage at first, which is also okay. You're looking for significant coverage without it being too flat. Putting on too much is worse than putting on too little. If you're light in an area you can always add a bit after you knock it down the first time. I had a few issues that I rectified this time around. First, I wasn't waiting long enough for the texture to dry before knocking it down. The can says to wait 1-2 minutes and it is lying to you. I was waiting 5-7 minutes and that still wasn't enough. 10-12 minutes is more like it. At that point, it's significantly stiffer, and you won't smear it as much. I'm tempted to wait 15 minutes, actually. I think I'll try that next time.
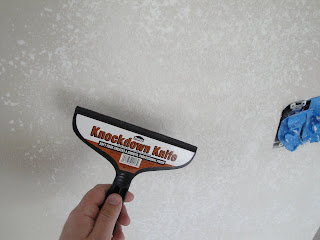 Here's another tip: Get one of these. It's a knife specifically designed for doing texture like this. Pros use a metal knife, I think, but they also use a hopper gun instead of the spray can stuff. I think it has a much different consistency, and the metal works better with it. For the can stuff, the foam-edge knife is the key. It's light and easy to control. It also helps you to have a light touch, which is really important. The foam edge has another function which I hadn't used before, but which made a big difference to me on this attempt.
With the foam knife, you're really just barely holding onto it while the weight of the knife pulls the blade down the wall. It's the lightest of light touches. The longer you let the texture harden, the more pressure you'll use, but think very light and adjust to harder if necessary. What you're doing is knocking down the tops of the splatters, hence the name knockdown texture. What you may notice is that the texture gets a little bubbly or rough.
 I don't know if you can see it, but that's what I'm talking about. I don't know what causes this, unfortunately. It could be the sprayer or letting it dry for longer than they suggest or any number of things. It might also fill in pretty well with paint and not be a big deal at all. I'm not sure, but I don't like it. Here's what you do to fix it. After you knock down the texture, let it dry for another 10-15 minutes and then wet the edge of your foam knife. When you drag the moist foam across the rough patches, it smooths them out a bit. You don't lose the overall texture, but it makes the smooth parts smooth which is what you want.
So far, I'm pretty excited about this patch of texture. I haven't been overly pleased with any of them until now, so I'm hoping this one will really work well. The biggest key to this is painting it. Once you get a wall all painted the same color, that's when you can really see whether the texture works.
Okay, that's all for now. Thanks for reading!
We planted the new flowers in a pot on the front step and it looks like two of the three plants are dying, despite my best efforts. I fear they may be overcrowded and I'm pretty terrible at remembering to water them. The one that's surviving is my favorite, at least. They're columbines, but they're little bushes on flowers instead of the normal stalks. They're really very pretty. Easily my favorite flower, so I'm hoping they survive and do well.
Also, we're trying to get the office sort of organized. Right now it has a folding table with two computers on it and the rest of the room is pretty much just boxes. We're going to get the boxes out of there and put in a real table for the computers. In that vein, we got some file cabinets. We've wanted to file our paperwork for al ong time, but didn't have the file space. Cabinets are really expensive, too. Like $120 for a 26.5" deep two-drawer one. Thankfully, we put my mom on the case and she found some for us for $50/ea on Craigslist. Woot! They're 'putty' colored, so we're going to paint them. We're doing a base of white with a stenciled design in the same blue as the accent wall. I'm really thinking they'll turn out well, so I'll post pictures of them as we go. Here they are as is:

The other one thing I got done this past week was to fix some texture. Because of the nature of this beast, the pictures are going to be pretty much useless to you. I'll post them anyway, but it's all just going to look like walls.


With the foam knife, you're really just barely holding onto it while the weight of the knife pulls the blade down the wall. It's the lightest of light touches. The longer you let the texture harden, the more pressure you'll use, but think very light and adjust to harder if necessary. What you're doing is knocking down the tops of the splatters, hence the name knockdown texture. What you may notice is that the texture gets a little bubbly or rough.

So far, I'm pretty excited about this patch of texture. I haven't been overly pleased with any of them until now, so I'm hoping this one will really work well. The biggest key to this is painting it. Once you get a wall all painted the same color, that's when you can really see whether the texture works.
Okay, that's all for now. Thanks for reading!
Monday, June 14, 2010
Back in Black
Well, you may have noticed a lack of activity here this past week. My wife and I were on vacation for a few days, celebrating our anniversary. We did nothing at all on the vacation, and didn't do much more once we got home. I mowed the front lawn yesterday, but that's about it. We did buy some more flowers while we were away, but we haven't even planted them yet.
Anyway, we have a few things on our list to do this week, and I'm really hoping we can get them done without too much delay. Here's what I want to accomplish:
Mount new wall cabinets
Replace broken drawer
Insulate dishwasher (if necessary)
Plant new flowers
Retexture walls where necessary
Touch up paint in upstairs bathroom
Buy woodwork paint
Begin painting woodwork upstairs
Replace door hardware
Practice cope joints for baseboards
It's a lot, but I think we can at least make progress in all of those areas. I'm really hoping to get the hall bath done. We got it to a functional place and the motivation to work on it past that point just hasn't been there. I think we really need to finish it, though. Having a room all the way done would be a huge step for us. We also want to get the office moving along a bit more. We have two computers set up in there now, but we need some paperwork management so we can get ourselves organized. Filing cabinets, shelves, drawers, something so we can keep track of what has been done, how much we're spending, what still needs to be done, etc.
Anyway, next post will be more interesting, I promise. Thanks for reading!
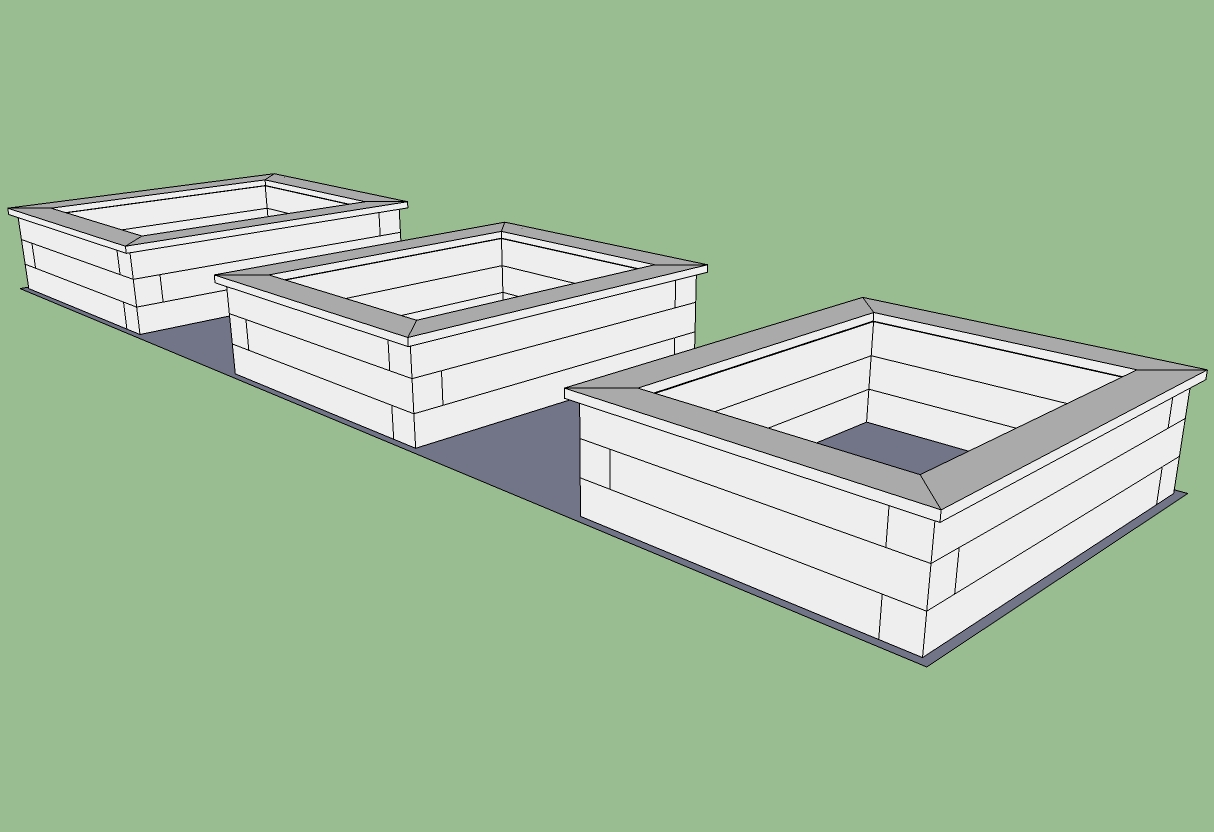
Oh, I forgot! I made up a sketchup model of the raised beds we're putting in the back yard. Here they are:
 They'll fit in the space between the concrete path and the lawn. They're pretty small and they're going to be shaded by a tree for a goodly portion of the day, so they'll be good primarily for shady plants that don't get too big. Not sure what all that includes, but I'm sure we'll find plenty. I'd love to grow some berry bushes, and these might be a decent size for some of those. I'm even building them so that we can put cold frames on top, or build mesh covers to keep the birds off our berries but let air and water in. As we continue, I'll let you know how that whole plan goes.
Anyway, we have a few things on our list to do this week, and I'm really hoping we can get them done without too much delay. Here's what I want to accomplish:
Mount new wall cabinets
Replace broken drawer
Insulate dishwasher (if necessary)
Plant new flowers
Retexture walls where necessary
Touch up paint in upstairs bathroom
Buy woodwork paint
Begin painting woodwork upstairs
Replace door hardware
Practice cope joints for baseboards
It's a lot, but I think we can at least make progress in all of those areas. I'm really hoping to get the hall bath done. We got it to a functional place and the motivation to work on it past that point just hasn't been there. I think we really need to finish it, though. Having a room all the way done would be a huge step for us. We also want to get the office moving along a bit more. We have two computers set up in there now, but we need some paperwork management so we can get ourselves organized. Filing cabinets, shelves, drawers, something so we can keep track of what has been done, how much we're spending, what still needs to be done, etc.
Anyway, next post will be more interesting, I promise. Thanks for reading!
Oh, I forgot! I made up a sketchup model of the raised beds we're putting in the back yard. Here they are:
Sunday, June 6, 2010
Yard, matey.
Well, we finally decided to start adding something to the yard, since we have finished taking out pretty much everything we didn't want. We went to Lowe's and got some cool greenery to go under the tree out front, and dropped it in yesterday. Here's how it all went:
 There's my lovely wife digging in the dirt. It was that rich black soil pretty much all the way down. I think after about a foot, it started turning to clay, but that's a lot of darn good soil.
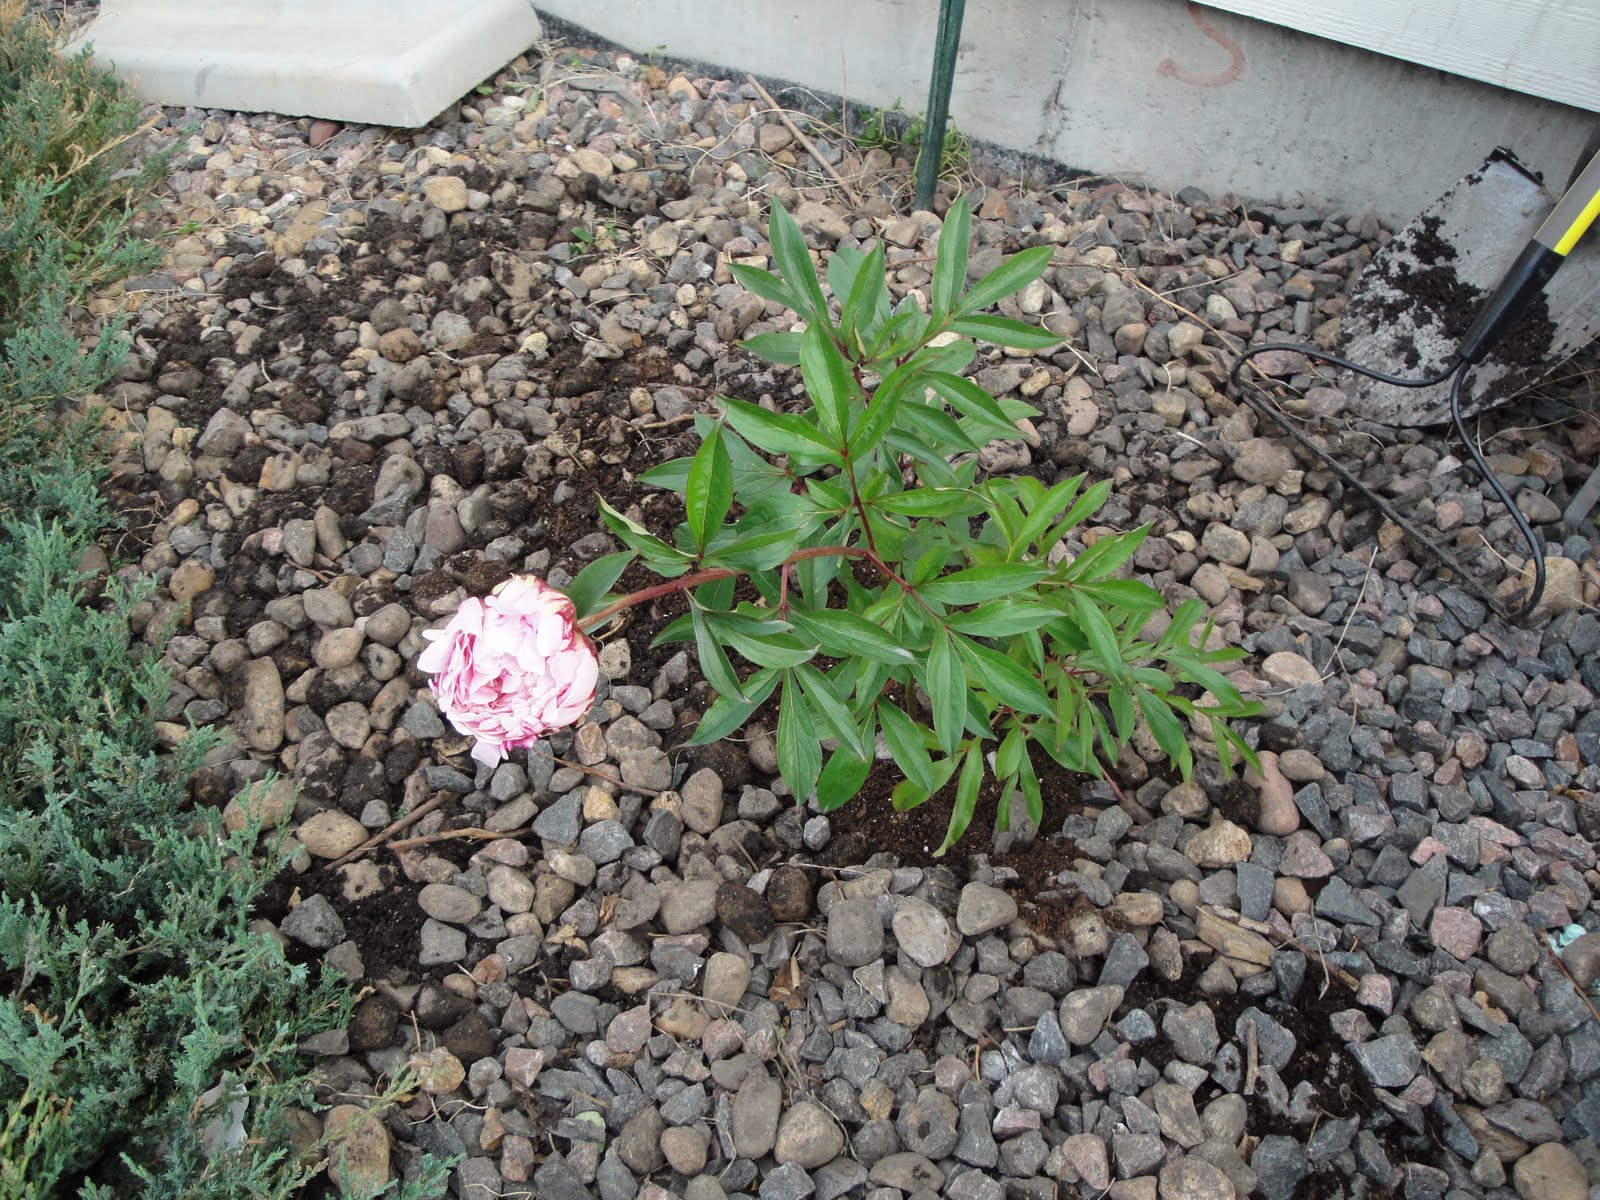
 Here's the peony we got to replace the rose bush. It looks pretty darned good there, and I think it will do well. Even though the front of our house is the north side, we get a fair bit of sun up there. Not too much for shady plants, but enough for partial sun guys and maybe some full sun. We'll just have to experiment and see what does well.
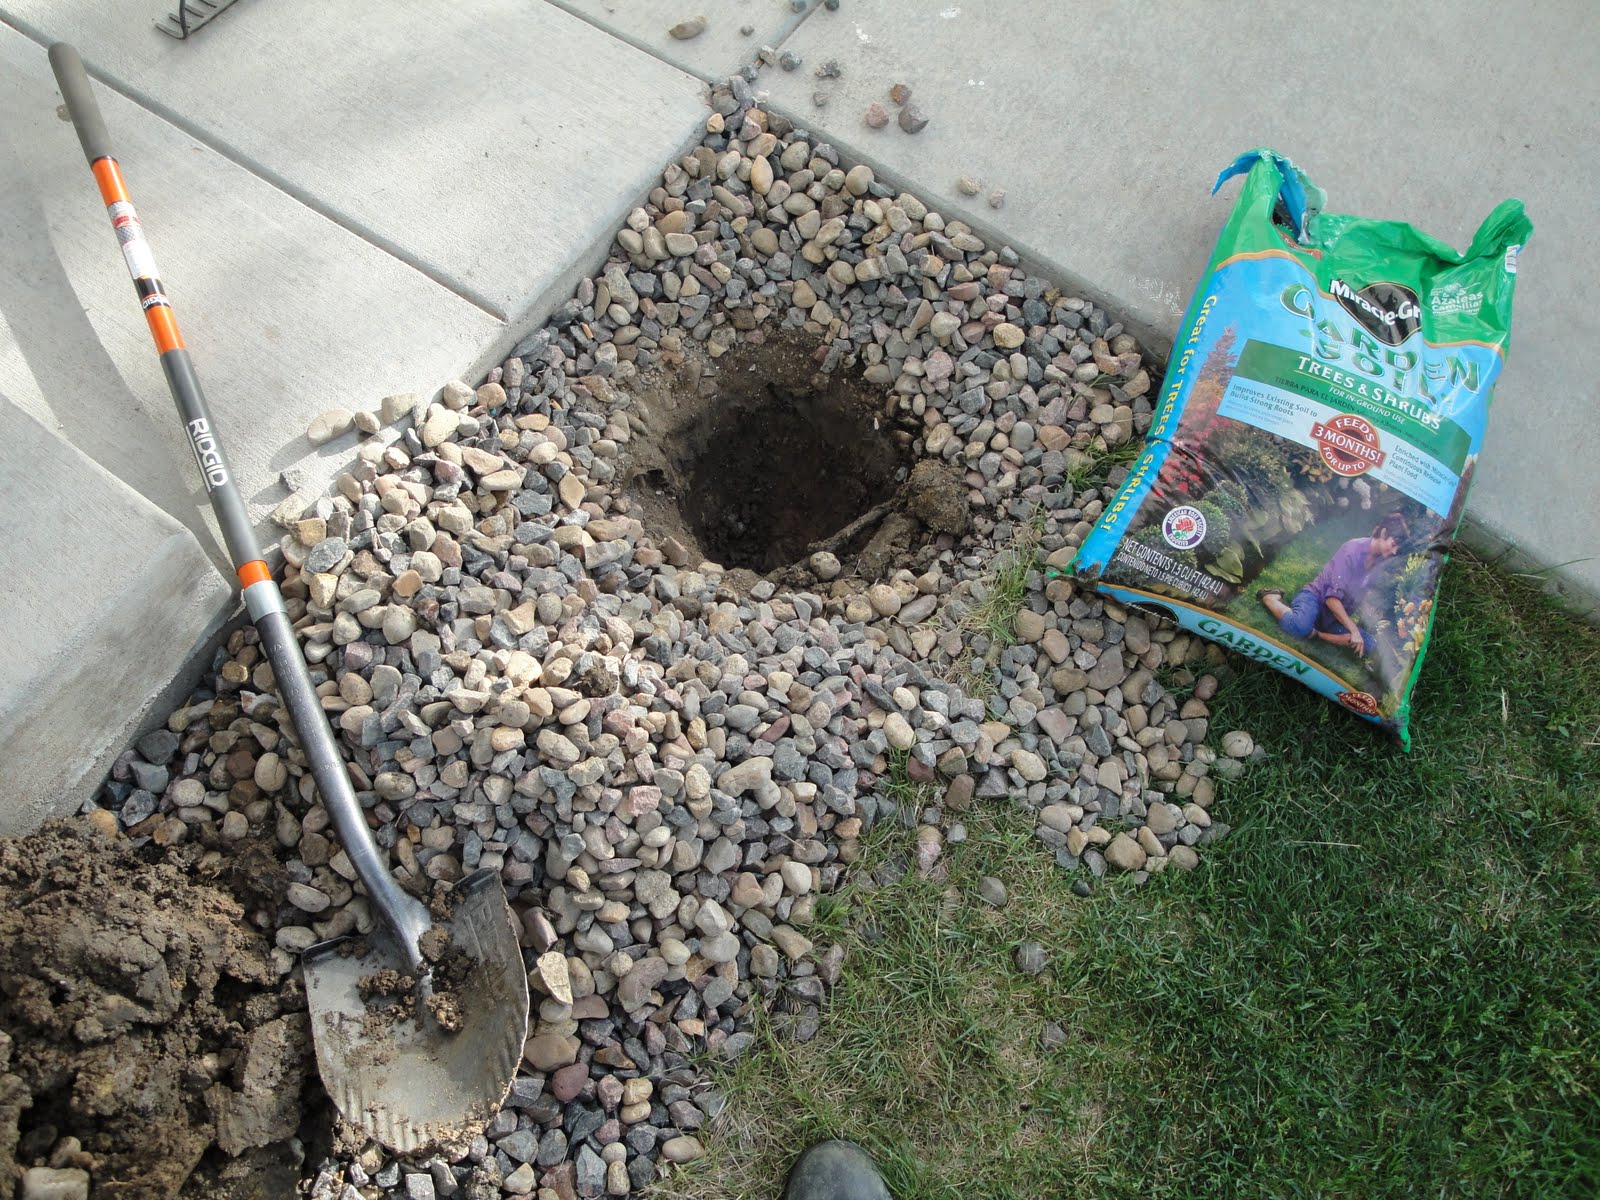
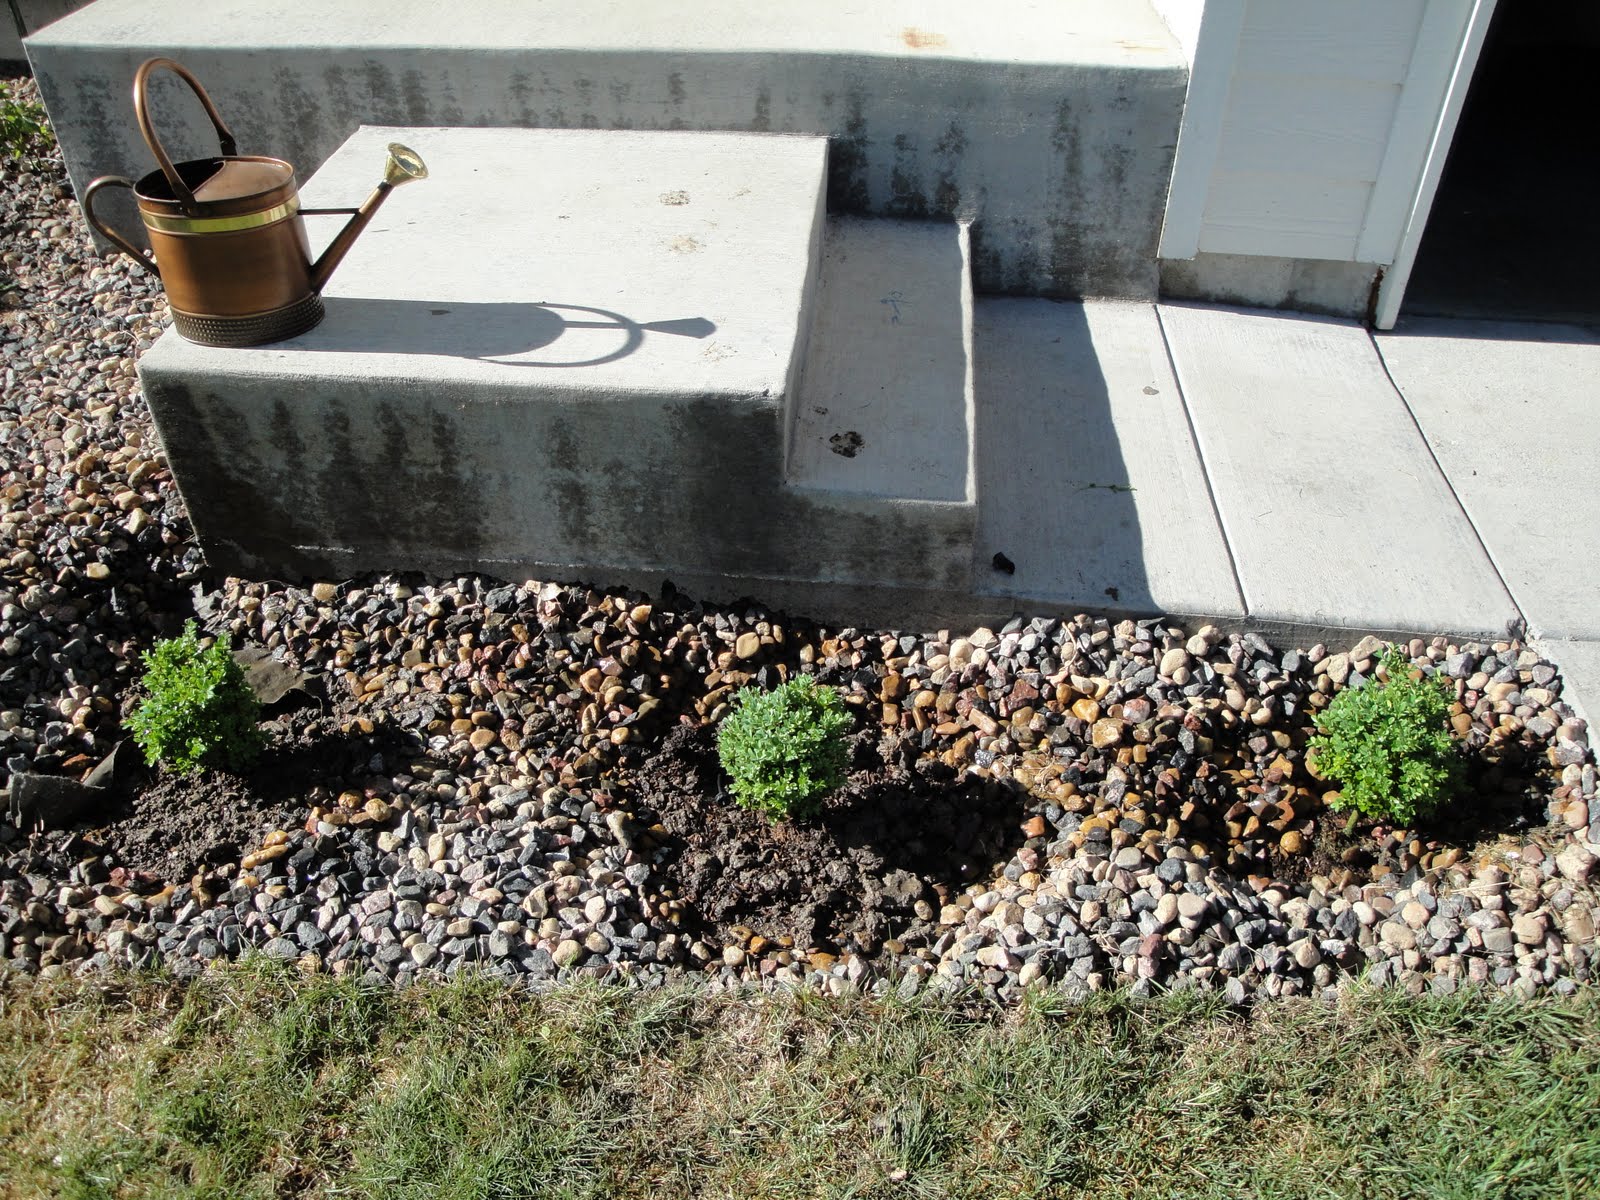
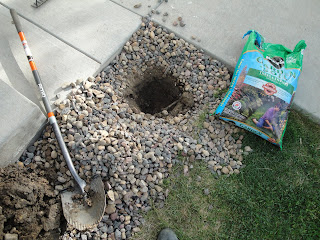 Yes, that shovel is as badass as it looks. I have to chain it up at night so I don't wake up to corpses scattered around the driveway. Also, it digs holes real good. We decided that this little rock area in front of the steps needed something, and we both love little boxwood shrubs. We got three of them ($5 each at Lowe's) and dropped them in.
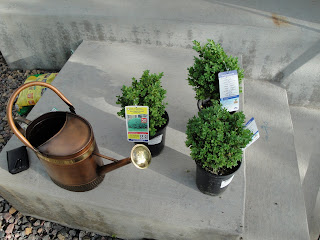 Yay, shrubs! That watering can is a new acquisition, too. Costco was short on plants, but they had some good garden tools and goodies. I got three new pairs of leather gloves, so I'll have backups for when I have a glove blowout going 75 MPH down my back fence.
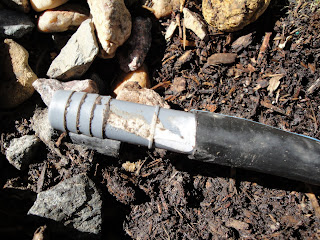
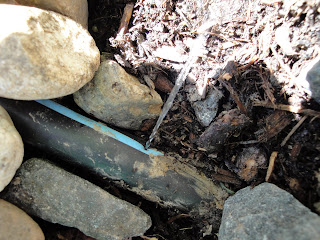
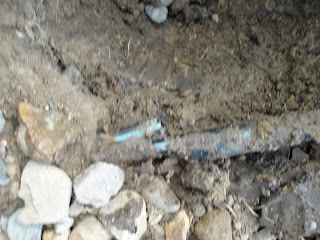 Sorry for the blurriness, but the picture isn't that interesting anyway. It's just to show you that I tagged one of the sprinkler lines with my shovel (He dug too greedily, and too deep). I'm going to pretend I did it on purpose just so I could show you how to fix a broken sprinkler line. Clever of me, huh?
 This was the first attempted fix. Terrible plan. This has those Gator Bite teeth in it, so it's supposed ot be a push-on solution, but it only works with some of the newer pipes. Mine are the old blue-stripe style, and they need something a little more old school.
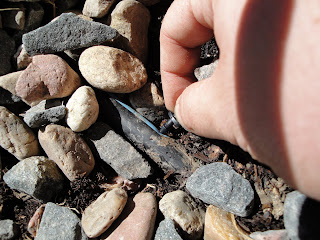
 I cut these off cleanly, and I probably took too much off. The less you take off the better on this stuff.
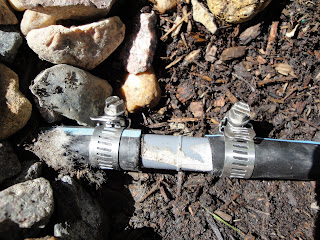
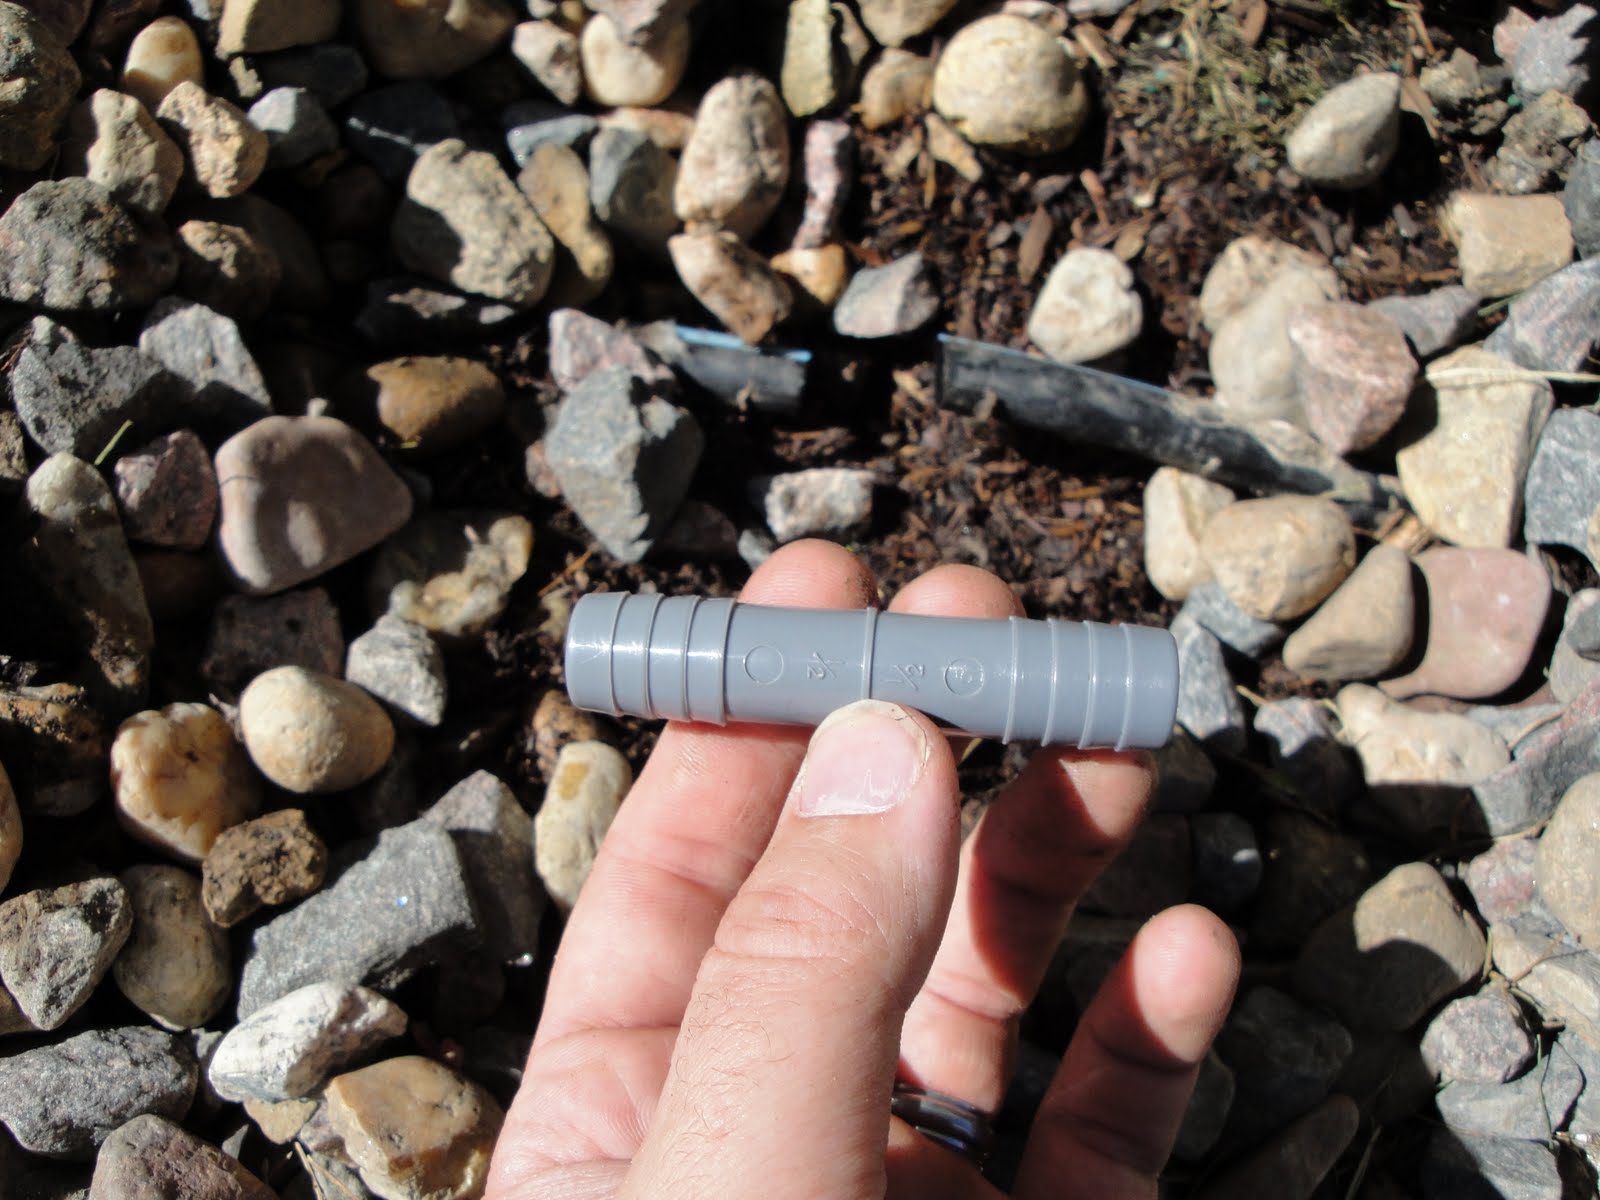
 This is the patch piece. They have them in all different sizes, but I think the standard for sprinkler lines (big ones, not the tiny feeder lines) is 1/2". Get one of these. If you really screw up, you can probably find a longer one, or cobble something together using a few of them and some spare line.
 Stick this in, but not too far. Getting it out again is a huge pain. I had some vegetable oil handy to get it slick in case it didn't want to go, but these were pretty easy. I've helped my dad work on my sister's sprinklers and they were really ornery. These went in just fine.
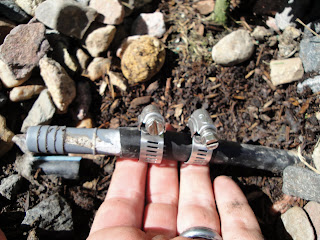 Get a couple hose clamps and slip them on before you put the connector into the other end. You can get most any size, but you should probably get the smallest ones that will fit comfortably on the hose so you don't have to spend a week tightening them.
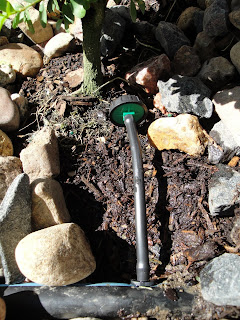
 Tighten these suckers down really hard. These clamps are going to keep you from leaking, so go to town on them. There we go. I turned the little valve in my sprinkler box (so handy to know about) and I had no leaks, which is really all a man can ask for.
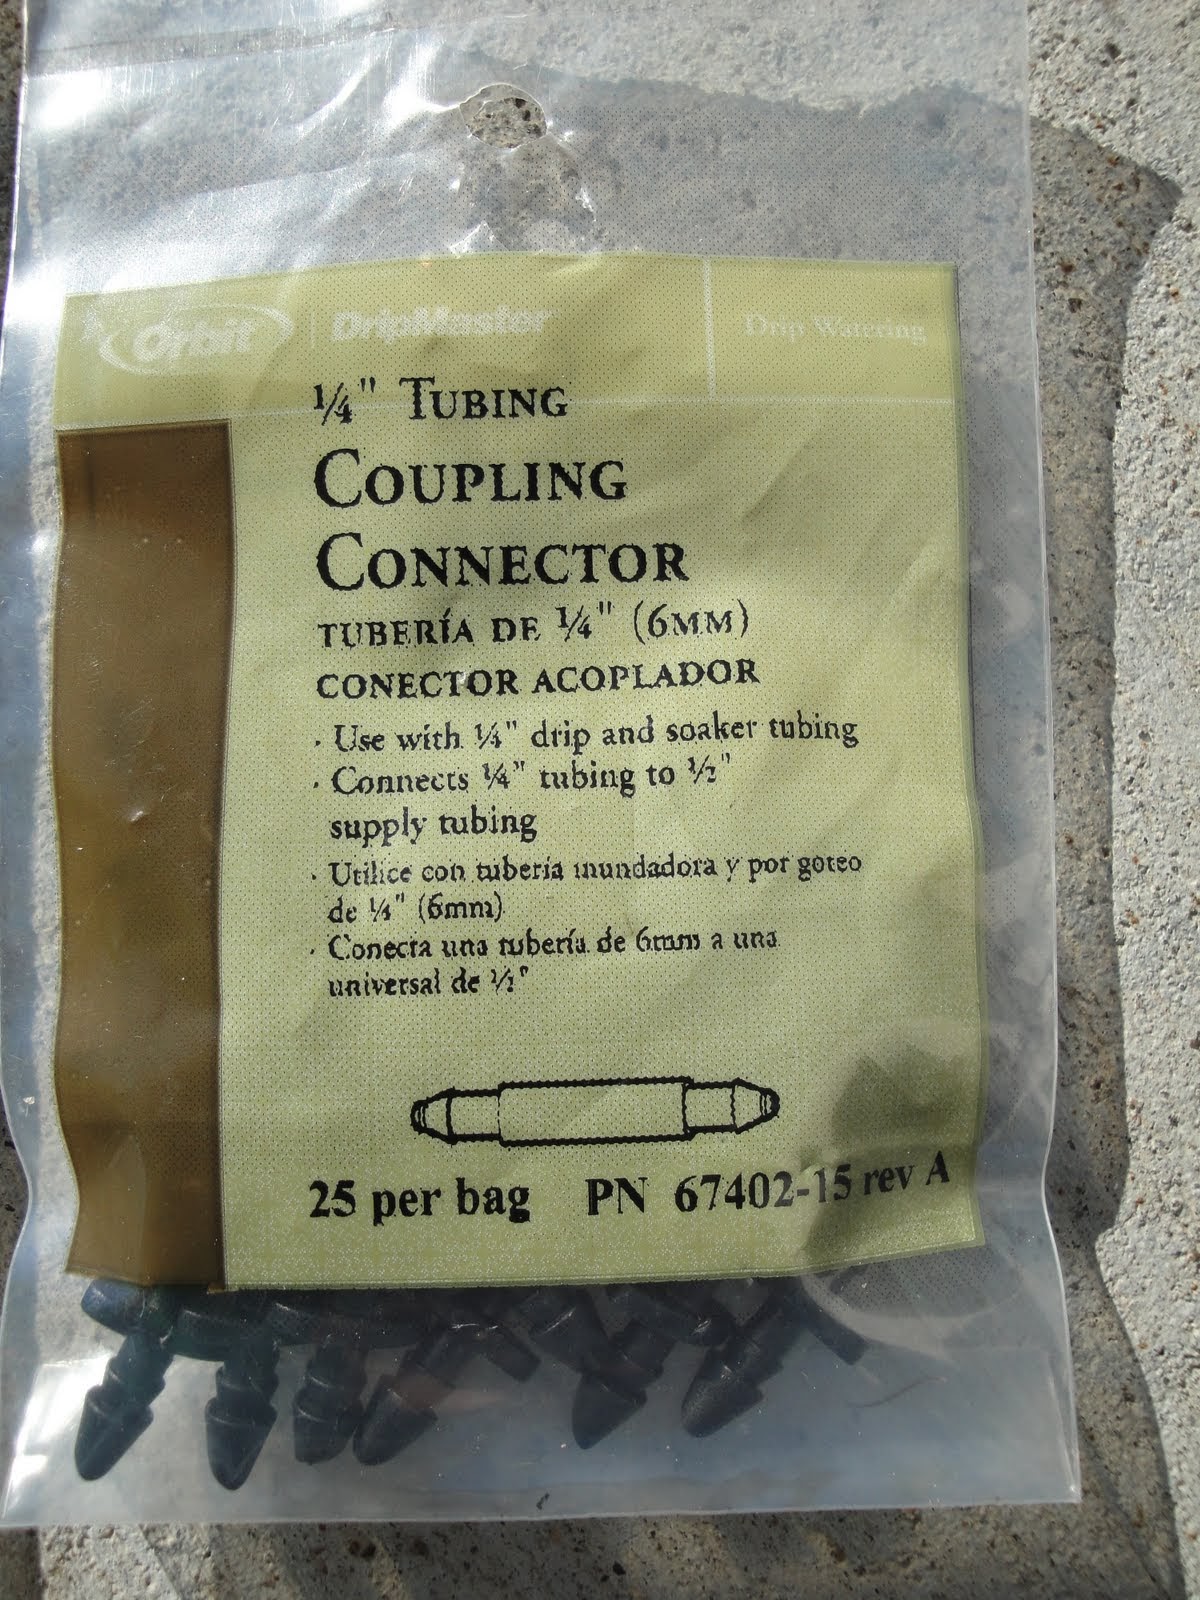
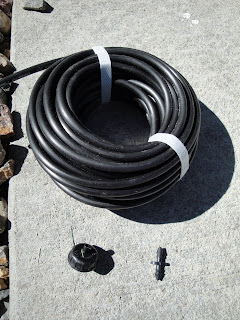 Now that the pipe is fixed, I can put in the drippers. You'll need some 1/4" feeder line, first. Make sure it says feeder, not soaker or dripper. Some of them will have holes in them and some are made of this weird stuff that just lets water soak right through the pipe. You'll also need some of these:
 And some of these:
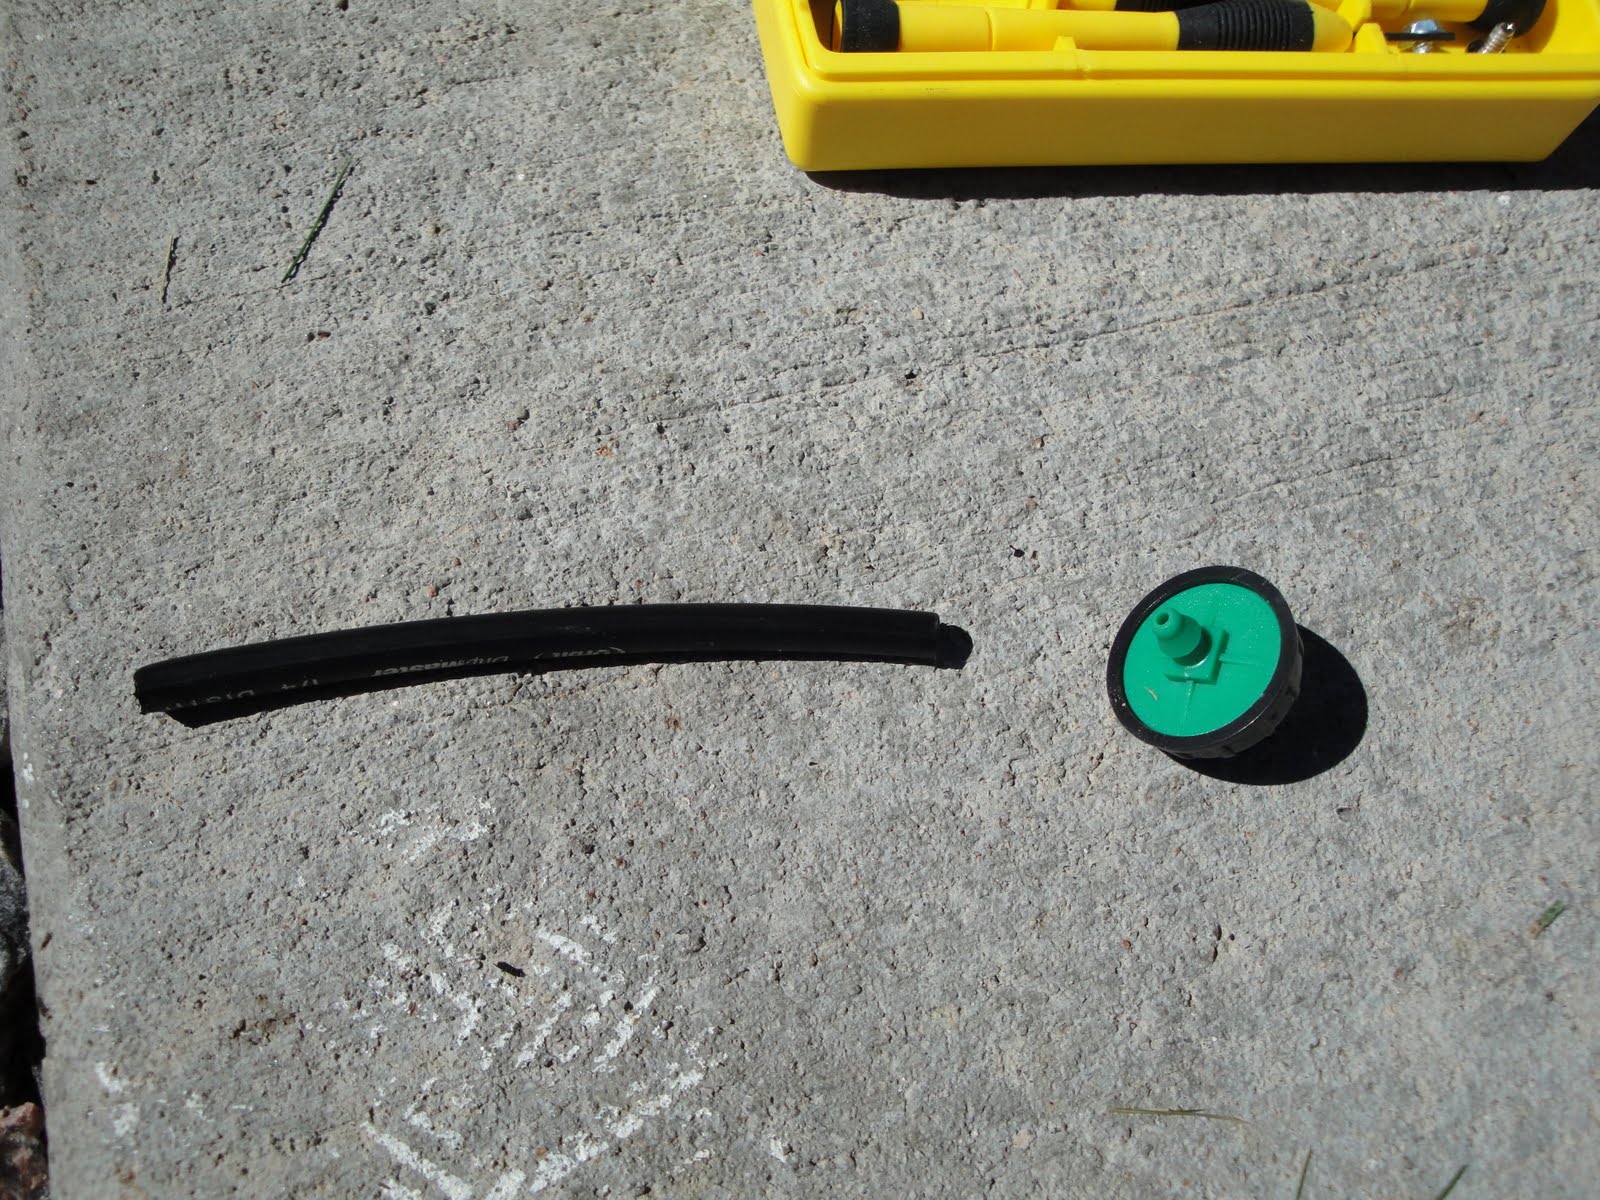
 We got 2 GPH drippers because we only have the drip system on for about 10 minutes. Hopefully that will be enough water for everyone. If not, you can always turn the drip system on for longer, or change out the drippers themselves.
 Poke a small hole in your water line. I used a tiny screwdriver, but an awl would work fine, too. There's water spraying out of here because the lines were still full from my leak test. It didn't slow me down or anything, so don't worry about it too much if yours leaks.
 Take one of the little pokey plug things and just poke it into the hole. It seems overly simple, but it works.
 Cut a length of the feeder line to reach from your main line to the roots of the plant. Grab a dripper. Put them together.
 That's the way!
 Now push the feeder tube onto the pokey deal and you're all done. Your drippers will drip and your plants will grow. Hooray! This whole project seriously takes like a minute, so there's no reason not to do it. Adding more outlets to your sprinkler system is really easy and a great way to minimize your maintenance in your yard. When we build our raised garden beds, we're totally running sprinklers through it and tying them into this system.
 Look how cute our little bushes are! Boxwoods are great shrubs. These are called Dwarf English Boxwoods and they're supposed to get 3-5' tall and 3-5' wide. The best part about boxwoods is that they're evergreens, so they'll still look good in the winter. The other best part is that they are hedge-worthy, so you can clip them into cool shapes if you want. Way cool!
 This is our little planter all done. The grasses there are really neat. They have little seeds on the end of each strand so they sort of look like fiber optics. We also planted some English Ivy next to the tree so it can climb the trunk. The rest are a couple little groundcover dudes. Some Aurea Irish Moss and some Blue Star Creeper. We're hoping it'll all mound up and get little tiny flowers on it. That's what it's supposed to do, anyway.
So there we are. Here's our great new front yard:
 Thanks for reading!


So there we are. Here's our great new front yard:

Subscribe to:
Posts (Atom)
