I haven't been posting mostly because we haven't been doing much. We're trying to unpack a little and get settled a bit, but mostly we're taking a break from everything. I've been working on getting our family room set up, A/V-wise. It hasn't been very easy, because the whole house is wired. Oddly, that's making it tougher than it would otherwise be right now. I'm going to find a way to work it to my advantage, though. Here's the situation right now. Remember this guy?
This is the vaunted "Structural Wiring" panel in the basement. You can't see it very well, so I made a diagram for you.
It looks pretty simple, and as near as I can tell, it is pretty simple. However, it also seems like it isn't really working very well. Unfortunately the manual for it is a little vague on some very important topics, and the websites for the companies involved are almost astonishingly unhelpful. Here's my understanding of all of this after having read the manual and doing some testing.
It all starts with the main cable line. That comes in from the outside and plugs into the CATV port in the top portion. The signal from there is distributed to the coax ports on the right. It's more or less an 8-way splitter. It's powered so it may be doing some kind of repeating instead of just splitting, but the function is similar. The 8 plugs on the left are other inputs. This is a neat idea, but I have yet to find anything useful to do with them. If you had a lot of video sources that output their signals on a coax cable, you could plug them into those ports and the signal would be visible on any TV hooked up to one of the ports on the right. Nothing except an NES or a VCR actually has a coax out anymore, so this is pretty much useless. You can use an RF modulator or something to turn a composite video signal into coax, but at that point you're really talking about low quality. I still might do it, but I'm not as excited about it as I was.
The other ports up there will likely remain unused by me. The Video port is actually an input for security cameras. the company that makes this panel also makes security cameras with a coax output so you can plug it in here. From there, any TV in the house can view the camera feed, which is a neat idea. I'm not going to be installing security cameras (or am I?) so I won't be dealing with it. The other input is for satellite dishes, to distribute their signals to the other TVs in the house. We're not planning on getting satellite, so that's also out for us. That's the top panel.
The left lower panel is the "Data Center" as they call it. Right now, I call it the "Stone Age Crap Center" because that's roughly what it is. It's a 4-port hub, not a switch. For those of you who aren't big on tech, the difference is that hubs are slow and stupid and switches are fast and smart. Hubs slow down your traffic and drop information, switches organize your data so things don't get lost and keep it going at a good speed. The even worse part is that the hub is 10 Base-T which makes it about as slow as it can be and still be considered functional. Switches moved through 10 to 10/100 and are now at 10/100/1000. Soon they'll be up to 3000. Those numbers mean about as much to me as they probably do to you, but suffice it to say they're getting much faster. So, this data center is entirely useless to me.
Instead, I'm going to go with an 8-port 10/100 switch. Here's how the new setup will look:
Fancy, eh? I like making diagrams of these things so I can keep track of how much of everything I'll need. I'm going to need a load of 3' Cat5e patch cables, for sure. Anyway, back to functionality. The coax cable goes into the modem, comes out as network cable, goes into the router. This is an important step, and can't be avoided. Your cable provider will give you one IP address for your house. Your router will assign IP addresses to each other item in the house that is hooked to it. This is very important because every item on your network needs to have its own IP address so they don't get confused about where things are coming from or going to. I originally did this without the router and even though several items were hooked in, only one at a time could get internet access. Lesson learned. Thanks to Doyle for the heads-up on that one. So now you have your router (which probably has 1 input port and 4 output ports) but where do you go from there? For me, I have more than 4 things that need to be hooked up. A lot more. An 8-port 10/100 switch is pretty cheap, and it's a good way to split your signals. If you're planning on transferring lots of files across your network on a regular basis, it might make sense to spend on the Gigabit switches (those are the 10/100/1000 I mentioned earlier) so your computers talk to each other more quickly. It won't speed up the internet (since that's like 20 Mb per second at the most, and even your 10/100 switch won't ever get topped out at that rate) but it will speed up internal file transfers. If you're way more advanced than I am and you have a video server somewhere that streams HD video to various sources around the house, then gigabit is the way to go. I'm not that guy.
So, as you can see, we're going to have a whole lot of wires plugging into the switch in the basement to connect all the wall panels to the main source. This will also create a home network, which is an added bonus. It means we can access files from one computer from another computer. The really cool thing this allows us to do is to use the receiver in the family room as a media player, and play music or movies from any computer in the house. I haven't actually done any of this yet, but it should be possible for sure. You'll also notice that we have a switch plugged into a switch. This is acceptable, and is sometimes even preferable to plugging both switches into separate ports on the router. Really, as long as there is a router between the modem and the end product, you're probably going to be okay. The switch in the basement will get signal to all of the wall ports in the rooms, and a local switch in the family room will also split the signal out to our different toys. Brilliant!
So that's really what I've been doing. Trying to get everything set up properly now that we have cable and internet in the house. We have some plans for this weekend, too. Tonight we're going to the cabinet store to see about getting another upper cabinet and a replacement drawer for the one the previous owners mangled. I don't know what they did to it, and I shudder to think about the horrors that drawer must have endured. You're going to a better place now, drawer.
As always, thanks for reading. I know this was a bit less constructiony than my normal posts, so if you have any questions or if I explained anything especially poorly, please let me know.
Friday, May 14, 2010
Tuesday, May 11, 2010
|||||||||||||||||||||||||... Your Project is at 95%
Here is our upstairs hall bathroom when we first moved in:
It's a bit dark because the electricity was off on our first trip and we didn't have the new camera yet. It isn't terrible at first glance, really. The walls are sort of boring, it has the towel rack above the toilet (I hate that) and the toilet is sort of bleh. It also turned out that the caulk in the tub was starting to deteriorate, the toilet wasn't functional, the floors were seriously damaged, and everything was just dirty. They also had those lame plastic valves on everything.
This room has been one of the main things we've wanted to get finished up. It's the bathroom we're currently using as the master, since the master needs to be torn out and re-done. We changed out the valves pretty early on, since they were prone to breaking. We also cleaned the heck out of it, re-caulked most of the seams, and replaced the floor, as you know. Here are some pictures of the other things we've done recently, and then how it looks as of today.
This is the blue color we painted in here. At first it seems kind of light, but as you add more bright white to the room is starts to feel very rich and beautiful. I like it a lot now.
And the tile. The grout has all dried to a really nice, consistent color now. It's lighter than we had thought it would be, but it isn't bad by any stretch.
Now, for the next big project. We need a toilet in here, stat!
The toilet came in three boxes. The stool, the tank and the lid. It's a Toto Drake and it came highly recommended.
Unfortunately, we didn't get a lot of pictures of the process, but I can walk you through them. The first thing to do is to get the stool attached to the floor. This has two steps. One, you have to put on the wax ring. Two, you have to bolt it down. Something to confirm on your toilet flange is that the slots where the bolts sit will allow for the toilet to sit perpendicular to the wall. It's tough to explain without pictures, so I'll have to be better about it on the next one we do. Since we have tile, we also had to get two wax rings. Don't skimp here, they're cheap. We got one that was a mega-sized ring with the bolts in there, which was nice. That's like $6. The main ring will have a plastic flange on it that fits into the drain pipe. You need one of those, for sure. You also want to get another one that doesn't have the plastic flange. They're less than $2. You stick the two together on the bottom of the toilet (called the "horn") and then turn it over and line it up on the drain. You have to have the bolts set into the flange at this point, since you won't be able to fit them underneath later. Set the toilet down on the drain, with the bolts coming up through the two holes in the base. You'll notice that it sits up pretty high on those wax rings. You need to exert some firm, even pressure on the stool as you twist slightly back and forth. You're trying to mash those two wax rings together and to the floor and stool so you get a nice water-tight seal. It'll take a little doing, but that's okay. Now you can attach the washers and nuts to the floor bolts. Don't over-tighten as you can crack your tile or the toilet itself. You need it to be firm enough that you're not going to move it when you sit on it, but that's about it.
Now, you need to put on the tank. The most important thing is for it to be level. Get a little torpedo level and set it on the tank front to back. Slide the tank around (it'll have a rubber gasket that fits into a hole on the stool) a little bit until you get it level, then tighten each bolt down a bit, going back and forth and keeping it level. For our toilet, we needed three points of contact for it to be stable. I don't know if that holds for all toilets or not, but your instructions should tell you.
Once the tank is on, you can attach your hose and fill it up. Give it a good flush or two just to make sure that it works and doesn't leak. If you didn't do your wax rings properly, you might see some water seeping out under the edges of the stool. Now is the time to fix it, so make sure you test it enough that you're confident there are no leaks. Here's what that looks like:
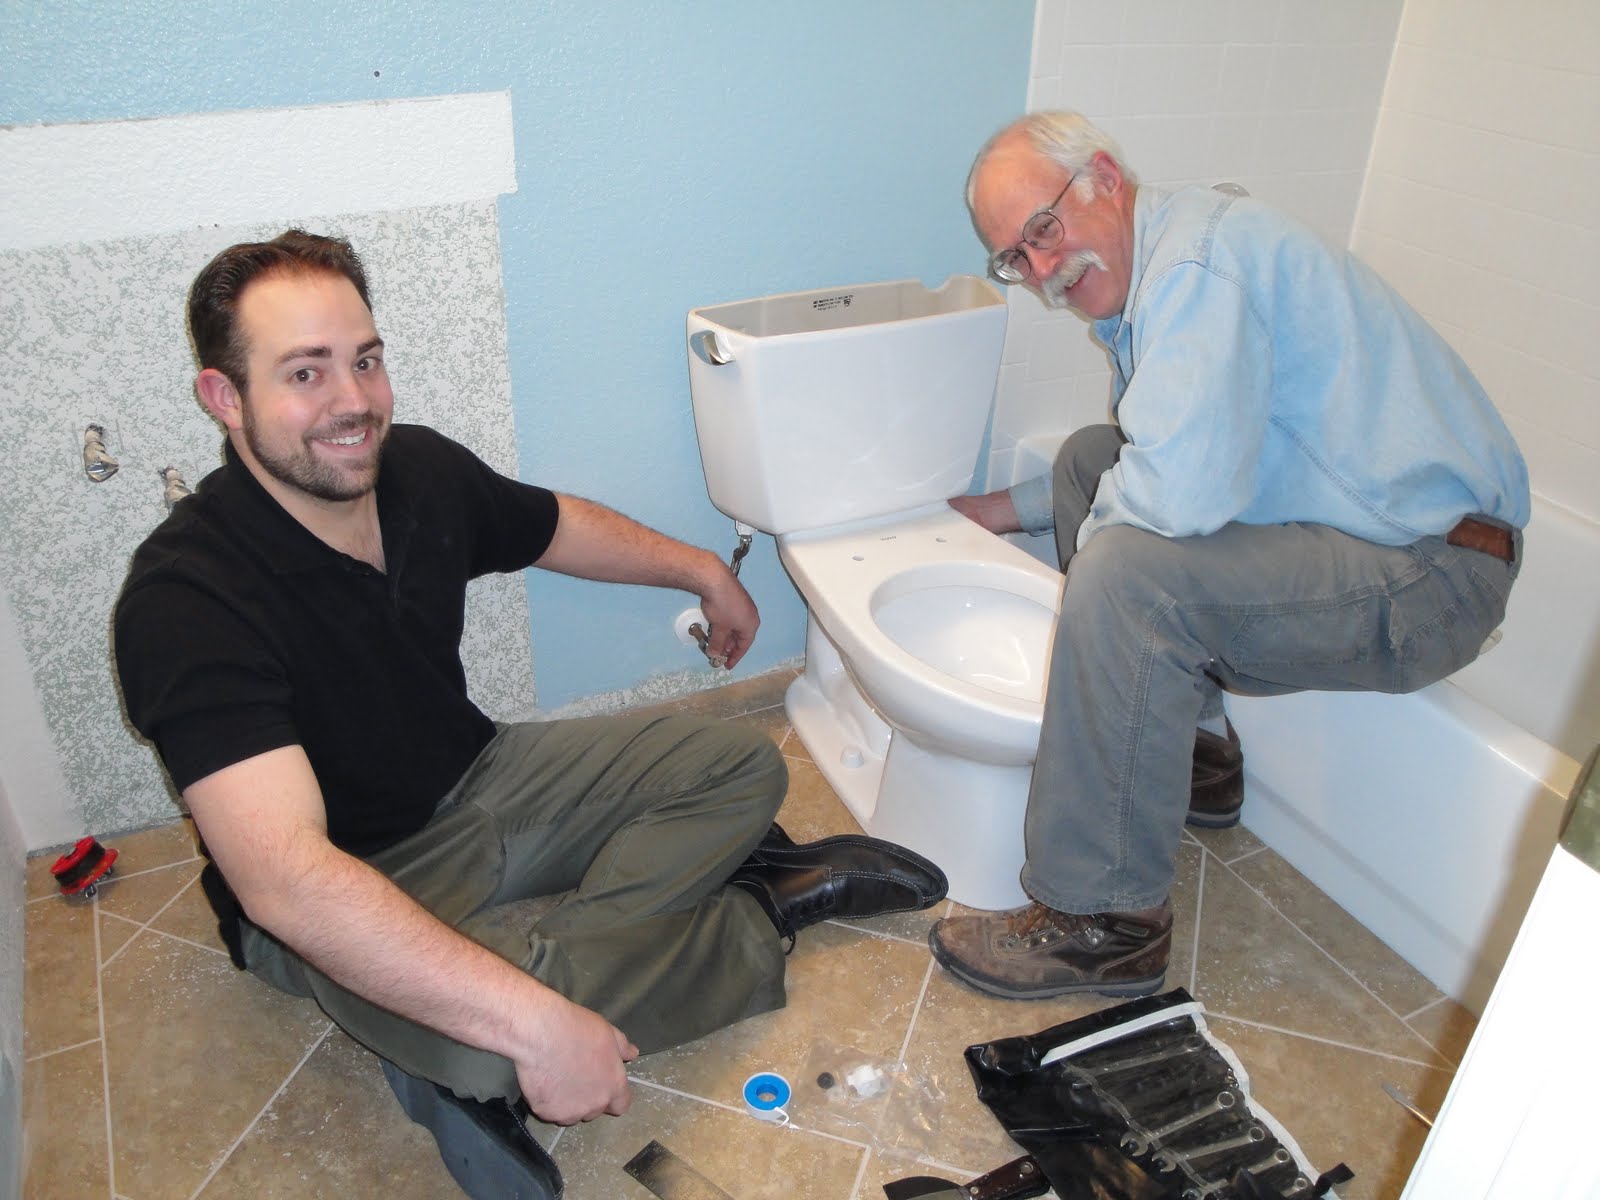
Yay, it works! Just slap the lid on there and you're good to go. Here we are, feeling mighty pleased with ourselves.
But our story isn't done yet! We still need to put a vanity right where I'm sitting. We'll also need a new mirror, since the old one won't fit. Keep that in mind when you do tile, by the way. Your floor height will raise by 1/2-3/4" and anything that fits perfectly probably won't anymore. For us, the vanity sits on top of the tile so it raised by a bit. The mirror used to go from the top of the counter straight to the light fixture, so that doesn't fit anymore. It's okay, we didn't like it anyway. We still have just a few more things to do, but we're very close now. The remaining changes are pretty minor and should go quickly.
Now that's a good-looking bathroom. We're going to remove that towel bar and put some pictures up there, probably in black frames.
We put up hooks for the towels instead of a bar. They take up less space, don't require any folding, and it gives sort of a spa look, I think.
Here's the tile floor, all clean and with the grout dried. Our cat also decided that he needed to make an appearance.
I also swapped in this soap dispenser this morning. I think it looks better in the room than the green one and I really love the style of it overall. Win!
We do have a little more to do. There's some touch-up paint to put up, we want to get a non-tension shower rod installed, we have to put up those pictures, patch some holes, install the baseboards...sounds like more than it feels like, but that's probably just due to our having done so much in there already. As always, I'll keep you all posted on it. Thanks for reading!
It's a bit dark because the electricity was off on our first trip and we didn't have the new camera yet. It isn't terrible at first glance, really. The walls are sort of boring, it has the towel rack above the toilet (I hate that) and the toilet is sort of bleh. It also turned out that the caulk in the tub was starting to deteriorate, the toilet wasn't functional, the floors were seriously damaged, and everything was just dirty. They also had those lame plastic valves on everything.
This room has been one of the main things we've wanted to get finished up. It's the bathroom we're currently using as the master, since the master needs to be torn out and re-done. We changed out the valves pretty early on, since they were prone to breaking. We also cleaned the heck out of it, re-caulked most of the seams, and replaced the floor, as you know. Here are some pictures of the other things we've done recently, and then how it looks as of today.
This is the blue color we painted in here. At first it seems kind of light, but as you add more bright white to the room is starts to feel very rich and beautiful. I like it a lot now.
And the tile. The grout has all dried to a really nice, consistent color now. It's lighter than we had thought it would be, but it isn't bad by any stretch.
Now, for the next big project. We need a toilet in here, stat!
The toilet came in three boxes. The stool, the tank and the lid. It's a Toto Drake and it came highly recommended.
Unfortunately, we didn't get a lot of pictures of the process, but I can walk you through them. The first thing to do is to get the stool attached to the floor. This has two steps. One, you have to put on the wax ring. Two, you have to bolt it down. Something to confirm on your toilet flange is that the slots where the bolts sit will allow for the toilet to sit perpendicular to the wall. It's tough to explain without pictures, so I'll have to be better about it on the next one we do. Since we have tile, we also had to get two wax rings. Don't skimp here, they're cheap. We got one that was a mega-sized ring with the bolts in there, which was nice. That's like $6. The main ring will have a plastic flange on it that fits into the drain pipe. You need one of those, for sure. You also want to get another one that doesn't have the plastic flange. They're less than $2. You stick the two together on the bottom of the toilet (called the "horn") and then turn it over and line it up on the drain. You have to have the bolts set into the flange at this point, since you won't be able to fit them underneath later. Set the toilet down on the drain, with the bolts coming up through the two holes in the base. You'll notice that it sits up pretty high on those wax rings. You need to exert some firm, even pressure on the stool as you twist slightly back and forth. You're trying to mash those two wax rings together and to the floor and stool so you get a nice water-tight seal. It'll take a little doing, but that's okay. Now you can attach the washers and nuts to the floor bolts. Don't over-tighten as you can crack your tile or the toilet itself. You need it to be firm enough that you're not going to move it when you sit on it, but that's about it.
Now, you need to put on the tank. The most important thing is for it to be level. Get a little torpedo level and set it on the tank front to back. Slide the tank around (it'll have a rubber gasket that fits into a hole on the stool) a little bit until you get it level, then tighten each bolt down a bit, going back and forth and keeping it level. For our toilet, we needed three points of contact for it to be stable. I don't know if that holds for all toilets or not, but your instructions should tell you.
Once the tank is on, you can attach your hose and fill it up. Give it a good flush or two just to make sure that it works and doesn't leak. If you didn't do your wax rings properly, you might see some water seeping out under the edges of the stool. Now is the time to fix it, so make sure you test it enough that you're confident there are no leaks. Here's what that looks like:
Yay, it works! Just slap the lid on there and you're good to go. Here we are, feeling mighty pleased with ourselves.
But our story isn't done yet! We still need to put a vanity right where I'm sitting. We'll also need a new mirror, since the old one won't fit. Keep that in mind when you do tile, by the way. Your floor height will raise by 1/2-3/4" and anything that fits perfectly probably won't anymore. For us, the vanity sits on top of the tile so it raised by a bit. The mirror used to go from the top of the counter straight to the light fixture, so that doesn't fit anymore. It's okay, we didn't like it anyway. We still have just a few more things to do, but we're very close now. The remaining changes are pretty minor and should go quickly.
Now that's a good-looking bathroom. We're going to remove that towel bar and put some pictures up there, probably in black frames.
We put up hooks for the towels instead of a bar. They take up less space, don't require any folding, and it gives sort of a spa look, I think.
Here's the tile floor, all clean and with the grout dried. Our cat also decided that he needed to make an appearance.
I also swapped in this soap dispenser this morning. I think it looks better in the room than the green one and I really love the style of it overall. Win!
We do have a little more to do. There's some touch-up paint to put up, we want to get a non-tension shower rod installed, we have to put up those pictures, patch some holes, install the baseboards...sounds like more than it feels like, but that's probably just due to our having done so much in there already. As always, I'll keep you all posted on it. Thanks for reading!
Moving in
This was a hectic weekend. No internet, for one thing. Also, we had to finish moving out of the apartment and get it cleaned up on Saturday. After a month of hard work on the house, that was just about the last straw. Thankfully we got to go out with some friends and get dinner and see Iron Man 2, so it was a great day overall.
However, the house is still a big horrible pile of mess. We aren't very well organized yet, and we need to start moving things down to the basement in earnest. The basement is the last place on the list that needs to be done, so things moved down there can be left alone for longer than things moved elsewhere. We're going to clear out the living room and the garage as much as possible and transfer things to the basement. Keeping some kind of organization down there is imperative, since we are regularly breaking into boxes to find stuff right now. Not sure how we'll do it, but I have faith in us.
Here, for your viewing pleasure, are some pictures of the house as it looks now:
That's the living room. We have a few things in there that need to be hauled out more quickly than others. One of them is a toilet that was sent to us in error that we need to pack up and send back. It should've been done a long time ago, but we've been a bit busy as you can see.
The garage. It actually has more stuff in it now, but I'm really hoping to get a lot of it pulled out soon. So much of it could fit in the basement and then we might even have enough space to work in here. Sounds crazy, right?
Also, we got the TV mounted. That's the culmination of a great big project. I learned some new things, too. You know how we had the wall panels with the HDMI ports? Well it turns out those only work if you have one in the line, not two. When we had both of them in the line, the signal got very messy and even got interrupted several times. As soon as I took one of them out, everything is sharp and perfect. I did a lot of testing, too, to see if it was an issue with one panel or the other, or some combination of the cables. It wasn't. Just some weird thing about having two connectors in there, I guess. It isn't the end of the world, since we have some extra cable that will go from the wall to the back of the receiver in the rear. Honestly, that's not even a little inconvenient, since the receiver will stay put the majority of the time, and it will cover the plate pretty well. I think the system is still very much what I was hoping for, I just could've saved myself $20 on another HDMI panel. Oh well, I suppose I'll have use for it somewhere later.
Here's the TV mounted. Don't mind the screen, it's supposed to look like that.
I'm going to be looking at speakers soon, and hopefully picking them up and installing them shortly. I've changed my mind on them a bit. We want to do an actual dedicated media room at some point, and I was hoping to get some speakers that we could transfer down there. I'm now thinking that getting some good, but less-expensive speakers is the way to go here. Part of it is that I really want to get this room functional as soon as possible, but part of it is also that I don't want to put really nice speakers in an area that won't really do them justice. I'd rather put them in the media room and have them be perfect and amazing than get used to them in the family room and have them feel like old hat by the time we move them downstairs. Maybe it's silly, but it makes some kind of sense to me. Thanks for reading!
However, the house is still a big horrible pile of mess. We aren't very well organized yet, and we need to start moving things down to the basement in earnest. The basement is the last place on the list that needs to be done, so things moved down there can be left alone for longer than things moved elsewhere. We're going to clear out the living room and the garage as much as possible and transfer things to the basement. Keeping some kind of organization down there is imperative, since we are regularly breaking into boxes to find stuff right now. Not sure how we'll do it, but I have faith in us.
Here, for your viewing pleasure, are some pictures of the house as it looks now:
That's the living room. We have a few things in there that need to be hauled out more quickly than others. One of them is a toilet that was sent to us in error that we need to pack up and send back. It should've been done a long time ago, but we've been a bit busy as you can see.
The garage. It actually has more stuff in it now, but I'm really hoping to get a lot of it pulled out soon. So much of it could fit in the basement and then we might even have enough space to work in here. Sounds crazy, right?
Also, we got the TV mounted. That's the culmination of a great big project. I learned some new things, too. You know how we had the wall panels with the HDMI ports? Well it turns out those only work if you have one in the line, not two. When we had both of them in the line, the signal got very messy and even got interrupted several times. As soon as I took one of them out, everything is sharp and perfect. I did a lot of testing, too, to see if it was an issue with one panel or the other, or some combination of the cables. It wasn't. Just some weird thing about having two connectors in there, I guess. It isn't the end of the world, since we have some extra cable that will go from the wall to the back of the receiver in the rear. Honestly, that's not even a little inconvenient, since the receiver will stay put the majority of the time, and it will cover the plate pretty well. I think the system is still very much what I was hoping for, I just could've saved myself $20 on another HDMI panel. Oh well, I suppose I'll have use for it somewhere later.
Here's the TV mounted. Don't mind the screen, it's supposed to look like that.
I'm going to be looking at speakers soon, and hopefully picking them up and installing them shortly. I've changed my mind on them a bit. We want to do an actual dedicated media room at some point, and I was hoping to get some speakers that we could transfer down there. I'm now thinking that getting some good, but less-expensive speakers is the way to go here. Part of it is that I really want to get this room functional as soon as possible, but part of it is also that I don't want to put really nice speakers in an area that won't really do them justice. I'd rather put them in the media room and have them be perfect and amazing than get used to them in the family room and have them feel like old hat by the time we move them downstairs. Maybe it's silly, but it makes some kind of sense to me. Thanks for reading!
Wednesday, May 5, 2010
Stuffed and Mounted
That's right, kids. The family room A/V setup is finally complete. The TV swing arm is mounted, the speaker ports are moved, the wires are connected and everything is ready for the install. Woot!
Here's the process, or at least a bit of it.
Connecting the frame to the wall with these wicked 3" lag bolts. Where's this thing going? Nowhere. Note the level on there, too. A torpedo level (as these are known) is a really handy tool for this job. They tend to have a magnetic edge so they'll stick to the frame. The two biggest keys to this process are finding the centers of your studs and making sure the frame is level. Finding the centers of the studs is sort of a neat process. I didn't get pictures of it, but I can try to describe it to you.
First, get a stud-finder from the hardware store. Then use it. Now you're done. ta-da! No, that's not really it. The stud finder will give you a pretty good idea of where the edges of the studs are, but you can't trust it with something like this. If you're just hanging a picture or a shelf or something, you're probably okay with just getting the screw into the stud. When you're hanging a flat-screen TV on a 3-foot arm, you want a damn solid connection. That's when you need to get dead-center in your studs. The way to do this is to use the stud finder to show you were the edges of the studs are. You do this by swiping it along the wall left to right and marking where it beeps, then right to left and marking where that beeps. That should give you the edges of your studs. There are some new fancy ones that will actually beep at you when you hit the center of the stud (we used one) but even then, you want manual confirmation. Get some tiny nails with decent-sized flat heads. By tiny I mean diameter. You need them to be at least 2" long so you can be sure they're getting through the drywall (even if there's a patch or a double layer or something funky). Drive the nails into the drywall just outside where the stud finder said they were. If you go straight through the drywall and don't hit stud on either side (and the distance between them is the width of a stud, 1.5") then you just measure to the middle of those nail holes and that's your center. If you do hit stud, adjust left or right until you don't hit the stud anymore. Measure to the other side of the stud and drive another nail. You really want a nail on each side of the stud, 1.5" apart to be certain you know where the center is. Once you have that, make a mark in the middle of the nails and then run a level up and down to make sure you're plumb. Repeat for the other side and you're good to go.
A few handy things to note: Studs are generally 2x4 boards. 2x4 is a misnomer, as they're actually 1.5"x3.75". Studs are also supposed to be 16" on center. That means the center of one stud and the center of the one next to it should be 16" apart. This is very handy, as it lets you estimate where the next stud should be so you don't have to drive nails all over the wall. This is such a standard measurement that a lot of shelves and TV mounts and other things that go on the wall will have holes specifically spaced to drive into the studs. Kinda neat.
Level, plumb, and now all done. Heck yes.
I'm thinking I may hit up the audio store this weekend while we're taking a break to see if I can find the speakers and receiver I want. We won't be getting them right away, but I'd at least like to confirm that the ones I want are indeed the ones i want.
Here's the process, or at least a bit of it.
Connecting the frame to the wall with these wicked 3" lag bolts. Where's this thing going? Nowhere. Note the level on there, too. A torpedo level (as these are known) is a really handy tool for this job. They tend to have a magnetic edge so they'll stick to the frame. The two biggest keys to this process are finding the centers of your studs and making sure the frame is level. Finding the centers of the studs is sort of a neat process. I didn't get pictures of it, but I can try to describe it to you.
First, get a stud-finder from the hardware store. Then use it. Now you're done. ta-da! No, that's not really it. The stud finder will give you a pretty good idea of where the edges of the studs are, but you can't trust it with something like this. If you're just hanging a picture or a shelf or something, you're probably okay with just getting the screw into the stud. When you're hanging a flat-screen TV on a 3-foot arm, you want a damn solid connection. That's when you need to get dead-center in your studs. The way to do this is to use the stud finder to show you were the edges of the studs are. You do this by swiping it along the wall left to right and marking where it beeps, then right to left and marking where that beeps. That should give you the edges of your studs. There are some new fancy ones that will actually beep at you when you hit the center of the stud (we used one) but even then, you want manual confirmation. Get some tiny nails with decent-sized flat heads. By tiny I mean diameter. You need them to be at least 2" long so you can be sure they're getting through the drywall (even if there's a patch or a double layer or something funky). Drive the nails into the drywall just outside where the stud finder said they were. If you go straight through the drywall and don't hit stud on either side (and the distance between them is the width of a stud, 1.5") then you just measure to the middle of those nail holes and that's your center. If you do hit stud, adjust left or right until you don't hit the stud anymore. Measure to the other side of the stud and drive another nail. You really want a nail on each side of the stud, 1.5" apart to be certain you know where the center is. Once you have that, make a mark in the middle of the nails and then run a level up and down to make sure you're plumb. Repeat for the other side and you're good to go.
A few handy things to note: Studs are generally 2x4 boards. 2x4 is a misnomer, as they're actually 1.5"x3.75". Studs are also supposed to be 16" on center. That means the center of one stud and the center of the one next to it should be 16" apart. This is very handy, as it lets you estimate where the next stud should be so you don't have to drive nails all over the wall. This is such a standard measurement that a lot of shelves and TV mounts and other things that go on the wall will have holes specifically spaced to drive into the studs. Kinda neat.
Level, plumb, and now all done. Heck yes.
I'm thinking I may hit up the audio store this weekend while we're taking a break to see if I can find the speakers and receiver I want. We won't be getting them right away, but I'd at least like to confirm that the ones I want are indeed the ones i want.
Tuesday, May 4, 2010
Grout Expectations
I didn't really know what to do with the grout, to be honest. The videos I'd watched on tile talked about it, but they had some kind of semi-magical technique they were using to get the grout to stick into the grooves. I think I ended up doing it pretty well, but I feel confident it will only get better as I go. On another note, I figured out why my camera kept running out of batteries. Apparently, when I plug it into the computer to pull pictures off of it, it will stay turned on, acting as a flash drive, until I unplug it. The power required to keep it in that state will drain the battery after a few hours. Now I know, and I won't be forced to use my cell phone as a camera again, like I unfortunately did last night. Thanks to my dad for taking pictures of me while I grouted.
Grout is an interesting thing. It's more or less just colored mortar and comes in two basic types. You have sanded grout and unsanded grout. Sanded grout is just grout with sand in it. The sand helps give it body and keep it from cracking and pulling away from whatever you're sticking it to. The same principle applies when making cob or various earth plasters. Sanded grout is for any grout lines that are 1/8" or wider. Since we were using 1/8" grout lines, sanded was the only way to go. Unsanded grout is only for very very small grout lines, but I get the feeling it doesn't get a lot of use.
Normally, you mix the grout (which comes in a bag as a powder, like most of these things) with water to get to the desired consistency. A trick we learned is to use distilled water in the mix to get the most accurate color. Another trick we learned (at Floor & Decor on County Line and University, where we got our tile and our wood floors because they are AWESOME) is to use a grout additive called "Grout Boost." Grout is a porous beast, being mostly cement. Normally, you have to seal your grout with a penetrating silicone sealer to keep water and other liquids from soaking in and staining it. With the Grout Boost, you just mix the grout powder with the Grout Boost and don't even use water. The idea is that the penetrating sealer is in the mix from the beginning and you never have to seal again. With 13x13 porcelain tiles with thin grout lines, a dark grout and this booster, we are hoping never to have to worry about stained grout ever again. Another nice thing with the grout boost is that the container is designed to mix with a 10-pound bag of grout powder. This ended up being way too much for the job we had to do, but I'd rather have too much than not enough. Getting a direct mix like that got me to the correct consistency without me really needing to know what the correct consistency looked like. If the thinset under the backer board was a milkshake and the thinset under the tile was peanut butter this was more like...slightly damp sand. Seriously. You basically want to mix it as dry as possible. It should be spreadable but not pourable. It should still have a gritty feel to it, unlike the other mixes which end up looking very smooth.
Now, you have some tools of the trade. One of these is a bucket of water and a sponge. I only used one sponge for this small floor, but a few extras are always a good idea. You also need a bucket in which to mix your grout. I suggest the 5-gal buckets from Lowe's or Home Depot. They're cheap (less than $2.50 each these days) and they're far more durable than lesser buckets. Both times I tried to use a cheaper bucket, I ended up punching a hole in it. Don't skimp on your bucket. Get the 5-gal and you can beat the snot out of it and get a few uses out of it at least. You can clean the grout or thinset out of your bucket if you take it out and hose it off relatively quickly. Next, you'll need a grout float. This is like a trowel in that it is a flat piece with a handle on the back. It is unlike a trowel in that the bottom of it is rubber or foam. This keeps it from scratching your tile, which is very good. A margin trowel is also handy for mixing the grout and for putting it onto the floor. Really, that's about it for tools. You'll want rubber gloves on for all of this, but you should probably be wearing gloves for most anything I discuss on this blog.
The technique is a little strange and I wish I had better pictures or even a video of it. Really, you're just using the float to shove the grout into the grooves between your tile. Before you begin, it's a good idea to check all your grooves and make sure they're clear. Ideally, this should be done when you lay the tile, but you can hit the edges with a plastic scraper or even a wooden paint stir stick, like I did. Anywhere you see thinset on the surface of the tile or the edges of the tile, clean it off with something that isn't metal and won't damage your tile. I was surprised at how well the stir stick worked and I think I'll use it again. After you do all this, take a shop-vac to the surface and clean out any dust or remaining particles of thinset. You want a clean surface so your grout can bond effectively. Now, use your margin trowel to drop some grout onto the tile. You won't need a lot and you'll get a feel for how much can cover what area as you go. Start in the far corner and work your way out of the room. Use your float to press the grout into the grooves. It's sort of a "push/pull" movement that's very hard to describe. Most any movement that gets the grout into the groove will work but I had some luck with the movement from the video. You're leaning the front edge (away from you) of the float up and pushing, then leaning the back edge up and pulling. As you go back and forth over the grooves, the grout will be pressed into them. You'll work up a sweat doing this, and you'll get into a rhythm before too long. Just keep an eye on your lines and fill in with extra grout anywhere that looks low. As you finish an area, tilt the back of the float up at about 45º and pull it towards you. You want to pull across your grout lines diagonally, never parallel or perpendicular to them. This is so that you don't pull more grout out of the lines you just filled. With a horizontal border and diagonal tiles, this is really tough. I ended up tilting the float on the vertical about 45º and angling it left or right about 15º to avoid pulling grout out of the lines. It takes a little getting used to, but it isn't bad. Finish the whole floor this way, and check to make sure you haven't missed any.
Now that you have grout in your grooves, you need to be very careful not to step on the grooves. Only step in the middle of the tiles. With my giant feet, this is easier said than done. This is where your sponge comes in. Your grout lines will likely be roughly even with the tops of the tiles and you need then to be recessed very slightly. You take your sponge, squeeze it out, and run it along each grout line. Run the sponge once and clean it out. I fudged a little with different corners and stuff, but really you want to be wiping with a clean sponge every time. If your sponge isn't clean, you'll end up pulling up more grout than you want or laying down new grout and making the lines messy. Each lines gets one swipe. It's just enough to smooth them out and recess them beneath the surface of the tile very slightly. Here's a picture of me doing this very thing:
This is pretty much your last step. You'll be left with something called "grout haze" on the faces of your tile, but don't worry about that now. You can take some cheesecloth to it in a few days and clean that off pretty well. Let your grout sit for at least 24-48 hours before you step on it, and let it dry for at least 72 hours before you put any penetrating sealer on it. It's also a good idea to treat it gently for a week or two so everything can be 100% cured and dry before you mop or do anything else that would potentially damage the grout lines you worked so hard to make. Our friends suggested misting the grout daily with distilled water to help make sure the top doesn't dry and crack before the bottom is all the way dry, so we're going to give that a go as well.
Well, there we have it. A tile floor all the way done. Total materials for this room were less than $100, I believe. The tools were probably $50 or so, but we can use them again on other tile jobs. Not too shabby at all for our first try at this whole thing, I think. Here's a picture of the finished product:
*Edit*
I went back tonight and took some better pictures of the floor with our actual camera. Here they are:
I had a bit of a scare with the white grout, thinking it had discolored somehow. Turns out it's jut part of the drying process and it's working out just fine. Woot!
Grout is an interesting thing. It's more or less just colored mortar and comes in two basic types. You have sanded grout and unsanded grout. Sanded grout is just grout with sand in it. The sand helps give it body and keep it from cracking and pulling away from whatever you're sticking it to. The same principle applies when making cob or various earth plasters. Sanded grout is for any grout lines that are 1/8" or wider. Since we were using 1/8" grout lines, sanded was the only way to go. Unsanded grout is only for very very small grout lines, but I get the feeling it doesn't get a lot of use.
Normally, you mix the grout (which comes in a bag as a powder, like most of these things) with water to get to the desired consistency. A trick we learned is to use distilled water in the mix to get the most accurate color. Another trick we learned (at Floor & Decor on County Line and University, where we got our tile and our wood floors because they are AWESOME) is to use a grout additive called "Grout Boost." Grout is a porous beast, being mostly cement. Normally, you have to seal your grout with a penetrating silicone sealer to keep water and other liquids from soaking in and staining it. With the Grout Boost, you just mix the grout powder with the Grout Boost and don't even use water. The idea is that the penetrating sealer is in the mix from the beginning and you never have to seal again. With 13x13 porcelain tiles with thin grout lines, a dark grout and this booster, we are hoping never to have to worry about stained grout ever again. Another nice thing with the grout boost is that the container is designed to mix with a 10-pound bag of grout powder. This ended up being way too much for the job we had to do, but I'd rather have too much than not enough. Getting a direct mix like that got me to the correct consistency without me really needing to know what the correct consistency looked like. If the thinset under the backer board was a milkshake and the thinset under the tile was peanut butter this was more like...slightly damp sand. Seriously. You basically want to mix it as dry as possible. It should be spreadable but not pourable. It should still have a gritty feel to it, unlike the other mixes which end up looking very smooth.
Now, you have some tools of the trade. One of these is a bucket of water and a sponge. I only used one sponge for this small floor, but a few extras are always a good idea. You also need a bucket in which to mix your grout. I suggest the 5-gal buckets from Lowe's or Home Depot. They're cheap (less than $2.50 each these days) and they're far more durable than lesser buckets. Both times I tried to use a cheaper bucket, I ended up punching a hole in it. Don't skimp on your bucket. Get the 5-gal and you can beat the snot out of it and get a few uses out of it at least. You can clean the grout or thinset out of your bucket if you take it out and hose it off relatively quickly. Next, you'll need a grout float. This is like a trowel in that it is a flat piece with a handle on the back. It is unlike a trowel in that the bottom of it is rubber or foam. This keeps it from scratching your tile, which is very good. A margin trowel is also handy for mixing the grout and for putting it onto the floor. Really, that's about it for tools. You'll want rubber gloves on for all of this, but you should probably be wearing gloves for most anything I discuss on this blog.
The technique is a little strange and I wish I had better pictures or even a video of it. Really, you're just using the float to shove the grout into the grooves between your tile. Before you begin, it's a good idea to check all your grooves and make sure they're clear. Ideally, this should be done when you lay the tile, but you can hit the edges with a plastic scraper or even a wooden paint stir stick, like I did. Anywhere you see thinset on the surface of the tile or the edges of the tile, clean it off with something that isn't metal and won't damage your tile. I was surprised at how well the stir stick worked and I think I'll use it again. After you do all this, take a shop-vac to the surface and clean out any dust or remaining particles of thinset. You want a clean surface so your grout can bond effectively. Now, use your margin trowel to drop some grout onto the tile. You won't need a lot and you'll get a feel for how much can cover what area as you go. Start in the far corner and work your way out of the room. Use your float to press the grout into the grooves. It's sort of a "push/pull" movement that's very hard to describe. Most any movement that gets the grout into the groove will work but I had some luck with the movement from the video. You're leaning the front edge (away from you) of the float up and pushing, then leaning the back edge up and pulling. As you go back and forth over the grooves, the grout will be pressed into them. You'll work up a sweat doing this, and you'll get into a rhythm before too long. Just keep an eye on your lines and fill in with extra grout anywhere that looks low. As you finish an area, tilt the back of the float up at about 45º and pull it towards you. You want to pull across your grout lines diagonally, never parallel or perpendicular to them. This is so that you don't pull more grout out of the lines you just filled. With a horizontal border and diagonal tiles, this is really tough. I ended up tilting the float on the vertical about 45º and angling it left or right about 15º to avoid pulling grout out of the lines. It takes a little getting used to, but it isn't bad. Finish the whole floor this way, and check to make sure you haven't missed any.
Now that you have grout in your grooves, you need to be very careful not to step on the grooves. Only step in the middle of the tiles. With my giant feet, this is easier said than done. This is where your sponge comes in. Your grout lines will likely be roughly even with the tops of the tiles and you need then to be recessed very slightly. You take your sponge, squeeze it out, and run it along each grout line. Run the sponge once and clean it out. I fudged a little with different corners and stuff, but really you want to be wiping with a clean sponge every time. If your sponge isn't clean, you'll end up pulling up more grout than you want or laying down new grout and making the lines messy. Each lines gets one swipe. It's just enough to smooth them out and recess them beneath the surface of the tile very slightly. Here's a picture of me doing this very thing:
This is pretty much your last step. You'll be left with something called "grout haze" on the faces of your tile, but don't worry about that now. You can take some cheesecloth to it in a few days and clean that off pretty well. Let your grout sit for at least 24-48 hours before you step on it, and let it dry for at least 72 hours before you put any penetrating sealer on it. It's also a good idea to treat it gently for a week or two so everything can be 100% cured and dry before you mop or do anything else that would potentially damage the grout lines you worked so hard to make. Our friends suggested misting the grout daily with distilled water to help make sure the top doesn't dry and crack before the bottom is all the way dry, so we're going to give that a go as well.
Well, there we have it. A tile floor all the way done. Total materials for this room were less than $100, I believe. The tools were probably $50 or so, but we can use them again on other tile jobs. Not too shabby at all for our first try at this whole thing, I think. Here's a picture of the finished product:
*Edit*
I went back tonight and took some better pictures of the floor with our actual camera. Here they are:
I had a bit of a scare with the white grout, thinking it had discolored somehow. Turns out it's jut part of the drying process and it's working out just fine. Woot!
Monday, May 3, 2010
Another transformation...
Here's what will eventually be the hobby room as it was when we bought the house:
Blue walls, blue ceiling, remnants of wallpaper on the walls.
One coat of primer and two of paint on the ceiling and it's starting to look like a real room again.
And here it is now. We're actually going to be doing a harlequin pattern on the walls in here, but it already looks so much better.
Here are a few other things we did this weekend:
That's all the wood we need for the whole floor including the stair treads and all. It's not really acclimating to the house yet, but it's at the house which is a big step in itself.
Here, finally, is the back of the alcove. We're leaving the middle hole for access to the cables and all in case something happens. It'll be covered by the TV mounting arm, so it'll look nice and clean back here.
And the back of the room as well. Left to right, we have ethernet, power, HDMI and surround sound. Sweet!
You can see that we moved the speaker panels up to the tops of the walls. Everything is actually all done now, as far as the wires go. We have a little more paint to do in here, but nothing crazy.
Here's the back. Speaker panels moved up back here as well.
As you can see, it was a busy weekend. I also took apart the fridge pretty much completely to find and mitigate an odor we were having issues with. Turns out it was the ice maker so we just pulled it all the way out. We weren't going to use it anyway, so now we have the space back and the smell is gone. Sweet! I even pulled the activation levers out of the front of the fridge just to make it pretty clear that there's nothing going on in there. This will eventually be in the basement and will be used mostly for long-term storage and drinks and whatnot. It's a really nice fridge and my buddy gave me a screaming deal on it. Getting it cleaned up and all was really important so we have somewhere to put our current fridge food. We're so close to moving in!
*Edit*
I almost forgot to add another transformation! Here's the front room from a decent angle where you can see the old color and then the new one:
And the new paint...
We're going to paint the low wall there the second blue from the left as a bit of an accent. We're also starting to load this room with all our stuff since it's probably the last room we'll need to use for reals. I'm loving the new color, though!
Blue walls, blue ceiling, remnants of wallpaper on the walls.
One coat of primer and two of paint on the ceiling and it's starting to look like a real room again.
And here it is now. We're actually going to be doing a harlequin pattern on the walls in here, but it already looks so much better.
Here are a few other things we did this weekend:
That's all the wood we need for the whole floor including the stair treads and all. It's not really acclimating to the house yet, but it's at the house which is a big step in itself.
Here, finally, is the back of the alcove. We're leaving the middle hole for access to the cables and all in case something happens. It'll be covered by the TV mounting arm, so it'll look nice and clean back here.
And the back of the room as well. Left to right, we have ethernet, power, HDMI and surround sound. Sweet!
You can see that we moved the speaker panels up to the tops of the walls. Everything is actually all done now, as far as the wires go. We have a little more paint to do in here, but nothing crazy.
Here's the back. Speaker panels moved up back here as well.
As you can see, it was a busy weekend. I also took apart the fridge pretty much completely to find and mitigate an odor we were having issues with. Turns out it was the ice maker so we just pulled it all the way out. We weren't going to use it anyway, so now we have the space back and the smell is gone. Sweet! I even pulled the activation levers out of the front of the fridge just to make it pretty clear that there's nothing going on in there. This will eventually be in the basement and will be used mostly for long-term storage and drinks and whatnot. It's a really nice fridge and my buddy gave me a screaming deal on it. Getting it cleaned up and all was really important so we have somewhere to put our current fridge food. We're so close to moving in!
*Edit*
I almost forgot to add another transformation! Here's the front room from a decent angle where you can see the old color and then the new one:
And the new paint...
We're going to paint the low wall there the second blue from the left as a bit of an accent. We're also starting to load this room with all our stuff since it's probably the last room we'll need to use for reals. I'm loving the new color, though!
I was floored!
Okay, as I see them we have a lot of smaller jobs (cleaning, painting, pulling baseboards, etc) that don't require me to learn any new skills or anything. We also have some big jobs (laying wood floors, tile, renovating a bathroom, putting in baseboards) that will require me to learn some new skills. These are jobs that will take longer, probably require some research and guidance and for some of them will require us to enlist the services of a licensed professional. We hadn't done any of these jobs until now. We'd been working for three weeks doing mainly the simpler things. We pulled wires, painted, changed some valves and stuff (the spigot was definitely a "big" job in spirit, but took such a short time I don't really count it) and mostly did routine maintenance sorts of things to the house. Not to say they weren't important, just that they weren't the things that I was thinking of as being the big projects. Unfortunately, every single room in the house requires a biog project to finish it because we're replacing the floor and the baseboards in every room. We were making progress, but we could only get to a point.
That all changed this weekend. We finally put down a new floor in the hall bathroom upstairs. This is important because that's going to be our primary bathroom for a while. We're completely re-doing the master bath and can't move into the master bedroom until that's finished so we're living on the main floor and using the hall bath shower for the time being. Not ideal, but you do what you have to do. Getting the hall bath 100% complete (or at least very close to it) before we move in was a big priority and the tile was the biggest step there.
Now, for pictures and explanation.
My friend Erick is helping me with this project. He and his wife Kristen are friends of mine from high school and we ended up moving just down the street from them. They've done a lot of really amazing work on their house and we asked them if they'd be willing to help us with the tile in here. They did their bathroom and it looks really amazing, so we were hoping we could take advantage of their experience. Here, we're working on the layout. We were originally just going to do a standard tile pattern with no border but once we tried laying the tiles diagonally Jenna was hooked. I have to admit, it looked really good from the beginning and I didn't really want to go back to the other either.
Here's what we did. We actually cut and fit all of the pieces together with spacers before we put down any mortar. It was nice because the actual process of laying the tile took a relatively short time. Erick and Kristen has previously cut and laid tiles simultaneously, so they could fit the tile perfectly next to the others as they ended up. That way also makes a lot of sense, for sure. The way that we heard on the DVD we've watched the most is the one I think we'll do in the future. In that method, you lay everything out with chalk lines on the backer board first, then set all of your uncut field tiles. You let that cure for 24-48 hours, then you go around and cut and set all the edge tiles. This is sort of the best of both of the previous methods. You get a really nice layout and have it rock solid on the floor, then you can custom cut all the edge pieces to fit perfectly based on the middle tiles. It will take a few extra days to finish, but I think it will be worth it.
Here's our tile saw setup. The saw is Martin's (the man has all the best tools) and we set it up on the patio. This is probably where you want to set yours up, if possible. The process is very dusty and will coat anything around it in fine particles of tile. You don't want to do it indoors and you only want to do it in the garage if you can tape or staple a drop cloth behind the saw to catch the spatter. We're using the tile saw style called a "bridge" instead of a "tub" saw. Here's what that means. A tile saw is a diamond blade spinning very quickly. It's not like a regular toothed blade, it's actually abrading through the tile more than it's cutting. That abrasion causes a lot of heat so you need water to cool down the blade and keep it from burning out. A tub saw has the saw mounted into a tabletop like a table saw. The bottom of the blade runs through the water in the tub and cools itself down. The bridge saw has the blade up top with a pump to pump water onto the blade while it's spinning. The tub underneath catches the water and the tile bits. Both styles will get you a messy tub of water, and gunky water will clog your blade eventually. What we did here is to put the pump into a bucket of clean water and just bail out the tub periodically. This way the water on the saw blade is always cold and always clean. It worked really well for us and the saw never gunked up or anything.
Men at work.
All the pieces laid in with the spacers. The issue we encountered with this method is that your starter pieces have to be in exactly the same place when you mortar them as when they were laid dry, otherwise things start getting a little loose. This is the main issue I see with this way of doing the tile and there are a few ways around it, but we didn't use any of them.
The other important thing when cutting everything first is that all the pieces have to be kept in the same place in relation to each other. We laid these out on the floor in the same way they were in the bathroom and then just pulled them out of here and laid them down. It worked pretty well, I think. Way easier than labeling them all, for sure.
Erick is enjoying some pink King Soopers cookies. They are the single greatest baked good of all time, in my humble but accurate opinion.
Kristen is mixing up the mortar. We're ready to lay the tile! We had actually used a power drill with a paddle bit on it to mix the majority of the mortar, but we stirred in a little more powder once we got it up here. The consistency you want is like peanut butter. We had gone to milkshake consistency with the stuff we put under the backer board so it would fill gaps, but for this you want it really thick. My cordless drill is a 14.4 volt thing that normally rocks the house. We have a corded drill we were using for this and it was getting really hot and smelling like burning. We're very lucky Erick brought his monstrous 19.2 volt cordless Craftsman drill to mix up the last part of this. It has a low setting that drains the battery quickly but busts out the same kind of torque normally reserved for trucks. It was ideal for this application and way easier than trying to mix by hand.
Kristen is doing something here called "back-buttering." Sounds dirty, but it just means you're putting the mortar on the back of the tile instead of the floor. It works well for small pieces or pieces that are too small for the trowel to fit inthe the space on the floor.
Getting all the pieces set in along the tub. The edge of the tub isn't straight which made this a tough thing to do.
Based on the hairiness of the arm, you can tell that I have taken over the tiling at this point. Something that kept nearly tripping me up is not spreading the mortar far enough. I would get it almost far enough to cover the whole tile, but not quite. Make sure you have plenty of mortar under each tile or you could end up with weak spots. Something else we used was a flathead screwdriver to clean out extra mortar from the gaps. You want to leave those gaps pretty clean so the grout can go and stick in there. We're only doing 1/8" grout lines so a screwdriver is just about perfect.
All done! We're going to let it set for two full days. The mortar says you can walk on it after 16-24 hours but we're going to be extra safe. We'll be grouting tonight and I'll get plenty of pictures of that, too. Woot!
That all changed this weekend. We finally put down a new floor in the hall bathroom upstairs. This is important because that's going to be our primary bathroom for a while. We're completely re-doing the master bath and can't move into the master bedroom until that's finished so we're living on the main floor and using the hall bath shower for the time being. Not ideal, but you do what you have to do. Getting the hall bath 100% complete (or at least very close to it) before we move in was a big priority and the tile was the biggest step there.
Now, for pictures and explanation.
My friend Erick is helping me with this project. He and his wife Kristen are friends of mine from high school and we ended up moving just down the street from them. They've done a lot of really amazing work on their house and we asked them if they'd be willing to help us with the tile in here. They did their bathroom and it looks really amazing, so we were hoping we could take advantage of their experience. Here, we're working on the layout. We were originally just going to do a standard tile pattern with no border but once we tried laying the tiles diagonally Jenna was hooked. I have to admit, it looked really good from the beginning and I didn't really want to go back to the other either.
Here's what we did. We actually cut and fit all of the pieces together with spacers before we put down any mortar. It was nice because the actual process of laying the tile took a relatively short time. Erick and Kristen has previously cut and laid tiles simultaneously, so they could fit the tile perfectly next to the others as they ended up. That way also makes a lot of sense, for sure. The way that we heard on the DVD we've watched the most is the one I think we'll do in the future. In that method, you lay everything out with chalk lines on the backer board first, then set all of your uncut field tiles. You let that cure for 24-48 hours, then you go around and cut and set all the edge tiles. This is sort of the best of both of the previous methods. You get a really nice layout and have it rock solid on the floor, then you can custom cut all the edge pieces to fit perfectly based on the middle tiles. It will take a few extra days to finish, but I think it will be worth it.
Here's our tile saw setup. The saw is Martin's (the man has all the best tools) and we set it up on the patio. This is probably where you want to set yours up, if possible. The process is very dusty and will coat anything around it in fine particles of tile. You don't want to do it indoors and you only want to do it in the garage if you can tape or staple a drop cloth behind the saw to catch the spatter. We're using the tile saw style called a "bridge" instead of a "tub" saw. Here's what that means. A tile saw is a diamond blade spinning very quickly. It's not like a regular toothed blade, it's actually abrading through the tile more than it's cutting. That abrasion causes a lot of heat so you need water to cool down the blade and keep it from burning out. A tub saw has the saw mounted into a tabletop like a table saw. The bottom of the blade runs through the water in the tub and cools itself down. The bridge saw has the blade up top with a pump to pump water onto the blade while it's spinning. The tub underneath catches the water and the tile bits. Both styles will get you a messy tub of water, and gunky water will clog your blade eventually. What we did here is to put the pump into a bucket of clean water and just bail out the tub periodically. This way the water on the saw blade is always cold and always clean. It worked really well for us and the saw never gunked up or anything.
Men at work.
All the pieces laid in with the spacers. The issue we encountered with this method is that your starter pieces have to be in exactly the same place when you mortar them as when they were laid dry, otherwise things start getting a little loose. This is the main issue I see with this way of doing the tile and there are a few ways around it, but we didn't use any of them.
The other important thing when cutting everything first is that all the pieces have to be kept in the same place in relation to each other. We laid these out on the floor in the same way they were in the bathroom and then just pulled them out of here and laid them down. It worked pretty well, I think. Way easier than labeling them all, for sure.
Erick is enjoying some pink King Soopers cookies. They are the single greatest baked good of all time, in my humble but accurate opinion.
Kristen is mixing up the mortar. We're ready to lay the tile! We had actually used a power drill with a paddle bit on it to mix the majority of the mortar, but we stirred in a little more powder once we got it up here. The consistency you want is like peanut butter. We had gone to milkshake consistency with the stuff we put under the backer board so it would fill gaps, but for this you want it really thick. My cordless drill is a 14.4 volt thing that normally rocks the house. We have a corded drill we were using for this and it was getting really hot and smelling like burning. We're very lucky Erick brought his monstrous 19.2 volt cordless Craftsman drill to mix up the last part of this. It has a low setting that drains the battery quickly but busts out the same kind of torque normally reserved for trucks. It was ideal for this application and way easier than trying to mix by hand.
Kristen is doing something here called "back-buttering." Sounds dirty, but it just means you're putting the mortar on the back of the tile instead of the floor. It works well for small pieces or pieces that are too small for the trowel to fit inthe the space on the floor.
Getting all the pieces set in along the tub. The edge of the tub isn't straight which made this a tough thing to do.
Based on the hairiness of the arm, you can tell that I have taken over the tiling at this point. Something that kept nearly tripping me up is not spreading the mortar far enough. I would get it almost far enough to cover the whole tile, but not quite. Make sure you have plenty of mortar under each tile or you could end up with weak spots. Something else we used was a flathead screwdriver to clean out extra mortar from the gaps. You want to leave those gaps pretty clean so the grout can go and stick in there. We're only doing 1/8" grout lines so a screwdriver is just about perfect.
All done! We're going to let it set for two full days. The mortar says you can walk on it after 16-24 hours but we're going to be extra safe. We'll be grouting tonight and I'll get plenty of pictures of that, too. Woot!
Subscribe to:
Posts (Atom)