Wednesday, December 15, 2010

Yar, ye be walkin' the plank

So we've put in more work on the office floor over the past few days. Here's what has come of it:

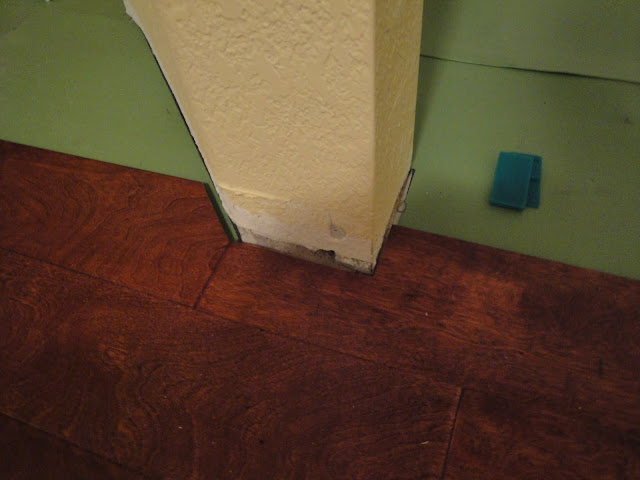
We have a few weird-ish areas around the door and closet, but thankfully they were close enough to 45ยบ that we could cut them without too much difficulty.

We're sneaking up on the closet wall here. Thankfully we've already undercut the door frame, so it was pretty easy to get the flooring underneath it.

We are definitely running out of space to keep our tools!

This was lucky. One of our boards fit perfectly so the end of it came right to the corner there on the left. If it hadn't, getting the board cut and fitting properly would have been pretty rough. Sometimes things just go your way.

We decided to finish out the entry first and then go back and fill in the closet.

So close now!

We had to rip a short board here. The walls aren't really straight, either in the horizontal plane or the vertical, so getting the wood to match was pretty tough.

Woo-hoo!

This was one of the tougher pieces, but the template we built for the underlayment really helped a ton. I'm never doing a project like this without templates again. It took a while to make, but it saved so much time and material later on.

Slowly filling in the closet.

We're to the point now where the nailer won't fit anymore, so we're drilling and nailing through the tongue.

Last row!

My finest moment. Ladies (and certain gentlemen) this is what you've been waiting for. First off, this is the last board in this room. Second, you can see my very cool little hat light. It's my normal flashlight I carry every day, but the clip can turn around to be used like this. It was incredibly handy. I suppose the fact that almost my entire hind end is hanging out of my pants might appeal to some as well. Mostly my wife.

All done!

Look how pretty! The foamy underlayment in here makes a huge difference. Walking around on the bare subfloor was incredibly loud and echoy. Echoey? I have no idea. It echoed a lot. In here now, everything is much quieter. Louder than on carpet, for sure, but very reasonable.

This is what success looks like.

With this room done, we're on to the colonial room! I'll keep you posted on progress there as well. Thanks for reading!

Monday, December 13, 2010

It's not a retreat, it's an advance to the rear

Well, after my last post, you may have thought that I was pretty well decided that I was going to do exactly whatever I felt like regarding the direction of my wood flooring. I really was. I had convinced myself that I knew better, and even talked to the wood floor guy at Floor & Decor and he said that with thinner engineered flooring the direction isn't quite as important. Somehow, despite all of that, despite my diagrams and my logical arguments and all the rest, I still decided in the end that going across the joists was better. Why? Because I really hate being proven wrong, especially when it's going to cost me weeks of labor and thousands of dollars. If I do the floors perpendicular to the joists, I have every reason to believe that they will last a long time and look great, which would justify the investment. If I do them parallel, they may look great, but they may start to sag and look lame after 5 years. I may not understand how it works and it may never happen. It could be that all my thinking and diagrams are totally accurate.However, I would be taking my own logic above the experience and knowledge of a buttload of people who install wood floors for a living, which is probably not a great idea.

So anyway, that's what happened. Here's how it progressed:

We did the lining up right this time. The way to do it properly is to measure each wall and mark the centers. Then draw lines across the room from each pair of opposing walls, giving you a cross in the middle of the floor. That is the actual center of the room. Because houses are rarely square, you may not have the same measurements. Ours were off by about 1/2" or so. We adjusted the wood at the far end to allow for that, and made sure that the boards lined up perfectly with our center line of the room. Once we got our first row in, it got much easier from there.

As an additional holding measure, we drilled and nailed through the tongue even on the boards we face nailed for the first row. The second row we only drilled and nailed through the tongue, and then we could use the pneumatic nailer.

Here's me tap-tap-tapping everything into place. We got the boards very nice and tight together. I've checked almost every seam in the room and I think there's one where I can fit my thumbnail into it. Everything else is pretty much perfect.

Have to leave this open.

There's the nailer that Erick kindly let us borrow for the project.

This is where we stopped Saturday. The boards on top are the next ones we picked to finish the row. They won't live there forever or anything.

Making progress.

Slowly creeping up on the halfway point...

There is now more floor in the room than not-floor.

I really love the color of this floor. It looks a little more red in the pictures than it does in real life, but it's just so warm and homey.

And here's where we ended on Sunday. We were exhausted and ended before we had to worry about any complicated cuts or anything.

Here are some teasers:


That's what it will look like with the wood floor and the baseboards installed. I think the color of the wood and the walls is really set off perfectly with the bright white woodwork.If all goes according to our worst-case plan, we should have the office 100% done by Wednesday night, including baseboards. We'll see, though. Worst case plans have a way of being underestimated. As we have learned many times, your worst case can always get worse.

So there you have it. We're going to have a few actually complete rooms soon. It's sort of amazing to be getting to this point now. Thanks for reading!

Thursday, December 9, 2010

Wooden Woes

So we got those two boards down, and now we're worried that we might need to pull them back up again. Here's why:

Here's a sample room in my upstairs. The window is on the front of the house (down) and the door is on the top (or the side of the top, which is why I didn't draw it). The joists (heavy black lines) are going front to back with the house. For brevity's sake, let's call that vertical. You have several options when installing a wood floor. You can go vertical, horizontal, diagonal, or around the room in a sort of strange patterny thing. Mainly, people go vertical or horizontal. There are several factors that influence this decision. One is the direction of the joists. Ideally, you want to go across them. Another is the direction of the doors and windows. You want to go perpendicular to those. The room shape is another factor. You want the floor to go with the longest wall in the room, so it doesn't end up looking cramped. So you have three things you really want to take into account. Here are my options:

Okay, this is the room with the boards across the joists. You can see that they are perpendicular to the joists, but they are parallel to the door and window, and also they are perpendicular to the longest walls. That scores 1/3 in my book.

In this example, we have the boards laid vertically. They are parallel to the longest wall and perpendicular to doors and windows, but they are also parallel to the joists. That's 2/3 for this one.

Diagonal and patterny are also options, but they work best for large, open rooms without a lot of furniture in them. Also, the wife really doesn't like them, so that pretty much rules them out. Diagonal is really the only way to get a 3/3 score though, since you can be across the joists, and sort of fudge the doors and longest wall rules.

Apparently, the point for being perpendicular to joists is supposed to be weighted more heavily, which adds to the confusion. This is my understanding of why.

When you go across the joists with a board, it is fully supported from underneath. Actually, there's another layer in between the two, but I took it out for clarity. It's a piece of 3/4" OSB, for reference. It's a pretty standard thing, so it's under carpet, tile and hardwood floors alike.

When you go along the joists with a board, you can supposedly get warping and gapping over time. Not all the boards are actually over top of any joists, unlike what I have drawn above. Some are completely unsupported, and the consensus seems to be that they will start to dip over time, giving you a wavy floor. I don't know, though, whether this refers to an issue in modern houses made with modern materials or if this is mostly an issue in older houses made with solid wood joists of some unknown dimension, placed some unknown distance apart, and covered with wooden floorboards instead of OSB.

So, to my mind, this is what is being suggested:

That obviously doesn't make much sense. If the OSB is also bending, then why don't you notice a rippled effect in carpeted rooms after a number of years? The wood flooring, even if it's not over a joist, is still rigid, and will distribute the force across a wider area. I'm thinking that maybe the thing that happens is that the OSB does bend, but it's so incredibly slightly that you don't actually notice it in a carpeted room, but you would notice it in a room with a wood floor. That's pretty much all I can figure. I also don't know if this holds true for engineered wood floors, since they should be more stable than solid wood floors. I also don't know if this only holds true for finish-in-place wood floors, since they tend to have a smoother, more uninterrupted surface that might telegraph extremely slight changes taking place beneath. With a prefinished wood floor, would you notice the same effect, given that the boards are all a little beveled around the top?

Of course, as we have learned on this journey together, not all things in a house obey the laws of logic or physics. Sometimes they just do their own thing and you try your best to keep up.

That's it for now. I'll let you know what we decide when we figure it out. Thanks for reading!

Monday, December 6, 2010

A woodchuck would chuck two boards, if he were me

Two boards, that's right. Well, there's more to it, but keep that number in mind.

What's this? Some kind of abstract art? No, it's the beginnings of a coat of primer on the floor of the office. We wanted to get a coat of primer on here to help lock down some of the stains and smells.

Pouring paint on the floor is sort of a weird experience. It's just not something you normally do.

Seriously, I've seen less interesting pieces in the Denver Art Museum. Anyone can be a modern artist, all you need is a beret and an attitude.

And there we go! Looks pretty decent. In the future, I think I might do a second coat. This worked well, but I think another strong layer would make me feel better about it.

Starting to roll out the underlayment. We got the uber-premium foamy stuff that's supposed to help deaden noise. It's a bit of a pain to work with, but it should make a big difference in the sound level both upstairs and downstairs.

Working our way across. This was the end of the easy part. After this, we have to go to the closet with the funky wall shape.

There's the funky shape, recreated perfectly in cardboard. We normally don't do a lot of templates, but this wall was pretty much screaming for one.

Look how perfect that is! The template totally wins.

All underlayed in here now. On to the actual wood floors, right?

This little doorway shape is causing us some grief. We have to start here to get into the rest of the room, but we also have to line up with the longer walls. Making this happen is sort of a giant pain in the butt. Note the cardboard for another template.

The template worked beautifully again. Woot!

These two boards are the end result of 10 hours of work. It doesn't look like much, but they are as perfect as we can get them with our understanding of the issues at hand and the tools we have available. We're going to take a short break and then get back to it, but I expect that we'll be able to go much more quickly once every piece doesn't have to be custom designed and cut to fit into a weird spot.

Thanks for reading!

Friday, December 3, 2010

It's-a me! Mario!

Actually, our plumber is neither Italian, nor mustachioed. We tried to find one, but there just aren't any available in our area.

Before the plumber could come and rough in the new pipes, we had to cut the ceiling out downstairs so they could access the plumbing above. Kinda strange, but there you go. I would've thought they'd go through the floor, but apparently the floor pieces are pretty key to the structural stability of the house so pulling large swaths of them out is a bad idea.

First, we start taping up the plastic to contain the giant dust plume that will invariably result from pulling down a big chunk of ceiling.

We sealed the area off pretty effectively, I think. it wasn't perfect, but it definitely contained the majority of the dust in this little bubble.

We're slowly taking out pieces of the ceiling to see where the joists are.

Now we're quickly taking out pieces to open it up for easier access. We could've gotten away with taking down less, maybe, but since we also want to run new electrical and change the location of the HVAC, this will make it easier on everyone.

This is the original plumbing.

This is the new plumbing. You can see we moved everything around and added some new stuff. The plumber used the plastic supply lines instead of copper and it sounds like they're pretty cool. They're faster to put in, cheaper, and even more durable than copper is, especially when it comes to freezing. He said he's seen then expand from 1/2" ID to over an inch when frozen and the don't burst. I like the sound of that.

Here are the new lines in the master. You can see where the shower is going, since the floor drain and supply lines are in there now.

Here's the vanity wall. I asked him to move the vent pipe from the wall on the right where is was before over to the back wall so the space on the right would be available for a medicine cabinet. Everything looks pretty well set. We'll have our two sinks there, and we're working on our cabinet layout now. I'm thinking we'll go with two 27" wide vanities with a 15" drawer stack between them. That leaves us some space on either side to use as filler so we don't have to worry about it if the walls aren't perfectly square.

So there we go! We're almost ready to start getting the last of the trade work done in here. We just need an electrician to come in and help us out, and the plumber is going to move the vent for us, since he also does HVAC work. He had a really great idea for it, too. We were having a very hard time figuring out how to get it all the way across the floor to a place where it wouldn't be in the way all the time. There's something called a "micro" running right through the middle of the space, and you can't pop a 6" hole through it. It's doing something silly like holding the house up or whatever. So what the plumber suggested was having the HVAC come up into the bottom of the center drawer stack and make the kickplate into the vent output. it'll push warm air out where we need it most and should be a pretty easy adjustment to make to the cabinet. Woot!

I'll try to keep the updates coming more regularly as we get stuff figured out. We're moving pretty quickly now! Thanks for reading.

Just another stick in the wall.

Sorry for the delay in writing and posting this. I've been really busy at work and at home, so I haven't had time to produce a blog of the brain-blistering quality you've come to expect. All that ends today! So here it is. This is what you've been waiting for all this time. Finally, your anticipation will come to an end, and the joy of having will be yours to savor. Yes, this very moment...okay, I'll stop.

We had to build out this corner so we could nail to it with the new wall. The studs from the original wall are all uneven, so we had to sort of average all of our stuff to match the largest number of surfaces possible.

Building the new small wall. This is the extension wall into the bedroom. You can see that we aren't making a huge change, but with the closet space we added, the bathroom gets much larger and more roomy.

We put the channel in here as well to give us a nailing surface for our drywall and the other wall that intersects here.

New wall!

Here we are laying out the stud locations for the new wall. The door is centered in the space between the vanity and the shower, and the wall next to the vanity is open so I can stick a medicine cabinet in there. I may have to add a new stud to it at some point to make the space work, but I think I can handle that pretty easily.

And the light shone down from the heavens and lit upon the new wall, signifying that this wall was good and right and had a proper place in the world.

There we go! It's actually a room again.

And here I am attaching the new wall to the existing structure.

There it is, the frame for the new bathroom. Exciting times! Thanks for reading.